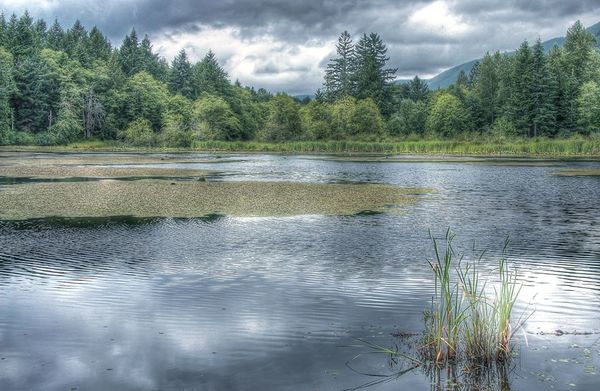
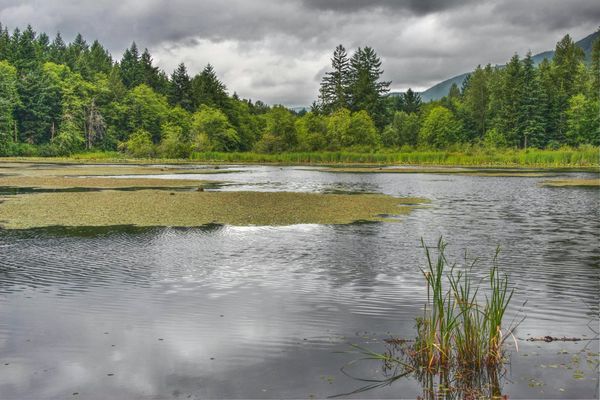
2nd Attempt at HDR
Jul 11, 2016 01:20:18 #
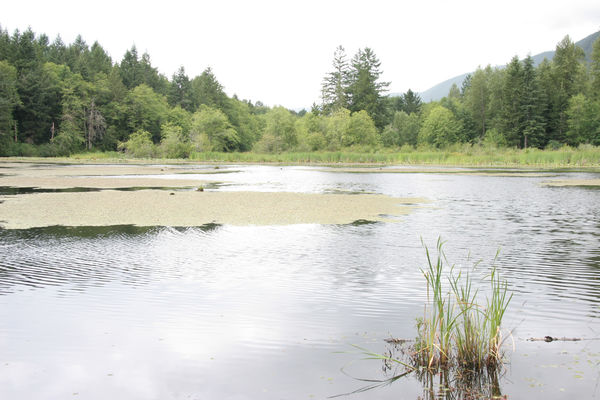
Should I lighten the clouds in PS with the dodge tool? Highlights behind bulrushes too blown? Please and thank you!
3 bracket AEB with Canon 20D 17- 85 kit lens
Photomatix...Lightroom...PS twigged.
3 bracket AEB with Canon 20D 17- 85 kit lens
Photomatix...Lightroom...PS twigged.
Jul 11, 2016 06:24:59 #
You might have wanted to decrease the contrast while in Photomatix to recover some of the highlights. But, what do I know? I'd be called a beginner also.
Jul 11, 2016 09:21:55 #

Count me in with the crowd that thinks it looks just fine as it is Trish. It's very dramatic, yet not overdone. This is a good rendition, but feel free to experiment and post others in this same topic. Sometimes by looking at them side by side, you can determine what works best for you.
Jul 11, 2016 10:59:06 #
djtravels wrote:
You might have wanted to decrease the contrast while in Photomatix to recover some of the highlights. But, what do I know? I'd be called a beginner also.
It's very interesting using all the sliders in photomatix djtravels, I would be nice to just use one software application but it seems the others have their benefits as well. Thank you for having a look!
Jul 11, 2016 11:05:18 #
Bob Yankle wrote:
Count me in with the crowd that thinks it looks just fine as it is Trish. It's very dramatic, yet not overdone. This is a good rendition, but feel free to experiment and post others in this same topic. Sometimes by looking at them side by side, you can determine what works best for you.
Good idea Bob. Better than having copies on my desktop and trying to pick the better of them all. Seeing them above each other in the post I could see the differences. I quite often work on them at night using my laptop.. not crazy about processing on a laptop compared to a desktop as it depends on how my screen is angled when I'm playing with the exposures etc. When I actually post them sometimes I'm disappointed and remove and start again.
Always appreciate when you drop by!
Jul 11, 2016 13:04:13 #
Islandgal wrote:
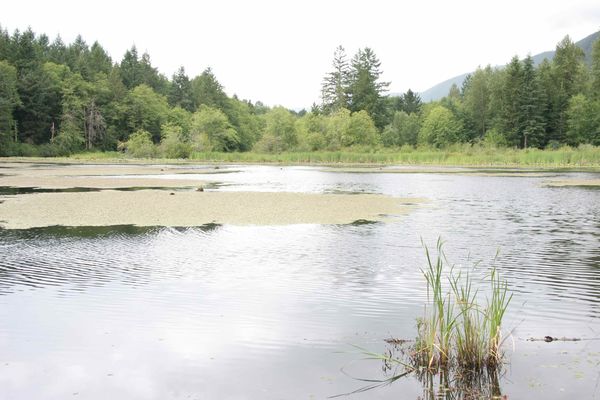
Should I lighten the clouds in PS with the dodge tool? Highlights behind bulrushes too blown? Please and thank you!
3 bracket AEB with Canon 20D 17- 85 kit lens
Photomatix...Lightroom...PS twigged.
3 bracket AEB with Canon 20D 17- 85 kit lens
Photomatix...Lightroom...PS twigged.
I like it the way it is. You could fool with it a bit in Photoshop, messing with color channels to bring more highlights to the trees. But overall, it's great.
Jul 11, 2016 13:19:32 #
rgrenaderphoto wrote:
I like it the way it is. You could fool with it a bit in Photoshop, messing with color channels to bring more highlights to the trees. But overall, it's great.
Thanks grenadier, you made my day!
Jul 12, 2016 06:31:14 #
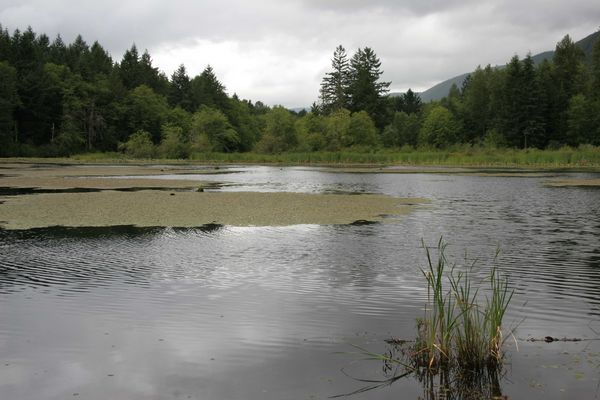
For me it has two major problems. The first are the blown highlights in the clouds. HDR has a way of making blown highlights look completely unnatural, because there is a sharp cutoff between where there is highlight detail and where there is none. And yes, I personally think the clouds are too dark--you never see clouds darker than the trees below them.
The second issue is severe haloing--for example look at the line of rushes behind the water--some are dark and some are light. In reality they should all be the same brightness--same with the cattails: they are dark in the darker parts of the water and very light where they intersect the light parts of the water.
The first problem is unfixable: you need to make sure that the darkest image in your bracket set has no blown highlights. The second problem is common with the older tonemapping algorithm in Photomatix called "Details Enhancer". You should go back and try the newer tonemapper, called "Contrast Optimizer", which should give you much smoother results. In "Details Enhancer" you might want to try adding microsmoothing and shadows smoothing, to lighten up the clouds a bit and darken the foreground so that it is not brighter than the sky. Just my 2 cents...I do like the image overall.
Jul 12, 2016 11:54:31 #
Kymarto, appreciate your honest opinion. I strive to get better each time and I'm learning from everyone's contributions. Most of what you see will point back at me and my choices I believe. Such as the preset for the darkened clouds. The halo effect came from the luminosity I chose in PS to brighten the tree line. I am using basic Photomatix not the pro version and still looking over Topaz Adjust. I agree with what other members have said on an earlier try... start with a good picture to work with. Trish
Jul 12, 2016 12:46:26 #

Islandgal wrote:
Kymarto, appreciate your honest opinion. I strive... (show quote)
In this image, probably the lightest exposure of the 3, the trees are exposed properly. When you finish cooking your image with whatever HDR program you decide to use, the trees should look this way. The darkest of the three images should have a properly exposed sky. So what you are trying to achieve is a properly exposed sky with detailed clouds and blue sky, a properly exposed midtones, and properly exposed shadows. Looks closely at the first image (HDR image) you posted and you'll see that you've gone too far with some of the sliders causing the typical HDR looking image. This is not what you are looking to do. You want your final image to give people the impression that this is how the image would look to the naked eye and not something surreal.
Jul 12, 2016 13:15:37 #
Trish--if you feel to post some small images of your bracket series, I can process them in Photomatix and other HDR proggys and show you what I personally strive for in HDR and what is possible. No pressure to do so, only if you feel to.
Toby
Toby
Jul 12, 2016 13:37:18 #
kymarto wrote:
Trish--if you feel to post some small images of your bracket series, I can process them in Photomatix and other HDR proggys and show you what I personally strive for in HDR and what is possible. No pressure to do so, only if you feel to.
Toby
Toby
No problem, I'm only too happy to be taught on how to improve and see the work of others. Thank you for the offer. When I looked the untouched photo above I did notice that there is a natural halo or colour difference at the top of bulrushes below the trees?
Hope these a small enough?
Jul 12, 2016 13:45:19 #
jeep_daddy wrote:
In this image, probably the lightest exposure of t... (show quote)
Jeep_daddy, perhaps I need to improve my overall basic skills of picture shooting as well, maybe this wouldn't be considered a decent day to photograph the lake, again I was told I need to wait for blue skies etc. I always want to come back with something to try new techniques. But your right... I don't want surreal photo's. Thank you for having a look! Trish
Jul 12, 2016 14:52:09 #
Hi Trish--
I 've quickly thrown together three different treatments, two in Photomatix and one in Adobe Camera Raw. First, your exposures are fine. There is a bright area in the sky that looked overexposed to me, but it just lacks detail. Also, some of what I thought was haloing seems to be actual shadow. One thing about HDR is that I find I never know exactly how things are going to come out. Sometimes everything works as I expect, but sometimes I get really crazy results and I don't know exactly why--part of the fun I guess :)
The first is done with "Contrast Optimizer" is Photomatix Pro. This is my favorite tonemapper. The second is with the older algorithm in Photomatix, called "Details Enhancer". It can work well sometimes, but tends to have problems with haze and haloing. The third is tonemapped in Adobe Camera Raw. For me it feels a bit flat usually, but can be useful sometimes.
I did do a fair amount of post processing, to adjust exposure and contrast and tonal balance. I really like Topaz "Clarity" for contrast adjustments--much more specific controls over contrast in different tonal regions of the image.
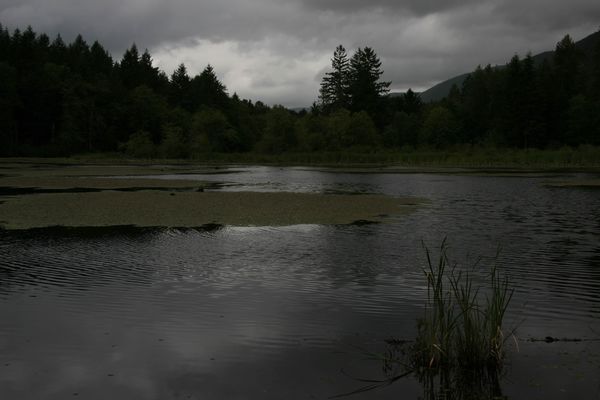
The fourth image is the first with some local adjustments: I darkened and evened out the reeds on the far shore, darkened some bright areas of the sky, brightened the darkest clouds.and darkened the mountains behind the trees--there was definitely haloing there. Not a perfect job, but just by way of illustration....
Looking at all these images, I wonder if they are all a bit too dark, but that kind of thing is easy to adjust (global adjustments). Anyway please download to view--the inline viewer in UHH really sucks.
I 've quickly thrown together three different treatments, two in Photomatix and one in Adobe Camera Raw. First, your exposures are fine. There is a bright area in the sky that looked overexposed to me, but it just lacks detail. Also, some of what I thought was haloing seems to be actual shadow. One thing about HDR is that I find I never know exactly how things are going to come out. Sometimes everything works as I expect, but sometimes I get really crazy results and I don't know exactly why--part of the fun I guess :)
The first is done with "Contrast Optimizer" is Photomatix Pro. This is my favorite tonemapper. The second is with the older algorithm in Photomatix, called "Details Enhancer". It can work well sometimes, but tends to have problems with haze and haloing. The third is tonemapped in Adobe Camera Raw. For me it feels a bit flat usually, but can be useful sometimes.
I did do a fair amount of post processing, to adjust exposure and contrast and tonal balance. I really like Topaz "Clarity" for contrast adjustments--much more specific controls over contrast in different tonal regions of the image.
The fourth image is the first with some local adjustments: I darkened and evened out the reeds on the far shore, darkened some bright areas of the sky, brightened the darkest clouds.and darkened the mountains behind the trees--there was definitely haloing there. Not a perfect job, but just by way of illustration....
Looking at all these images, I wonder if they are all a bit too dark, but that kind of thing is easy to adjust (global adjustments). Anyway please download to view--the inline viewer in UHH really sucks.
Jul 12, 2016 16:24:46 #
kymarto wrote:
Hi Trish-- br br I 've quickly thrown together th... (show quote)
Kymarto, thank you for taking the time to show the differences with different applications. In all you have remedied the blowout, which balanced the colour for the foreground bulrushes. It looks 100% better! I actually like the third rendition for it's more natural colour of the tree's, it has a bit less saturation which is more pleasing to my eye. The clouds look gentler in all, but still have an ominous feel don't they!
In these hand held brackets I was leaning on a rail to stabilize but didn't realize that the dock was lightly moving. So even if I had a tripod I probably would have still had blur... lets' hope I improve on my 3rd instalment of HDR... or maybe even my 100th! Trish
If you want to reply, then register here. Registration is free and your account is created instantly, so you can post right away.