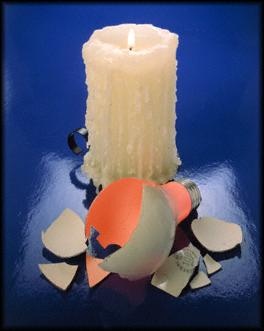
Cut the "shiny" off my candles!!
Mar 23, 2012 12:28:15 #
When I was photographing oil paintings and acrylics for artist friends I used and polarizer on the camera and sheets of polarizer on the strobes. You need to orient them to cut out the reflections. You loose a couple of stops of light due to the polarizers, but on a tripod in a studio, this is not an issue. This combination worked fine for me.
Good Luck---Joe
Good Luck---Joe
Mar 23, 2012 13:31:40 #
Experiment and keep experimenting. You should always post your pictures and check the store original box so we can see what your f stop, shutter speed, and ISO are. We can see flash and other settings as well. Also, the images shown in browsers are never good. If we can download the image and see it full sized, we can be better judges.
Mar 23, 2012 14:13:13 #
Shoot them inside a light tent. All sides of the tent should be pass0through white material, so the light from outside the tent can get inside. The wall of the tent on the side of the camera should be non-reflective, with a hole cut in it just big enough to shoot through.
Make sure that all the light hitting the candle is defused, and if necessary polarized. This may not be necessary if the tent itself is properly set up, but keep it in mind if the problem persists.
Make sure that all the light hitting the candle is defused, and if necessary polarized. This may not be necessary if the tent itself is properly set up, but keep it in mind if the problem persists.
Mar 23, 2012 14:50:10 #
There is too much direct flash and while there are many ways to correct this try something simple like placing a piece of nose tissue over the flash. You may need a fold or two depending, but it will cut the glare. Beautiful candles by the way!
Mar 23, 2012 15:15:32 #
Aambertyme wrote:
I carve candles, and have tried taking pictures of... (show quote)
The first idea that comes to my mind is talcum power.
If you smear it on, that or corn startch, perhaps some of the shine will turn into a soft glow.
Think about your gear, what are you shooting with? I'm not recommending a Canon 5D mark 3 or anything but a quality dslr, unless you use one now, would help a lot.
Also, I don't think you need a macro lens. Just stand back, with your tripod, zoom tight and shoot with the corn starch or power on the candles and see what happens.
Hope this helped. Good Luck, Jim
Mar 23, 2012 16:02:04 #
Mar 23, 2012 16:07:36 #
A little reflection is OK it gives dimension to the subject. Try a softbox and light from above. Use white reflector board in front as a fill. See my image below. BTW it was three exposures made on 4x5 film. An exposure for each of the light sources in the photograph.
Candle

Mar 23, 2012 20:10:40 #
Lucian
Loc: From Wales, living in Ohio
Doesn't anyone actually read the posts on a thread anymore??? Everyone is just repeating what has already been said a number of times earlier. It would certainly reduce the pages if people only posted a new idea instead of repeating what has already been said, over and over and over again.
As far as the mat spray, I don't think anyone was intending the use of an actual paint. What I suggested and I think the other person did, was actually a matting spray, and this is not a paint at all. It is the same stuff that has been used for many years in advertising shots.
So, unless someone has a new idea, there is no point in suggesting using powder or mat spray again because it has already been suggested, along with every conceivable lighting set up an d polarizing filter.
Mar 23, 2012 22:44:29 #
Mar 23, 2012 23:41:29 #
You could try dusting the candles with something non-reflective, such as baking soda or baby powder. I saw an article years back about a professinonal who sprayed shiny opaque objects with a powder spray deodorant, but I don't think they make that anymore, and it could contaminate the candles. The baking soda could be dusted off carefully with a watercolor brush. You might want to dust a small portion of a candle, or do one that didn't turn out so well, to see if this works. This combined with clever lighting could do the trick.
Mar 24, 2012 00:28:35 #
Forget the powder and spray and all that garbage. The first rule of photography is to pay attention to the lighting.
I tried to point you toward that in my previous post with a link to a great tutorial but as usual no one reads the previous posts.
Here's another link which shows exactly what I mean:
http://www.photosig.com/articles/1577/article
What you need is a large light source(s) set near to the specular object. If you don't have a large softbox find a non-sunlit large window or patio door and use it as that softbox. Put a reflector (large sheet of white poster board or cardboard) opposite for fill light.
I say again, the solution is to get the lighting right!
Mar 24, 2012 00:57:44 #
Thank you everyone for your interest and help. I'm the wife of the team, by the way, and hubby is my "technical director" of sorts, except neither of us have done very much or very well at display photography.
We use a Sony 300a and Sony CD 1000. I don't recall if I tried to shoot them as automatic or manual -- probably both to see what would work during several sessions.
I appreciate the homemade light box idea. I never thought of making one myself, but with the instructions given, I think it's something I can accomplish. The bridal silk sounds like a good idea, I'll look into it.
Of course, I didn't think anyone was suggesting I "paint" the candles! I understood it as a clear matte spray that would dull the candle enough to take the pictures. I don't mind a little shine, but what I got is too much. And, like one of you said, the photos are very grainy. Most of my other photos are not grainy, they're very clear, so having all my candle pics come out grainy was very disturbing to me.
Our only concern is that, if I take the photos before I glaze the candles, that the matte spray, talc powder, or cornstarch, might interfere with the glaze when I get ready to dip them. I'll experiment with failure candles and see what happens.
I'm going to have hubby read all these ideas so he can translate the ISO and filter and other information -- that stuff just baffles me!
I will let all of you know how things go, and will show you pictures of the finished products!!
Thanks again, all!
Mar 24, 2012 03:25:44 #
Aambertyme wrote:
Here's a sample picture.
Fantastic candles!
Are you using a filter on your lens? Everything looks a little hazy, but it looks like more than poor focus.
Mar 24, 2012 18:01:13 #
Aambertyme wrote:
When I try to take pictures of them, the glaze seems to glare back at me.
I've looked at other carved candle websites, and they don't have the shiny look.
I've never done very well with any of the display photography I've tried.
Any ideas? Thanks.
When I try to take pictures of them, the glaze seems to glare back at me.
I've looked at other carved candle websites, and they don't have the shiny look.
I've never done very well with any of the display photography I've tried.
Any ideas? Thanks.
Aam, You have gotten lots of great advice . You are probably closing in on the solution.
I only want to make sure that you know the mechanics involved. Light bounces off of a surface like a pool-ball off of the bumpers. It scatters off at 90 degree angles to the source. When something is round there will ALWAYS be a surface 90 degrees to your lens from the source, hence a glare. You can see these in your viewfinder, they don't just magically appear on the finished photo. Look for them TTL then turn ,tilt,rotate or whatever untill they are to your satisfaction. But that would be in addition to lighting, matting etc. Try outside on a very overcast day which is essentially what you are replicating with the light boxes.
Mar 24, 2012 18:11:46 #
If you want to reply, then register here. Registration is free and your account is created instantly, so you can post right away.


