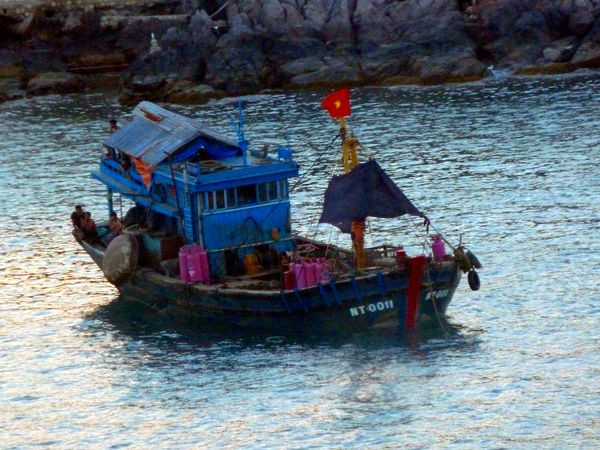
How do I get rid of the sunlight on water.
Sep 29, 2011 03:46:01 #

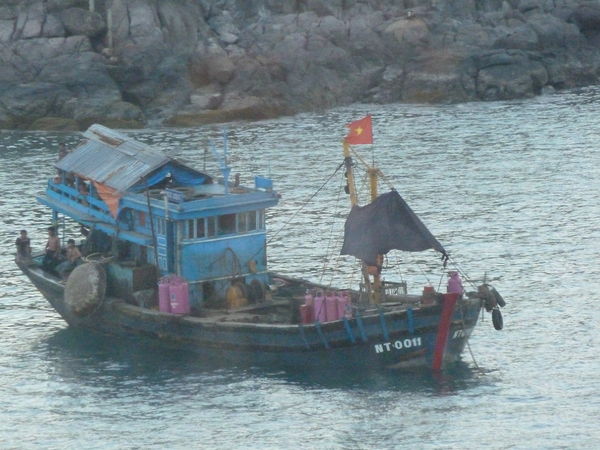
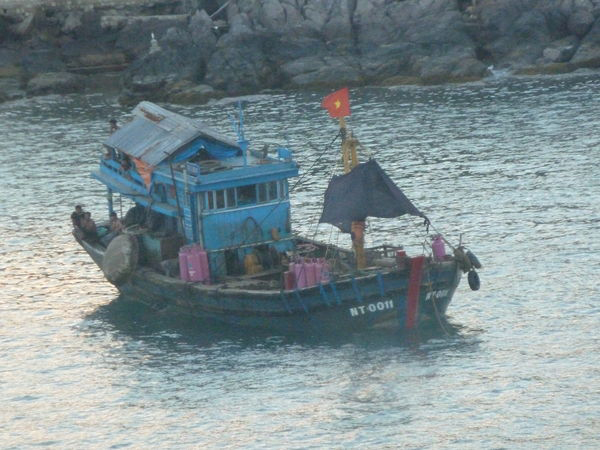
I am putting the 1st photo on a canvas frame. It will be wrapped around on the edges, so I cannot use the 2nd photo. It has no post production, since I do not know how to do it yet. Is there any way to lessen the reflected light on the water in the lower right corner? Any assistance will be appreciated. I do not have Photoshop, but I do have a program that has most of the editing features, so I can (hopefully) make the changes you recommend.
Taken on Auto with Panasonic Lumix DMC-ZS7
Exposure Time: 1/30 Second
Fstop: F4.9
Focal Length (zoom): 49.2mm
ISO Speed: 1000
If you could also give me an idea of what the proper settings (instead of above chosen by camera) it will help me next time I take a similar picture with my Canon T3i on manual.
Thanks in advance...
Vietnamese Junk - 2011

Vietnamese Junk - 2011 No Reflection No Border
Sep 29, 2011 08:42:14 #

PokerInsider wrote:
I am putting the 1st photo on a canvas frame. It w... (show quote)
A circular polarizing filter will do it easily if you have a dslr.
Sep 29, 2011 12:30:14 #

Unfortunately, water glare is one of those things that is difficult to impossible to do much with in post processsing. Increasing contrast will lessen it, as will selectively darkening (using a brush tool) the light areas.. This may be your best approach
Some advanced techniques, such as replacing the water, or tone mapping could be successful, but it seems that this may be outside your comfort zone.
As mentioned, a polarizer on the camera is best as this is one effect that software is unable to duplicate after-the-fact..
Some advanced techniques, such as replacing the water, or tone mapping could be successful, but it seems that this may be outside your comfort zone.
As mentioned, a polarizer on the camera is best as this is one effect that software is unable to duplicate after-the-fact..
Sep 29, 2011 14:49:56 #
Sep 30, 2011 10:12:10 #

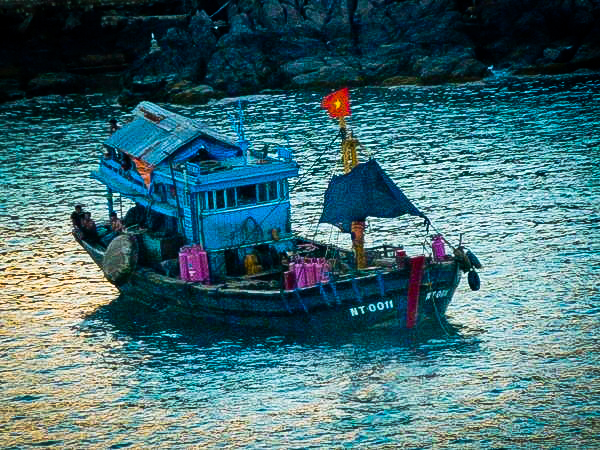
The colors in this picture are great! I used Lightroom and spent less than 5 minutes to create the revised copy. The most helpful settings were vignetting (to darken the water around the edges), increasing contrast, increasing brightening, and sharpening.
original
revised
Sep 30, 2011 10:22:20 #

PokerInsider wrote:
I am putting the 1st photo on a canvas frame. It w... (show quote)
I read an article the other day that suggested that for people wanting to learn how to manually use their camera to find the shot, put the camera in "P" mode and check the settings in the viewfinder and then put the camera in "M" mode using the settings they saw in "P" mode.
I haven't tried it yet, thought I'd just pass it along.
Hope it helps.
Sep 30, 2011 10:35:21 #
you might want to brighten or pull back a bit on your saturation to get a more realistic look like you originally had, unless you like this way better. always remember, if you like it that is all that matters.
Sep 30, 2011 10:46:25 #
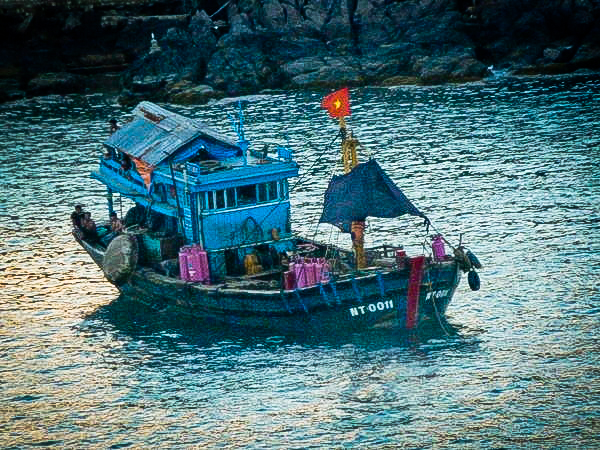
Incorporating suggestions above (decreasing saturation, slightly brightening)
revised1 from above (increased saturation)

revised2 (less saturation, a little brightening)
Sep 30, 2011 11:42:01 #
amanda, I think the second image works really good, more realistic if that is what you are going for, however, if you like the rich color look, you got that in the first. nice job.
Sep 30, 2011 11:57:45 #

Sep 30, 2011 12:55:42 #
If the OP is asking if this particular file can be cleaned up I think the few examples shown here should give you an idea what could be done easily to improve the overall look of the photo.
It appears this picture was shot under an overcast sky and at a very bad angle to avoid the big white sky reflecting in the water.
It will only take a slight increase in contrast to make it pop and with a little more effort the water could be enhanced as well.
These changes should be done on a full size copy of the original file of course to maximize the finished quality.
Oct 1, 2011 04:16:51 #
Thank you all for the help. I downloaded Gimp 2 Yesterday and cannot believe what the improvement on my pictures is just using the auto swttings. Below was what I got with the Auto White Balance and Color Enhance.
Auto White Balance and Color Enhance
Oct 1, 2011 04:17:44 #
GTinSoCal wrote:
I toned down the highlights a bit, all done in ACR.
Gordon
Gordon
This one I really like. I pulled it back off the site and it was small. Could you email me the full size version? Thanks
Dan
Dan(at)PokerInsiderDOTorg
Oct 1, 2011 07:45:22 #

If you want to reply, then register here. Registration is free and your account is created instantly, so you can post right away.