What lighting setup do I nee for copying?
Oct 4, 2023 17:24:52 #
kenArchi wrote:
I will be taking pictures if many family photos etc.
With a emd 10, 12-35mm lens, tripod, etc.
I believe this will be quicker than scanning.
With a emd 10, 12-35mm lens, tripod, etc.
I believe this will be quicker than scanning.
I am currently scanning hundreds of family photos in the last few days.
There is absolutely no way I could set up a camera, lay the photos out and upload photos to the computer in even twice the time of scanning.
And they come out better.
Yes, I have done it both ways and used a dedicated copy stand and paper holder to hold them flat.
Oct 4, 2023 23:46:17 #
kenArchi
Loc: Seal Beach, CA
Ok. Well, I guess I will have to put my Canoscanner back to work.
I am thinking I only need to scan at 6mpxls.
It should be quicker.
I am thinking I only need to scan at 6mpxls.
It should be quicker.
Oct 5, 2023 08:56:08 #
DaveyDitzer
Loc: Western PA
kenArchi wrote:
Do I need to use a CPL?
I do have white 5500 light bulbs.
I do have white 5500 light bulbs.
I bought a 5500 LED and it's much handier for my set up.
Oct 5, 2023 11:57:53 #

kenArchi wrote:
I will be taking pictures if many family photos etc.
With a emd 10, 12-35mm lens, tripod, etc.
I believe this will be quicker than scanning.
With a emd 10, 12-35mm lens, tripod, etc.
I believe this will be quicker than scanning.
A couple of (nominally) 12"x15" LED panels made for video and photography... These should be identical, and have a high CRI (95 or better).
Raise on stands so the top edge of each panel is 45° above the base of your copy stand or surface.
Adjust both lights to the same brightness level and color temperature of 5500°K.
100% manual Exposure Mode — Manual Base ISO, Manual Aperture, Manual Shutter Speed
Use a Delta-1 Gray Card (about $10 at camera stores) as both exposure and white balance reference. IGNORE the meter readings from prints! Read ONLY the gray card. DO NOT use auto white balance. The Custom/Pre-set/Manual (term varies by manufacturer) gray card white balance is accurate enough.
Each time you photograph a different SIZE batch of prints, re-meter. Don't change the white balance or light settings.
Full Area Autofocus
Electronic Shutter with 2-second delay
Mirror locked up on dSLRs (use live view mode)
Aperture should be 2-3 stops down from wide open
Flat field macro lens, ideal focal lengths is 30mm on Micro 4/3 for use on a table-top copy stand.
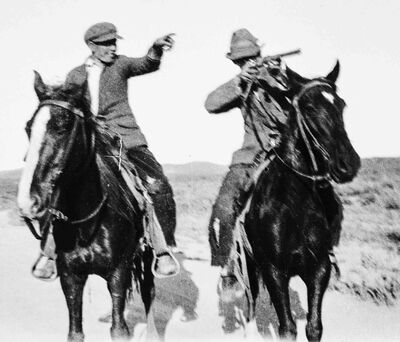
Best results are from raw files processed in good raw conversion software. See samples. View downloads.
Old snapshot copied with method described above — original is a contact print from size 616 film
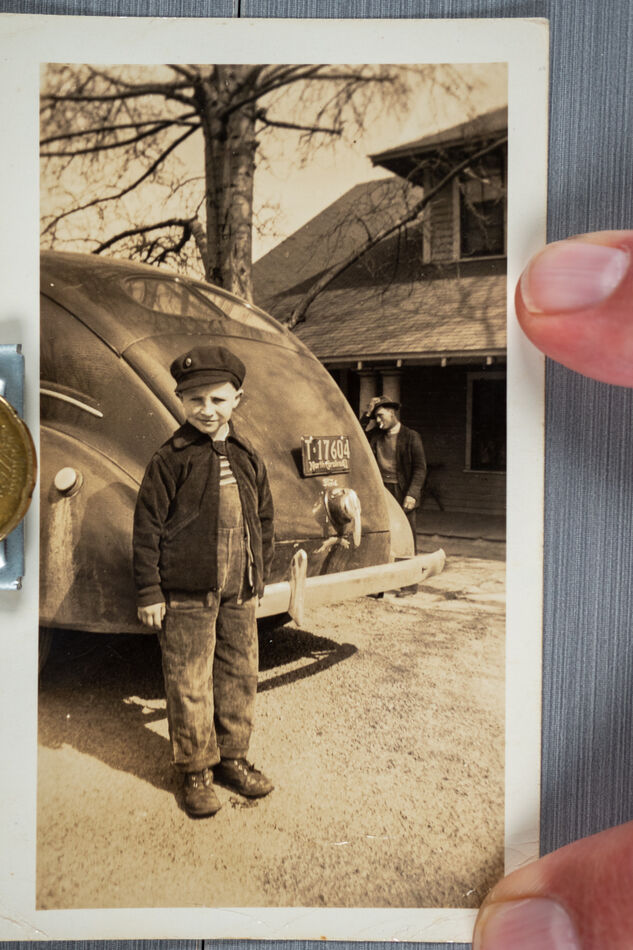
(Download)
cropped, spotted, enhanced version
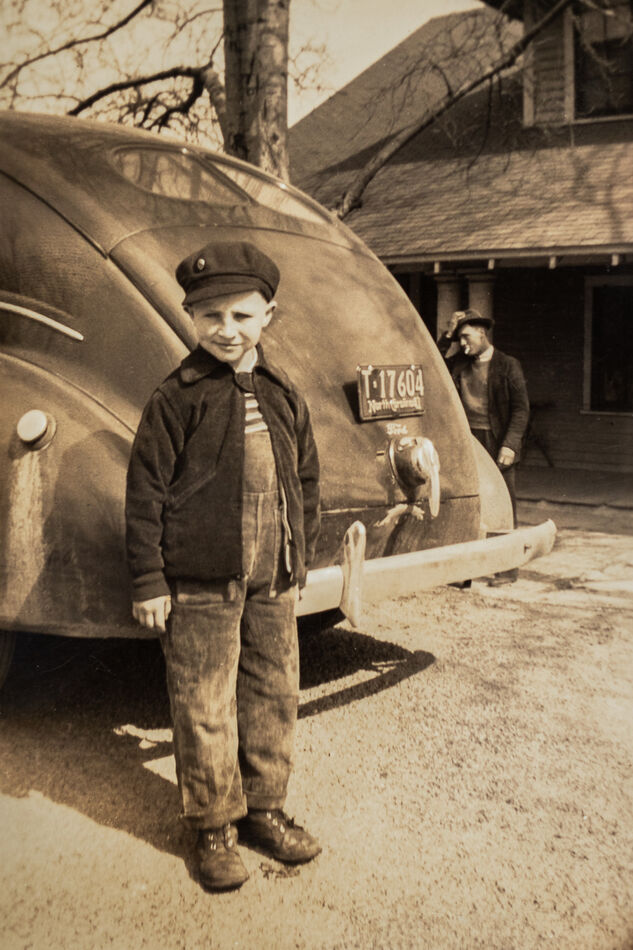
(Download)
Oct 5, 2023 12:02:20 #
A couple more notes:
If you have a ColorChecker Chart, photograph it.
If making JPEGs, use the Natural or Neutral color profile on the camera.
If using Lightroom Classic, change default to "Camera Natural" or "Camera Neutral" for your camera (i.e.; not Adobe Color).
Set camera profile whether using raw or JPEG. Use custom/manual white balance even if using raw mode. It "primes" your software.
Oct 5, 2023 12:07:15 #
How about leaving in some white margin or adding a white strip on the edge so you can have a check on the white balance. Photos in albums are probably not all the same aspect ratio so you’re going to be cropping anyway.
Oct 5, 2023 12:15:43 #
DirtFarmer wrote:
How about leaving in some white margin or adding a white strip on the edge so you can have a check on the white balance. Photos in albums are probably not all the same aspect ratio so you’re going to be cropping anyway.
I DO leave in the borders, if there (see above example), but I DON'T add a white strip to borderless prints. Reason:
> For correct copying, white balance should be referenced to a standard, not an individual print. That way, all prints are given the greatest chance to produce digital reproductions that look like the originals. Hence the reason for a custom/manual/pre-set white balance (whatever your camera mfr calls it), AND the reason for full manual exposure settings.
> If you don't like the original when it gets into post production software, that is where white balance should be adjusted.
I do use the tools in ACR/LrC Develop Module quite a bit to pull up shadows, increase contrast, remove color casts, enhance faded color, etc., but I like to have a raw file that is as faithful to the original as I can start with. That way, I know whether I've improved it or not.
Oct 5, 2023 16:30:56 #
fetzler
Loc: North West PA
kenArchi wrote:
I will be taking pictures if many family photos etc.
With a emd 10, 12-35mm lens, tripod, etc.
I believe this will be quicker than scanning.
With a emd 10, 12-35mm lens, tripod, etc.
I believe this will be quicker than scanning.
If you have prints of old photos you will likely find a scanner more convenient. 600dpi will allow for modest enlargement but prints are not likely to have more detail than this.
I would choose a macro lens with a moderate telephoto length (80-100mm FF) My 60mm Oly lens and 85mm Nikon lens work fine. The reason for choosing a macro lens is that such lenses have a flat field of focus and have minimal pincushion distortion. Zoom lenses are often quite bad in this regard. Macro Lenses of normal focal length will also work especially for large photos.
For small photos a copy stand is most convenient. You will need glass, print paper holder or drafting tape to hold the picture flat. Large photos can be wall mounted or mounted on an Easel that allows the working surface to be perfectly vertical. You will likely need a large level to ensure this. Your camera will be mounted to a tripod that has been leveled.
Lights are placed at a 45 degree angle with respect to the axis defined by the camera position and the photo. LED panels work well but regular high CRI LEDS will be OK too. Use a gray card and a light meter to confirm that the lighting is even. The light meter in the camera can be used.
For large and medium format transparencies, and negatives a scanner can be and easy method. 35mm slides and negatives are handled easily with a slide copying holder. A copy stand a diffuse light source can also be used. You may need film holders to keep unmounted film flat.
Oct 5, 2023 16:34:19 #
Oct 5, 2023 16:41:58 #
cahale
Loc: San Angelo, TX
kenArchi wrote:
I will be taking pictures if many family photos etc.
With a emd 10, 12-35mm lens, tripod, etc.
I believe this will be quicker than scanning.
With a emd 10, 12-35mm lens, tripod, etc.
I believe this will be quicker than scanning.
Don't see how. Put the object in the scanner. Hit scan. Remove object. Repeat. I don't think you can do it faster with a camera. Now if you're going larger than the scanner bed, then camera is probably faster, because you don't have to splice afterwards. Either way, good luck.
Oct 5, 2023 18:52:14 #
Timmers
Loc: San Antonio Texas.
kenArchi wrote:
I will be taking pictures if many family photos etc.
With a emd 10, 12-35mm lens, tripod, etc.
I believe this will be quicker than scanning.
With a emd 10, 12-35mm lens, tripod, etc.
I believe this will be quicker than scanning.
The correct and best set up is with four light, two on either side of the copy stand. You can of course get by with two lights especily if your material for copying is about 8X10 to 11X14 inches in diameter. That said, the truly critical issue with a copy stand is that it be covered with black and if possible all the surrounding areas (including you) are a matt black surface of low reflection.
The key issue is to have a flat light meter to read (digital preferred) that is used to adjust the light distribution so as to achieve as even a spread of light as possible. There are several 'great secrets' for achieving this magical distribution. First you need four lights. The next is to toss the written nonsense of 45 degrees as the angle of the lights to the plain of the copy board, many years ago (before WW II) Eastman Kodak researched this question and found that 30 to 38 degrees of angle produced the best distribution AND that not all the lights were at the same angle, the angles as stated above are used (35 degrees was decided as a nice mid point). Finaly, there is a rather interesting phenomena that is found in every four (4) light set up. When all the lights are adjusted to their optimal placement as a whole system, at the dead center on the copy board it will be found that the absolute center of that flat surface the light will fall off by 1/10 of a stop from the even distribution of the copy surface. This always happens, always. It is the indicator that the copy set up is properly balanced.
To reveal myself, I worked with flat copy stands made by E. Leitz and the Polaroid MP 3 and MP4 stands as well as making 'copy' records of murals for artists and art historians, institutions. Here is the strait dope. If you copy any gravure printings, especially roto gravure from Experian sources, you will dis cover that you must open the camera lens UP by 1/3 stop from what the light meter say will be the correct exposures or the resulting transparencies will be dark by 1/3 stop. Never use Polarizing filters on drawings and many paintings as the polarizer will favor certain layers of multiple layers of work. Always use UV filters at the light source to block UV illumination (not just on the lens), UV is junk light to most photography and can alter the color outcome of film as well as digital.
Last, objects under glass (a book holder with glass front is also this type of issue), use a flat blacked cardboard card over the lens such that the card has a hole in it's center and the sliced parts are left to hold the card in place in front of the camera. Use a cable release or remote shutter release, the only part that can reflect in the image is the optic and this will not show if the camera is perfectly aligned for all three dimensions. If you are shooting a large glass covered art object, the use a tripod and a matt black cloth draped over the camera and tripod (usually requiring a separate stand with top cross bar to hold the cloth. Critical, the angle of the art work (hanging images under glass are rarely 'flat' to the wall, so angle finder is used to determine the angle of the art work and this angel is the angle set for the back of the camera body to insure a flat field effect.
All of this assumes you are photographing a flat field work. Multiple dimensional works require a specialty type of handling in which a long exposure be made and the photographer must paint the surface with light by evenly moving the light about behind the camera surface. This requires a rather unique style that few photographers poses.
Oct 5, 2023 23:43:16 #
cahale wrote:
Don't see how. Put the object in the scanner. Hit scan. Remove object. Repeat. I don't think you can do it faster with a camera. Now if you're going larger than the scanner bed, then camera is probably faster, because you don't have to splice afterwards. Either way, good luck.
I ran a commercial scan room for three years in the late 1990s. We scanned mostly 4x6 prints to reproduction size at 300 PPI, using two 11x17 UMAX flatbeds.
I WISH we had been able to use a copy camera. My home setup is much faster. I ditched my Epson V600 a few years ago. Too sloooow.
Oct 5, 2023 23:56:39 #
Timmers wrote:
The correct and best set up is with four light, tw... (show quote)
Great description of a high end commercial setup, similar in concept to the 14’ overhead camera we used to make class composites with in a school portrait lab in the ‘90s. Also similar to what I used in my AV lab in the ‘80s.
It’s not necessary to use four lights to illuminate the average hobbyist’s snapshots. Two good video grade LED panels will do, for copy up to 11x17.
Oct 6, 2023 07:34:54 #
burkphoto wrote:
I ran a commercial scan room for three years in the late 1990s. We scanned mostly 4x6 prints to reproduction size at 300 PPI, using two 11x17 UMAX flatbeds.
I WISH we had been able to use a copy camera. My home setup is much faster. I ditched my Epson V600 a few years ago. Too sloooow.
I WISH we had been able to use a copy camera. My home setup is much faster. I ditched my Epson V600 a few years ago. Too sloooow.
Interesting, I scan a print with my V750 every 20 seconds. That is from start, picking up the print, placing it, to it being placed into the folder on the computer.
I timed it because of the slow comments.
No additional transfer time required.
Oct 6, 2023 11:08:29 #
Architect1776 wrote:
Interesting, I scan a print with my V750 every 20 seconds. That is from start, picking up the print, placing it, to it being placed into the folder on the computer.
I timed it because of the slow comments.
No additional transfer time required.
I timed it because of the slow comments.
No additional transfer time required.
When setup properly, I can make a JPEG that is a close match to the original from a 4x6 about every seven seconds. I tend to make raw files so I can spot out dust, scratches, and clean up faded color, though. But if I'm in a hurry and just need a quick copy, it's quick. Resolution is not a factor in the time it takes to scan with a camera, either, because it is whatever the sensor can do.
If you want to reply, then register here. Registration is free and your account is created instantly, so you can post right away.