Infrared processing
Feb 15, 2023 23:17:45 #
JimH123 wrote:
Perhaps I should mention why RAW us the best way t... (show quote)
To shoot in jpeg would eliminate the most important part of shooting IR. Rob Shea's actions help bring out the colours.
There is an action that goes on camera raw that starts your processing by changing the colour temp to make it easier to process.
Look at Rob Shea's web sit, he has videos on how to do it. And several actions.
I like the 590nm. It gives me more to play with. More colour. You can easily go to 720nm or anything that you want, but you can't go back once you use the higher filter.
Feb 15, 2023 23:31:05 #
Thank you very much...I have reviewed Rob Shea's website...very instructional...my camera was converted to a 590nM filter so am anxious to get some images...
Feb 15, 2023 23:47:09 #

zacksoccer wrote:
Thank you very much...I have reviewed Rob Shea's website...very instructional...my camera was converted to a 590nM filter so am anxious to get some images...
I think you will find it fun. Rob Shea tries White Balance points all over the image looking for a look that he likes. He will sample a cloud, or tree leaves, or tree bark, both in the sun or in the shade, or dirt, or whatever is in the image. All over the place.
Here is an example I will walk through. I will label the images to show what I was doing. You should see in this one the richness that comes from a nice gray scale.
Now there can be variations. For instance, I could elect to do the B&W conversion on the original. But it might miss some of the beauty. Or I could have chosen a different WB, and again, the results could end up different.
But remember, there is no "Right" or "Wrong" way to do this. You go for what you find appealing. Also, Rob Shea tends to do WB before the channel swap. I have been leaning towards WB after the channel swap.
And for a FYI, with all the recent rain in California, the current water level in this reservoir now reaches the tree line on the right side near the center of the image.
With a little practice, I'm sure that you will be able to do this too.
Original image using 590nm filter
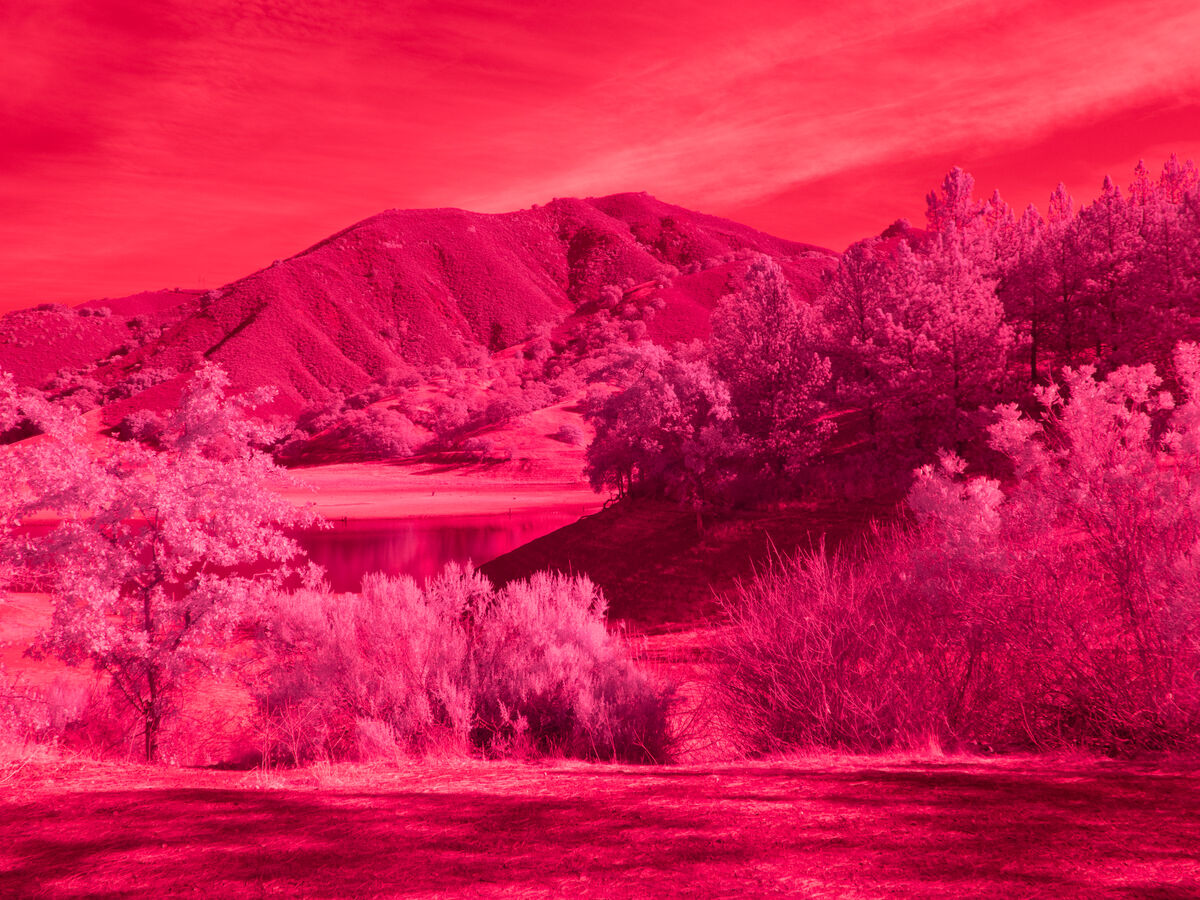
(Download)
A red-blue channel swap (some tweaking added to get a yellow that I liked)
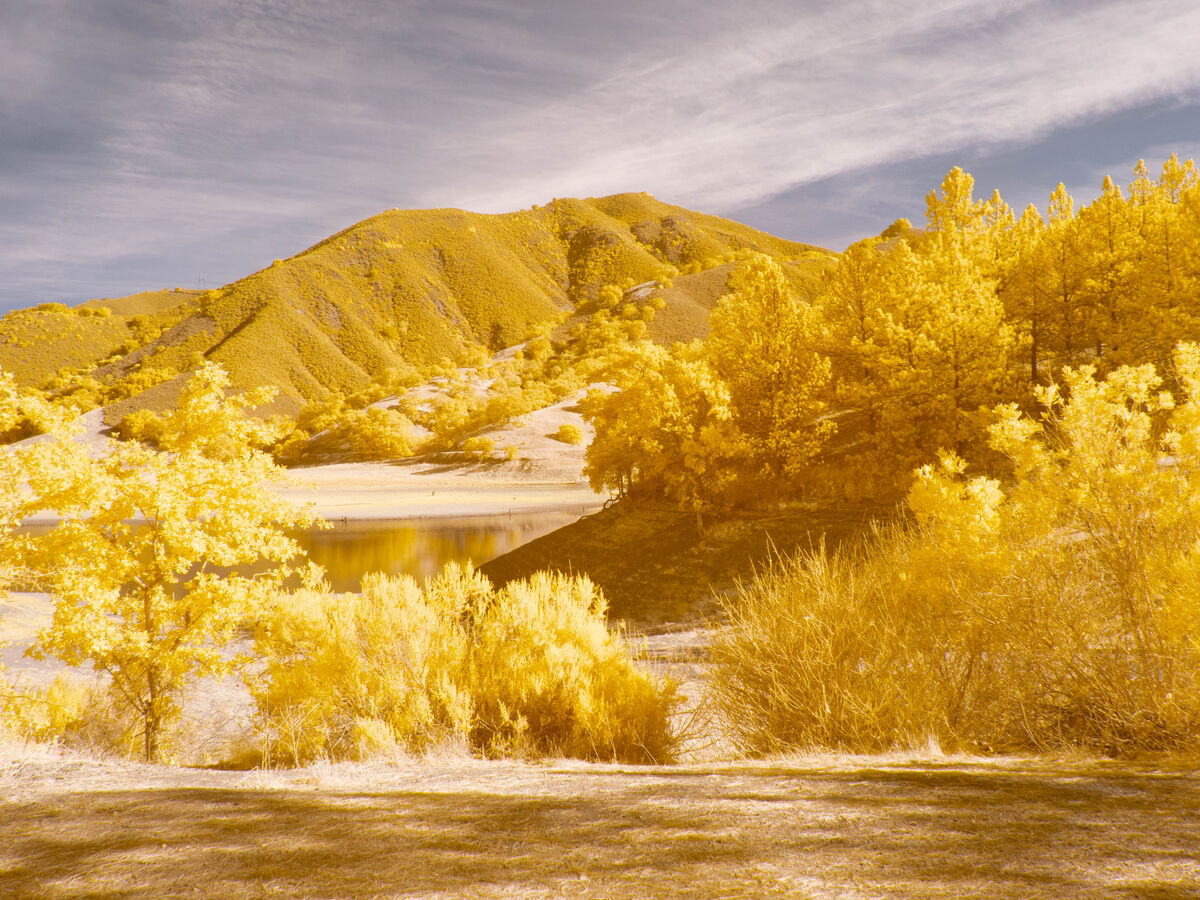
(Download)
After trying a number of WB points, I decided I liked the WB done on the close by shrubs
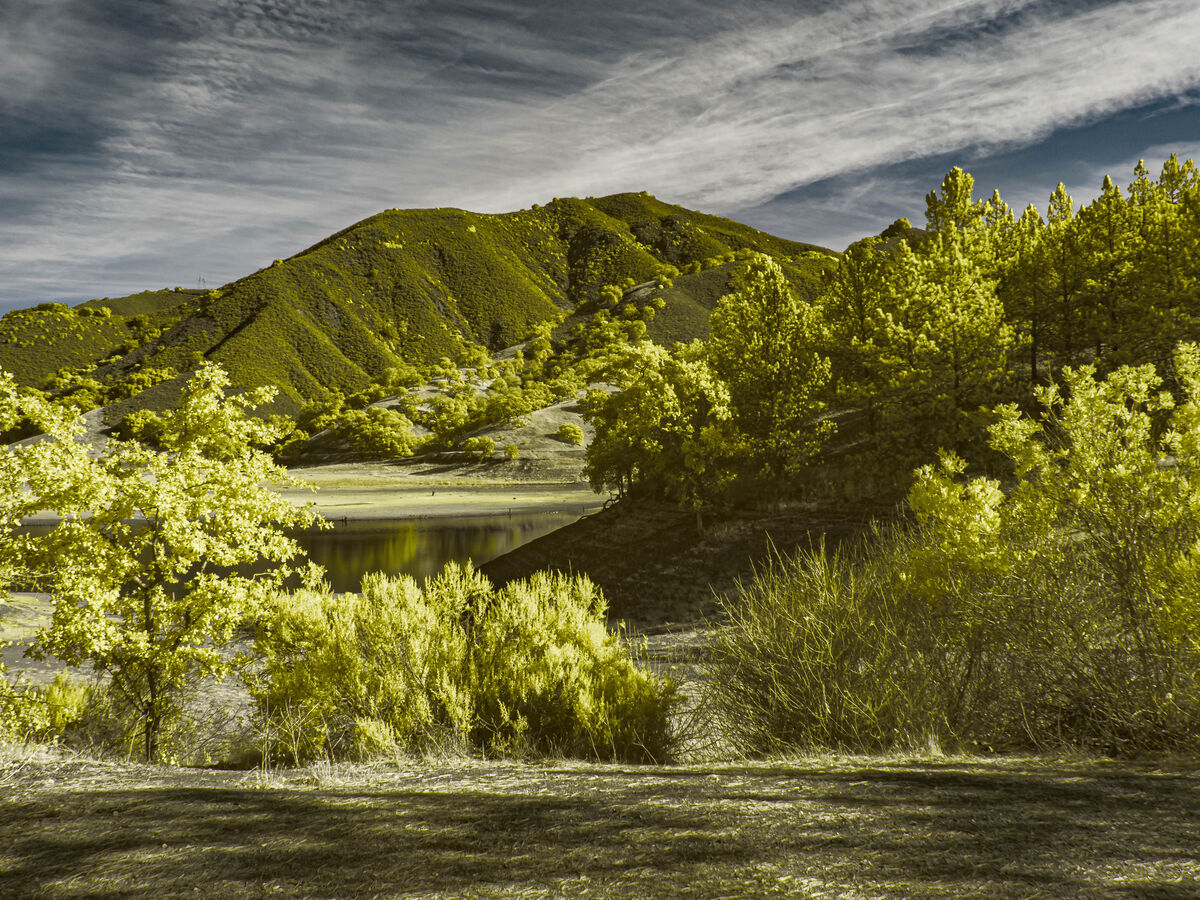
(Download)
Conversion to B&W using NIK's Silver Efex Pro with the WetRocks Profile
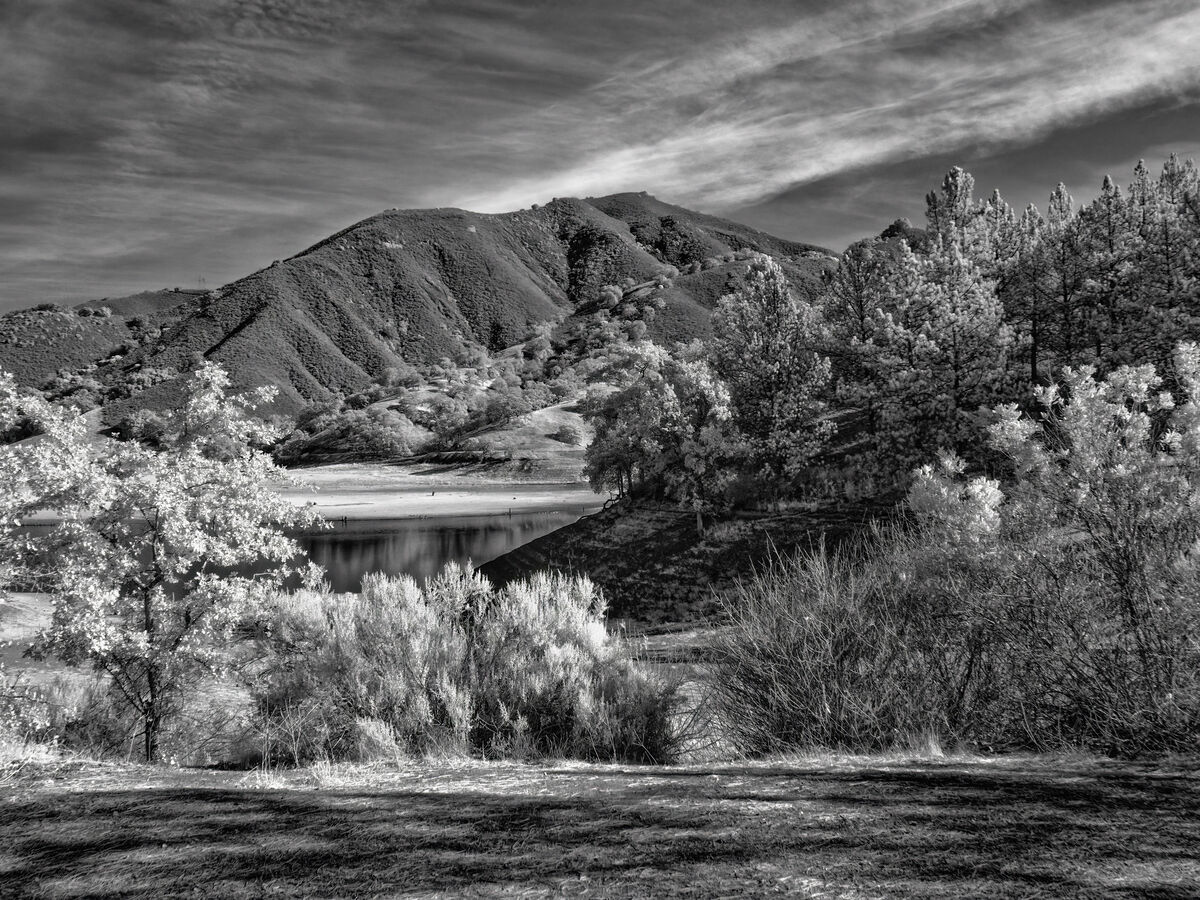
(Download)
Here is a variation I tried where I keep the blue sky on a B&W conversion

(Download)
Feb 16, 2023 02:38:28 #
Feb 16, 2023 02:40:19 #
topcat wrote:
That looks great. I think that you have it down. I would like to see more.
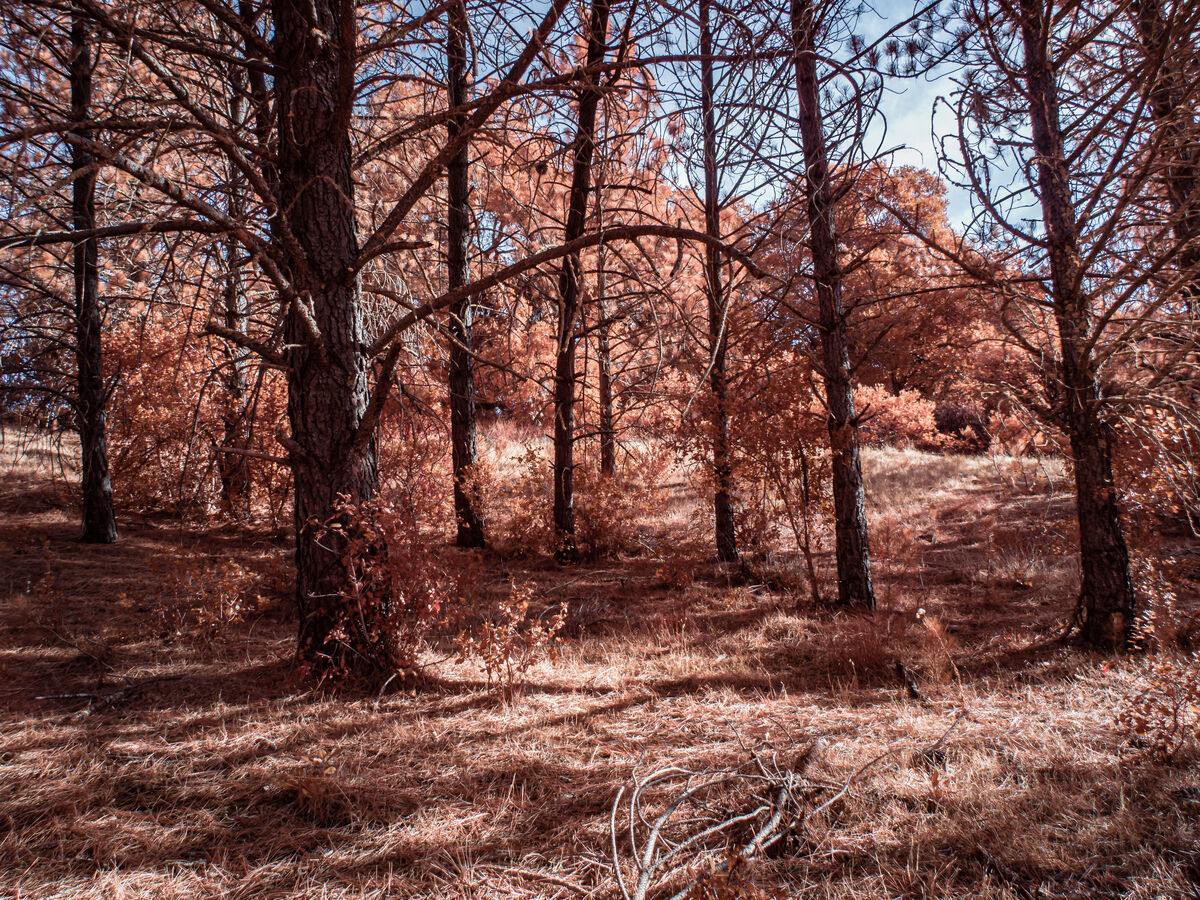
Here is one that I did

Feb 16, 2023 10:40:40 #
topcat wrote:
Here is one that I did
Beautiful results where you allow the pink to show in the trees. I like it.
Feb 16, 2023 12:00:53 #
JimH123 wrote:
Beautiful results where you allow the pink to show in the trees. I like it.
Thank you
Feb 16, 2023 12:33:11 #
Here is a special type of IR that is sold by Kolari and is called the ChromeIR filter. This type of IR filter is different in that there is no need for doing things like channel swapping. For this image, the only thing I did to it was to reduce the saturation in the chrome colored leaves since it was too intense and didn't look quite right. This gives us the ability to produce an autumn look in the summer months.
This filter can only be used on a full spectrum IR camera. It cannot be used on a camera that has been modified with one of the IR filters such as 590nm, or 630nm, or xxx nm.
This filter can only be used on a full spectrum IR camera. It cannot be used on a camera that has been modified with one of the IR filters such as 590nm, or 630nm, or xxx nm.
Feb 16, 2023 12:34:24 #
Feb 16, 2023 12:58:09 #
And here is another route. Used 3 filters on a full spectrum modified camera. With 3 filters, there is risk of vignetting, so I actually used larger filters along with a step up ring adapter. The following filters were used:
1. A Vivitar X1 filter -- this is a pale yellow green filter. I have tried various other pale yellow green filters which produce variations from muddy orange to cranberry colors. The Vivitar X1 produces a color in the middle.
2. A B+W KB20 filter - This is a filter that looks blue when looking at it.
3. A Hoya 80C filter. This filter is light blue.
These 3 filters work together to produce the effect. Like the ChromeIR filter, no additional processing is needed, but I do find that adjusting the WB temperature can vary the pink color to exactly the look you want. Remove any one of them, and the look is destroyed.
I did not invent this look. I did find someone online using this combination. He had a different filter than the Vivitar X1 filter which I was unable to find. After trying many other pale yellow green filters, the Vivitar X1 filter produced the same Candy Pink look.

If you want to reply, then register here. Registration is free and your account is created instantly, so you can post right away.