PSE Color Cast
Nov 30, 2020 15:52:15 #
amfoto1
Loc: San Jose, Calif. USA
Gene's correction certainly looks better (and might have served as a useful guide for colorizing this image)...
But I wanted to give it a try after reading a little about colorizing and watching a couple Youtube tutorials. The result is attached, but it's just a first attempt and I would do quite a bit of additional fine tuning, if it were my project. I first converted the image to B&W in Photoshop, and then colorized that image (I was just guessing at colors... and I especially see my hair and plant colors need some work. But I like my wall color better than the original! )
)
But I wanted to give it a try after reading a little about colorizing and watching a couple Youtube tutorials. The result is attached, but it's just a first attempt and I would do quite a bit of additional fine tuning, if it were my project. I first converted the image to B&W in Photoshop, and then colorized that image (I was just guessing at colors... and I especially see my hair and plant colors need some work. But I like my wall color better than the original!
)
Nov 30, 2020 16:43:10 #

Nov 30, 2020 17:01:14 #


Check out Infrared Photography section of our forum.
Nov 30, 2020 17:37:01 #

Opened in Photoshop Elements 2021. 1. Command/control J to duplicate layer. 2. Filter , Blur adjustment Choose Average. 3. Command/control i to invert top layer which is now a solid yellow tan color. Color changes to blue. 4. Blend mode soft light. Adjust opacity to taste. 5. Flatten Image. 6. If color cast still exists repeat 1 through 5 again. This method can be used for any color cast. I learned this from Anthony Morganti who has a very active YouTube channel and also a website, You might want to check him out. The YouTube tutorial was on Photoshop CC and I adapted it to Affinity Photo.
Nov 30, 2020 19:11:10 #
dadcowell wrote:
Ladies And Gentlemen,
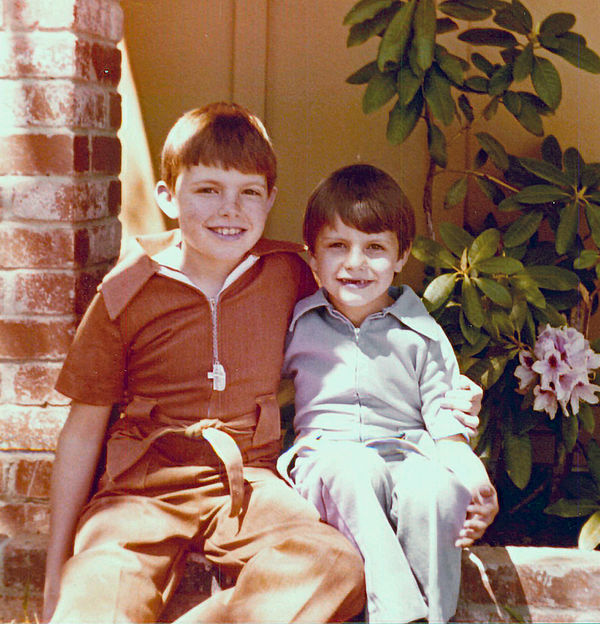
Here is an example of a photo I can't seem to fix.
Here is an example of a photo I can't seem to fix.
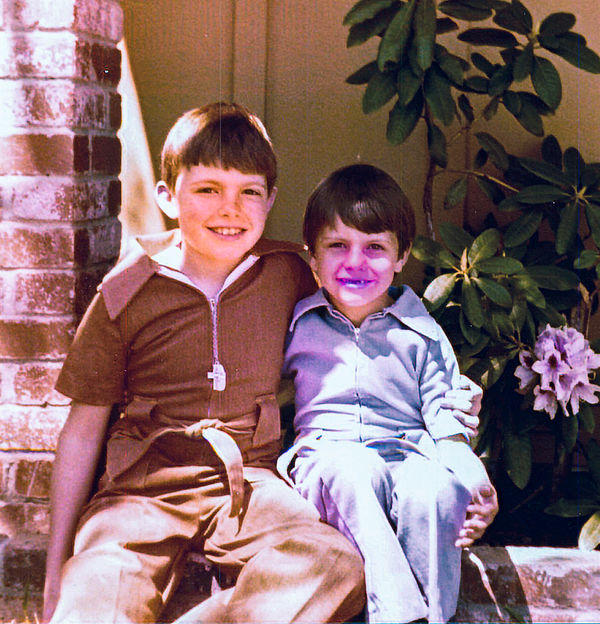
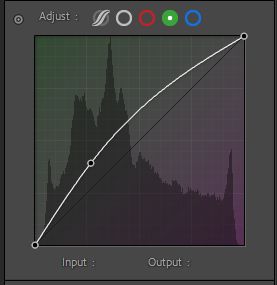
Here's some work in Lightroom.
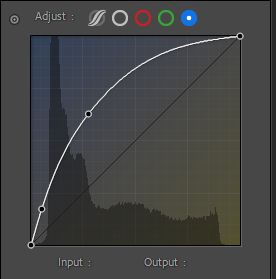
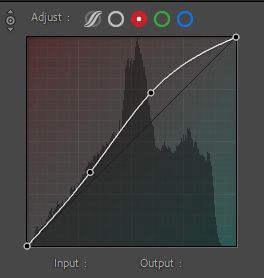
Looking at the histogram it appears that the old photo has lost most of the blue. So I went into Tone Curve and pumped up the blue, then tweaked red and greeen a bit. Got the leaves looking reasonable.
Then I worked a bit on the faces using the radial filter, adjusting temperature, exposure, and clarity (and some saturation). The kid on the right needs more work because of the shadows. The kid on the left might benefit from some more work but I used my available time to this point.
Nov 30, 2020 19:25:00 #
I found a piece of software specifically designed to correct color casts and poor contrast in scanned photos. It's called Restore by Vivid-Pix. Prior to using Restore I used levels and curves to correct color casts, usually in my scanning software when I scan the image, or in PSE / Photoshop when someone else completed the scan. Here is the one click result from Vivid-Pix Restore.

Nov 30, 2020 20:07:31 #
tvhasben
Loc: Chattanooga, Tennessee
It took me several tries in Ps CC. I just fiddled with color balance till it looked better.

Check out Wedding Photography section of our forum.
Dec 1, 2020 23:19:27 #
First I used a shadow area on the leg of the smaller child as a starting point for a "neutral".
Then worked with exposure and contrast, and added some dynamic contrast. No idea why the pattern in the younger child's clothing is repeated on his left arm!
Then worked with exposure and contrast, and added some dynamic contrast. No idea why the pattern in the younger child's clothing is repeated on his left arm!

Dec 2, 2020 15:40:28 #
rwm283main
Loc: Terryville, CT
Edited in Photoshop CS5. Began finding the 'correct' gray for the image using the eye dropper in Curves. Once I was happy with the gray, using Curves and looking at the histogram, I tweaked the colors so that they all matched (left to right saturation wise). Final step was to use some vibrance and saturation to give the photo some punch. About 20 minutes worth of processing. I would think, and I could be wrong, that you are trying to make each slide in your slide show realistic looking considering the vintage of the photos.
My wife has approx. 300 35mm slides in a slide show that I will attempt to scan this winter using an Epson Perfection V550 Photo. Believe it or not it does a great job using the 'Full Auto Mode.' White balance, compared to the slide, is a very close match. I usually spend about 10 minutes per slide in post process. Portrait skin tones is the hardest and takes more time. There's many ways to skin the cat though.
Have fun.

If you want to reply, then register here. Registration is free and your account is created instantly, so you can post right away.
Check out Astronomical Photography Forum section of our forum.