A flower developed with Affinity - what frequently goes into finishing a flower photo.
Jul 11, 2019 16:21:01 #

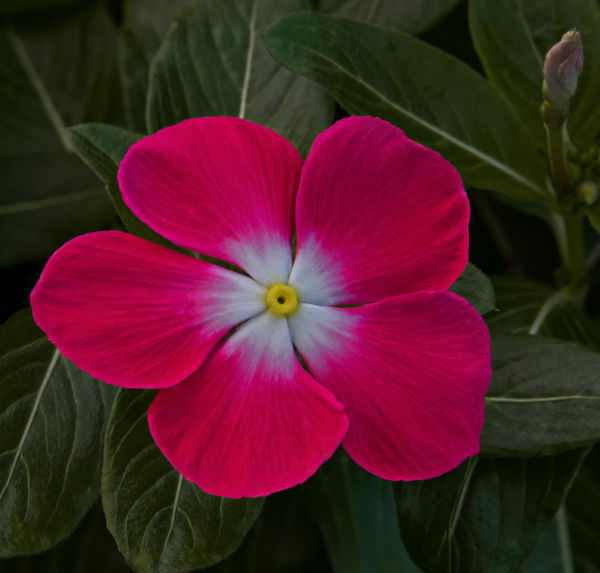
I know I have posted a great many flower photos in the past few weeks. This is another but with a twist. I wanted to show just a taste of what can be done with Affinity and also a glimpse of what goes into a finished flower shot.
The first picture is my finished product and the second is a jpg created from raw with only the most basic of adjustments to brightness. The second flower did not add to the image in any way. I tried cloning it out but it didn't come out well. Instead, I copied the blossom to a new layer by itself. I also copied the
leaf directly below the flower to a new layer. I then duplicated the leaf layer. I was able to move, stretch and rotate the two leaves to cover all the lower flower. I then placed the blossom layer on top to tie everything together. After merging the layers into a single image layer, I proceeded to crop and do a few more basic adjustments. As a very last step I used NIK Color Efexs for final touch up but the change was minimal.

Jul 11, 2019 16:28:44 #

Excellent work - I'm using Affinity Photo also but still revert to CS6 when I need to process a bunch quickly.
Jul 11, 2019 16:41:25 #
ecobin wrote:
Excellent work - I'm using Affinity Photo also but still revert to CS6 when I need to process a bunch quickly.
Thank you, Elliott. I love Affinity but I am still learning! It is a very capable program.
Jul 11, 2019 17:40:08 #
kenievans
Loc: Dallas
Great job Carol. I wouldn't have known how much work you had to put in it if you hadn't explained it or shown the original. You make it look effortless! 
Jul 11, 2019 17:43:32 #
Cwilson341 wrote:
I know I have posted a great many flower photos in... (show quote)
Nice work, Carol; thanks for sharing your expertise. I'm nowhere near being able to do what you did but it's encouraging to see what can be done with Affinity.
Jul 11, 2019 17:57:07 #
kenievans wrote:
Great job Carol. I wouldn't have known how much work you had to put in it if you hadn't explained it or shown the original. You make it look effortless!
Thank you, Keni. Most of my flowers have fairly extensive work in pp. I enjoy doing it so all is good.
Jul 11, 2019 17:59:06 #
srt101fan wrote:
Nice work, Carol; thanks for sharing your expertise. I'm nowhere near being able to do what you did but it's encouraging to see what can be done with Affinity.
Thank you! It is fun and there are usually multiple ways to accomplish a desired result. If one approach doesn't work, I just try something else.
Jul 11, 2019 18:03:05 #

Thank you for sharing this excellent solution, Carol. Looks great!
Jul 11, 2019 18:07:22 #
Thank you, Linda. I always try the easiest route first but cloning and inpainting just didn't work out.
Jul 11, 2019 18:51:57 #

Jul 11, 2019 18:54:03 #
UTMike wrote:
Wow, Carol, you really have this PP thing down!
Thank you, Mike. I'm getting pretty good at the things I do regularly but there is so much more I've barely touched.
Jul 11, 2019 21:44:03 #

Cwilson341 wrote:
I know I have posted a great many flower photos in... (show quote)
amazing difference in the shots, carol...you did a great job!
Jul 12, 2019 05:20:20 #
merrytexan wrote:
amazing difference in the shots, carol...you did a great job!
Thank you, Merry!
Jul 12, 2019 06:19:55 #
Guyserman
Loc: Benton, AR
I'm glad you showed the "before'' picture also. Nice work and beautiful result. It's good you have things to enjoy.
Jul 12, 2019 06:40:10 #

Great job Carol - I would not have guessed all the steps taken on this excellent image. The sign of good editing is that it's not immediately noticeable, and you nailed it.
If you want to reply, then register here. Registration is free and your account is created instantly, so you can post right away.