Negative scanned in with an All in One
Jan 12, 2013 20:19:21 #

Oh I wish I would have listened to my 9th grade teacher on taking care of your negatives! Last weekend I was going through my buckets of stuff and sorting them out in preparation for my first child's graduation in 2 1/2 years (yes I'm a little anal and a planner to the extremes!).....anyway I was going through and my husband found a picture he loved. Needless to say I scanned the picture in and fixed the water marks and such so he can have a one for work.
Now this brings me to today, as I scanned in the photo (that my husband wanted) I noticed that one of the options for scanned image was flim (Espon Workforce 610); thus my curiosity was raised. So I went through my millions of negatives and found the one I loved (I took back in the days) of my kids.
Needless to say that when I finally found the negative and tried to scan it in (of course reading the help section for my printer) it was discovered that I needed an adapter. Thus I knew this but was hoping by some miracle that I had a hidden surprise.
Not to be discourged and being the type of person I am, I said what if I try anyway without the adapter and see what I get....
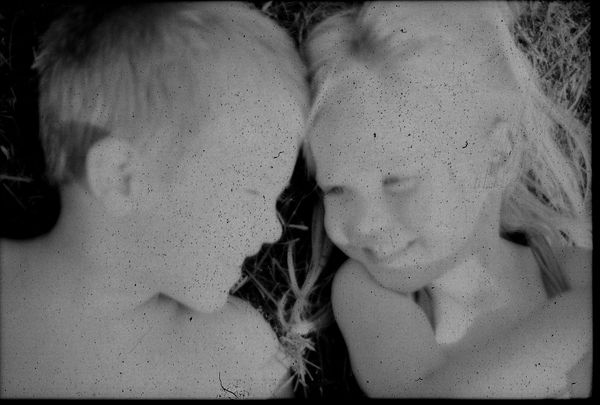
Well, a 342 KB of a very dirty negative (film)....so my next task is to first try and remember how to clean a negative correctly (which won't fix the scratches on the negative) and then see how far I can salvage the poor thing. Oh yes, I am in market for a scanner of photos and negatives but that is yet to come.....so I'm off to research on how to clean negatives along with restoring damaged photos (due to a flood we had) and see what I can do.....
So attached is one of my favorite images and remember its ok to say hey I wonder if it'll work (it does...but not the greatest) and take care of those negatives you never know when you need them and my 9th grade photo teacher was wiser than I thought.....thanks
Now this brings me to today, as I scanned in the photo (that my husband wanted) I noticed that one of the options for scanned image was flim (Espon Workforce 610); thus my curiosity was raised. So I went through my millions of negatives and found the one I loved (I took back in the days) of my kids.
Needless to say that when I finally found the negative and tried to scan it in (of course reading the help section for my printer) it was discovered that I needed an adapter. Thus I knew this but was hoping by some miracle that I had a hidden surprise.
Not to be discourged and being the type of person I am, I said what if I try anyway without the adapter and see what I get....
Well, a 342 KB of a very dirty negative (film)....so my next task is to first try and remember how to clean a negative correctly (which won't fix the scratches on the negative) and then see how far I can salvage the poor thing. Oh yes, I am in market for a scanner of photos and negatives but that is yet to come.....so I'm off to research on how to clean negatives along with restoring damaged photos (due to a flood we had) and see what I can do.....
So attached is one of my favorite images and remember its ok to say hey I wonder if it'll work (it does...but not the greatest) and take care of those negatives you never know when you need them and my 9th grade photo teacher was wiser than I thought.....thanks
Jan 12, 2013 21:03:21 #

I worked a little on the image and will post it if you like. I got rid of most of the very noticeable spots.
Jan 12, 2013 23:49:11 #
wendy,
Go for it, I also did the same at home but as always it will never be the same as before.....if you do please tell me what you did as I have many more to go through. Thanks GP
Go for it, I also did the same at home but as always it will never be the same as before.....if you do please tell me what you did as I have many more to go through. Thanks GP
Wendy2 wrote:
I worked a little on the image and will post it if you like. I got rid of most of the very noticeable spots.
Jan 13, 2013 00:41:20 #
GPoyner wrote:
wendy,
Go for it, I also did the same at home but as always it will never be the same as before.....if you do please tell me what you did as I have many more to go through. Thanks GP
Go for it, I also did the same at home but as always it will never be the same as before.....if you do please tell me what you did as I have many more to go through. Thanks GP
Wendy2 wrote:
I worked a little on the image and will post it if you like. I got rid of most of the very noticeable spots.
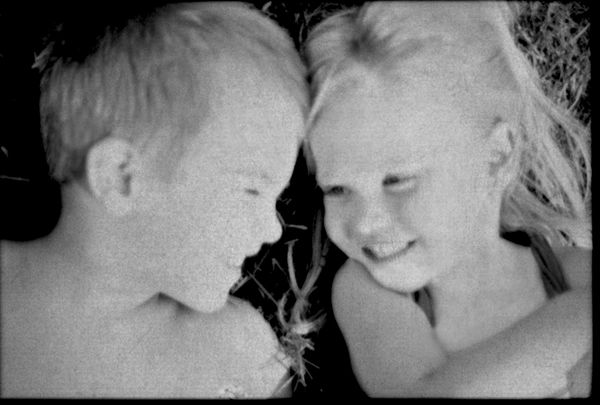
Sure, here it is.
The one thing that really got rid of the spots was in CS5 under 'Filters" "dust and scratch removal". I also used despeckle, but just once.
I used the burn tool to help with the eyes and did some exposure adjustment.
There is still a lot of speckling, but the more you try to get rid of it, the less defined the photo becomes. Good luck with figuring out how to clean the negatives. That will probably help a lot.
Jan 13, 2013 05:32:00 #

GPoyner wrote:
Oh I wish I would have listened to my 9th grade t... (show quote)
For what it's worth I recently scanned a couple of thousand of my parents old slides. There were some quite dusty ones so with a soft scareen cleaning cloth I cleaned them as I went, rubbing between thumb & finger & then a flip with the cloth. It removed most of the dust & most of the scratches were from earlier handling. The results were great. Any of those that warranted a better presentation, I PPd them. Try it on a few lesser important slides & see if there is any detriment. Be brave!!.
Oh yeah, the same went for a heap of B&W neg's i've just finished. Just wipe the dust etc off. If it won't move then PP it later.
Jan 13, 2013 05:36:20 #

GP: I wanted to do the same thing. I have about 10,000 slides I want to scan. One Christmas about 3 years ago, wife and I were walking thru Staples Business Depot and they had this nice little scanner for sale. Weird looking thing so I picked it up for a closer look. When I saw that it scanned negatives as well as slides, in the cart it went. It is a model ITNS-301 made by innovative technology (made in Japan). The beauty of this beast is that you do not have to have the computer turned on. It runs by USB or can be plugged in to a standard with the included adapter. Plug in a SD card and away you go. There are holder for the slides, 4 at a time or a strip of negatives. Yes, there is still the dust issue. I was just doing a little blow on each side of the strips. Seemed to work fine. If you put the negative in upside down or backwards, the machine has options to mirror image top to bottom, left to right. The unit was like either 39 or 59 dollars
Steve
Steve
Jan 13, 2013 08:51:06 #

Well, seems to me I recall from the ol WET days that negatives were during their birth wet! If I had your negative with lot of skuz on the surface I would try to give it a bath in a mild detergent rinse well with distilled water and hang to dry. Next find a friend with a good scanner with adapter like my Epson 4490 (years old). Once scanned do a "color reversal" on the image. Download a 30 day trial of Topaz B&W to give it the treatment. To the extreme, try IR photography of the negative (cleaned). Not sure, but often recovery experts for old scrips use spectra outside the visual.
Darn if the Windy2 gal ain't perty good and helpful... that was a lot of work... Kudos Windy. :thumbup:
Darn if the Windy2 gal ain't perty good and helpful... that was a lot of work... Kudos Windy. :thumbup:
Jan 13, 2013 09:28:24 #
Thanks Wendy, I got as close to your end results also but not as good.
Wendy2 wrote:
quote=GPoyner wendy, br br Go for it, I also di... (show quote)
Jan 13, 2013 09:29:37 #
Oh yes I remember them starting wet. I might give it a try with some ones that are of non-importance first....thanks
dpullum wrote:
Well, seems to me I recall from the ol WET days th... (show quote)
Jan 13, 2013 09:31:30 #
rayford2
Loc: New Bethlehem, PA
Wendy2 wrote:
quote=GPoyner wendy, br br Go for it, I also di... (show quote)
That's what's called being "downright neighborly".
Good job, Wendy.
Jan 13, 2013 13:28:48 #
rayford2 wrote:
quote=Wendy2 quote=GPoyner wendy, br br Go for... (show quote)
Thanks rayford2! That is what I try to do.....
Jan 13, 2013 15:45:32 #

The image is soft, not in good focus. Fairly good chance that the negative was upside down. Also, 342 KB equates to a very low resolution. You should rescan, making sure the negative is flat, which is one reason for an adapter. Did you scan as film, or as reflective?
You should rescan at a high DPI, make sure it's not set to reflective in your scan settings, and make sure the negative is flat. Maybe you can put a clean piece of glass on top to make sure it's flat.
You should rescan at a high DPI, make sure it's not set to reflective in your scan settings, and make sure the negative is flat. Maybe you can put a clean piece of glass on top to make sure it's flat.
Jan 13, 2013 16:17:53 #

GPoyner wrote:
Oh I wish I would have listened to my 9th grade t... (show quote)
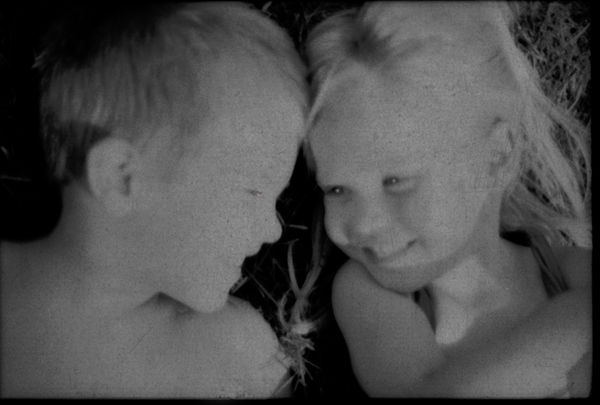
I used the Dust-and-Scratches, as Wendy 2 did, but chose not to use the De-Speckle feature. Left the burn tool alone, but added some light reflection to the girl's eyes. It generally adds life to the subject if not overdone. There is much that can be done with the picture depending on your preferences.
Jan 14, 2013 08:57:39 #
Oh I know that 342 kb is extermly small. The point of the post was not to promote the use of my scanner without the adapter or even not use a true film scanner. It really was wow it did work and that I really should have taken care of my film.
But thank you for you comment I do appreciate your input.
But thank you for you comment I do appreciate your input.
RMM wrote:
The image is soft, not in good focus. Fairly good chance that the negative was upside down. Also, 342 KB equates to a very low resolution. You should rescan, making sure the negative is flat, which is one reason for an adapter. Did you scan as film, or as reflective?
You should rescan at a high DPI, make sure it's not set to reflective in your scan settings, and make sure the negative is flat. Maybe you can put a clean piece of glass on top to make sure it's flat.
You should rescan at a high DPI, make sure it's not set to reflective in your scan settings, and make sure the negative is flat. Maybe you can put a clean piece of glass on top to make sure it's flat.
Jan 14, 2013 11:09:35 #

Simply wiping the negs off can cause further damage by adding scratches from the dirt, dust etc. As stated previously wash in a luke warm bath of mild detergent and rinse thoroughly. Hang to dry and Bob's your uncle.
Slides will need to be un-mounted forst before a bath and then remounted although remounting is only required if you plan to show them in a projector. Otherwise simple storing like the negs will do.
Good luck.
Slides will need to be un-mounted forst before a bath and then remounted although remounting is only required if you plan to show them in a projector. Otherwise simple storing like the negs will do.
Good luck.
If you want to reply, then register here. Registration is free and your account is created instantly, so you can post right away.