RAW edit " Order Of Operations "
Jan 14, 2024 13:57:22 #

MrBob wrote:
After being involved in a recent Math Puzzle regar... (show quote)
This is why when I need to move to PS from LrC, I always open my image as a SmartObject, so that if I need to make RAW edits I can still go back and make tweaks.
Jan 14, 2024 14:12:27 #

Jack 13088 wrote:
Well ACR (and I assume all raw editors) rebuild th... (show quote)
I should have added that it is faster to wait to do the more compute intensive operations such as sharpen/noise reduction and lens correction until the end to save time during editing.
Jan 14, 2024 14:14:25 #
CliffMcKenzie
Loc: Lake Athens Texas
Ready for a surprise? LRC Develop Module actually is setup based on Adobe recommended workflow.
Is that what I do? Close
1. During import apply my preset import. This preset import includs lens profile correction and sharpening set to 0.
2. Look at the images and if they are all shot under the same conditions (this is very rare), set white balance and “As Shot” and then sync all images.
3. “R” – this takes you instantly to Develop Module and Crop. Make sure image is level and will crop as needed.*
4. Basic panel address profile needs (note #2 is rare)
5. Standard image, I might try Auto. A night image, eclipse, never use Auto. Also check vibrance and saturation at this point.
6. Depending on the shot (always), I usually start with dehaze and then move up to Texture or Clarity.
7. Move to Masking…masking is really cool
8. Look at image to remove anything distracting. I like LRC’s new help here, but I usually round trip to PS.
9. Now it is time for Topaz Denoise and\or Sharpen. The ISO in many cases points which direction. If it very light, I will use LRC denoise. * If I know I going to use Topaz AI, I do it early in the process as AI wants the whole pre-cropped image...I am not a fan of this. Example a good image of a person but also in the image is very bright light that will be cropped out.
Note, you can batch process, via roundtripping. I do all like images at one time.
Last point – always work from Collections.
Hope this helps, Cliff
Jan 14, 2024 14:22:43 #
Jack 13088 wrote:
Well ACR (and I assume all raw editors) rebuild th... (show quote)
I am not a software engineer but I doubt that Lightroom automatically uses the optimal sequence in producing an image from raw data even though it uses ACR.
Lightroom presents you with a list of the edit history. You can do a little bit of one edit, then do a bunch more, then adjust the first edit again. As many times as you need to. I can't see it trying to take your sequence and re-sequence it into an optimal sequence. I'm not sure all the edits are commutative.
ACR might well go through a standard sequence but that means that Lightroom would apply ACR to each edit command separately. So Lightroom would apply ACR multiple times. I have no way to evaluate whether that's what it does.
Jan 14, 2024 14:25:24 #

Our subscriber friends should all recognize bringing the images into Lightroom belongs near the top of the sequence of steps. Those with the Topaz AI tools should recognize they need to output their RAW processing to DNG and bring the processed image into LR with the Topaz edits in the DNG 'wrapper'.
Whether you start with Lightroom or Topaz really depends on the specifics of the image, rather than a default 'always' workflow. Only in rare situations do my images need noise processing for the entire set of culled results.
Whether you start with Lightroom or Topaz really depends on the specifics of the image, rather than a default 'always' workflow. Only in rare situations do my images need noise processing for the entire set of culled results.
Jan 14, 2024 14:29:27 #
CliffMcKenzie wrote:
Ready for a surprise? LRC Develop Module actually is setup based on Adobe recommended workflow...
Are you saying that we should be going top to bottom on the Develop Module panel?

Jan 14, 2024 15:11:25 #
CliffMcKenzie
Loc: Lake Athens Texas
DirtFarmer wrote:
Are you saying that we should be going top to bottom on the Develop Module panel?
First, your example shows a jpeg and not a raw example. You just hired the Morman Tabernacle Choir to hum.
Second, both Library and Develop Modules were created to suggest running down left panel, across the top and then down the right side. It is a suggestion from Adobe, a good starting point. In the Develop Module, you need to watch the left panel with a focus of Navigator and History but the workflow is on the right side. After Basic, I would recommend just above a left to right starting with Edit and ending with Mask.
Is this what I do? No, in my example odds are I am going to Crop (R) first. As stated prior, type of images and even mix of types of images will dictate a custom response.
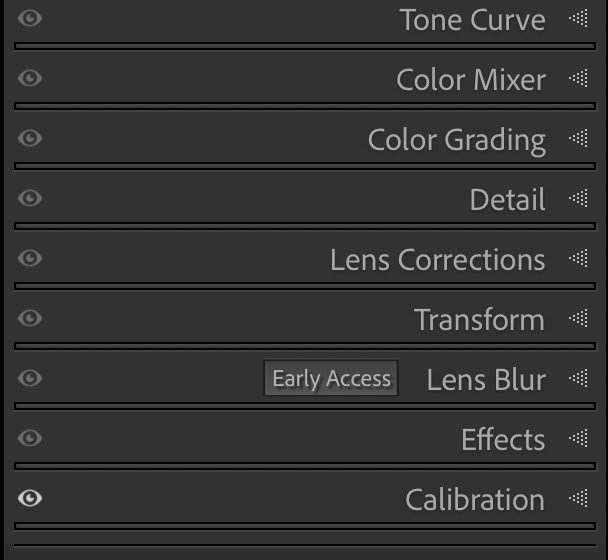
What about Tone Curve to Calibration boxes below? Use them but only if a specific need dictate. Keep your boxes in Solo mode.
Hope this helps, Cliff
Jan 14, 2024 15:29:18 #

This is always a funny discussion. Everybody does it differently. Take a little of this answer and add a little of that answer. Maybe a dash of this one, then flip the whole sequence and that's how I do it sometimes, depending on the subject and who is going to win the Packers game.
I always start with exposure in a general way and sync the next bunch of shots if they are sort of the same. This will change as I fine tune them. Cropping comes fairly soon and dehaze before black levels most of the time. When the file generally looks good I might do some masking and custom dodging and burning. Denoise, sharpening and lens corrections are always way at the bottom and I might even print a few small versions around this time before I commit to a big or final print.
So, you see, a little of this and a little of that. And tomorrow I might change it all up. There isn't a right or a wrong way, just my way and your way.
Jan 14, 2024 16:01:00 #
CliffMcKenzie wrote:
First, your example shows a jpeg and not a raw example. You just hired the Morman Tabernacle Choir to hum.
Well, I did choose a random image, but it was actually a psd that had originally started as a nef, not a jpg. I should have chosen a different image. Mea Culpa.
CliffMcKenzie wrote:
Second, both Library and Develop Modules were created to suggest running down left panel, across the top and then down the right side. It is a suggestion from Adobe, a good starting point. In the Develop Module, you need to watch the left panel with a focus of Navigator and History but the workflow is on the right side. After Basic, I would recommend just above a left to right starting with Edit and ending with Mask.
I usually ignore the left panel while editing unless I want to modify the edits. I concentrate on the image and the effect thereon from the sliders I'm working at the moment. I suppose I work this way because, being male, I have never read the Adobe instructions that tell me what to do. I just do what I think works.
Jan 14, 2024 16:03:19 #
CamB wrote:
... There isn't a right or a wrong way, just my way and your way.

Jan 14, 2024 17:06:47 #
Jan 14, 2024 19:34:57 #

DirtFarmer wrote:
I usually ignore the left panel while editing unless I want to modify the edits. I concentrate on the image and the effect thereon from the sliders I'm working at the moment. I suppose I work this way because, being male, I have never read the Adobe instructions that tell me what to do. I just do what I think works.
Yep, the right panel sliders seem to be the basic place to be...
Jan 14, 2024 19:37:37 #
CamB wrote:
This is always a funny discussion. Everybody does ... (show quote)
Yep, getting into a n assembly line process takes a lot of the creative fun out of it... Every click seems to want you to start in maybe a different area... One thing I AM consistent in is White Balance...
Jan 14, 2024 20:28:15 #

Jan 14, 2024 23:06:13 #
DirtFarmer wrote:
I am not a software engineer but I doubt that Ligh... (show quote)
I am not a software engineer either. In the development process in worked in I was a System Engineer I wrote the specifications the software engineers design, code and test to. A big difference to our customers anyway.
Neither do I have inside information on the workings of any raw editors other than the considerable information revealed in The Lightroom Queen’s FAQ book and poking around with the user files LrC creates particularly the sidecar files.
Let’s establish a common understanding about what is happening. Since the individual sensor elements are color blind there is a mosaic of red, green and blue filters immediately in front of the sensor array such that the raw data must be de-mosaic processed to recover the color data. This process is not reversible so you cannot save your edits in the same file type. Rather than save the full resultant file after each edit Adobe saves the setting you used. With Lightroom it saves the edit settings in the catalog database. With Ps or Bridge it saves the settings in a sidecar file. It also records the actions in the in the History display.
Since as you noted actions are not commutative ACR automatically applies them in the appropriate (optimal) order. So it starts all over applying the edits in the proper order before showing you the preview. The original raw image is cached in memory to make the editing seem seamless. To answer the OP’s original question order does not matter. Use whatever seems comfortable to you. I repeat my suggestion of leaving the longer operations to last to save time in every do over.
If you want to reply, then register here. Registration is free and your account is created instantly, so you can post right away.