Focused Stacked Image of a Weevil - New Positioner Stage
Jan 13, 2024 22:31:03 #

This is a face-on focused stacked image of a flower-eating weevil using a 10X microscope objective mounted on a 200mm macro lens as the optic for the camera.
Staging the small specimens at high magnifications has always been quite challenging for the slightest touch to get them into the desired view often moves them completely out of the view of the camera. I measure my time in cups of coffee and the cup is often empty before the job is done.
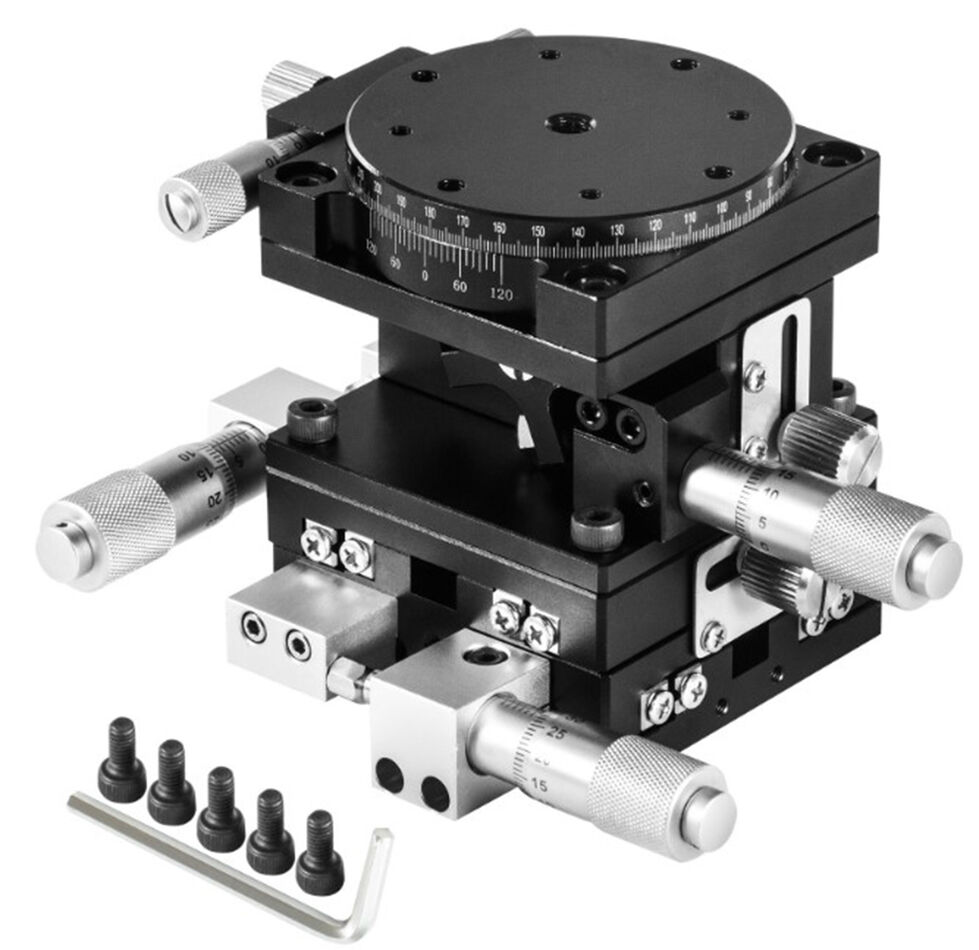
Although I enjoy my cups of coffee, I purchased a micrometer-controlled stage that has four micrometers that have fine movements of 0.01mm which allow me to move the specimen forward and back, left and right, up and down, and rotate it all without touching the specimen. The stage is commonly referred to as an XYZR positioning trimming stage. I used 3M automotive trim adhesion tape to attach it to the milling table that I use for rough specimen positioning.
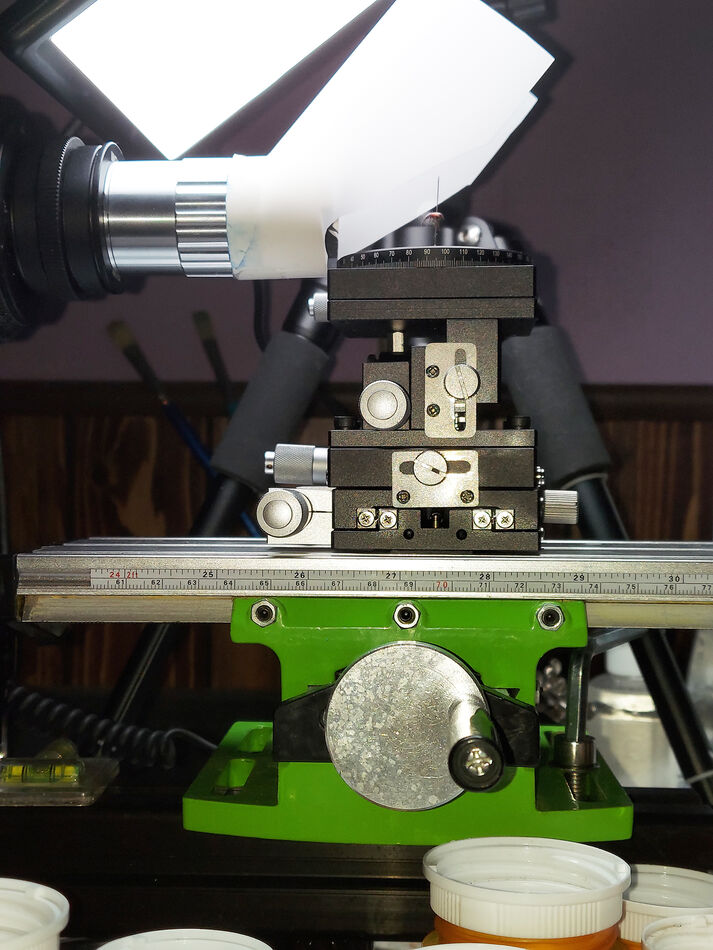
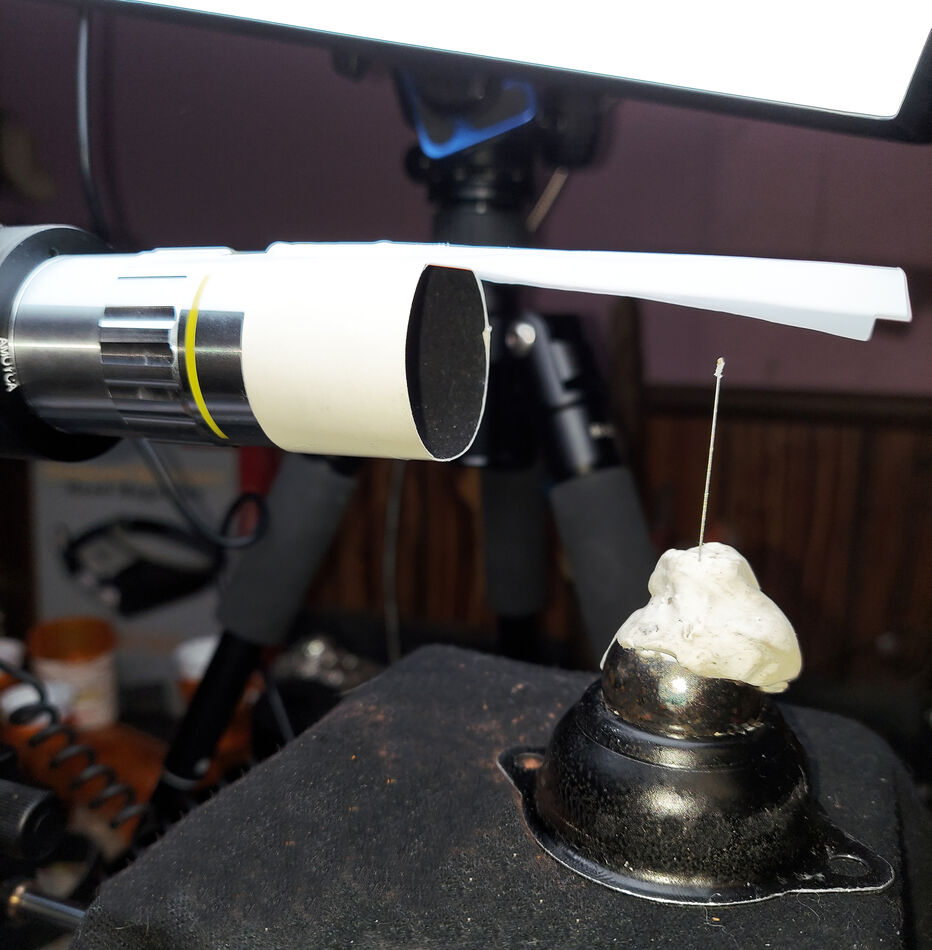
I've attached a view of how I use it and a copy of the product description page showing it in more detail. Also, if you look closely, you will see the weevil mounted on the #000 mounting pin on the stage. There is a hole in the center of the rotating stage which I put a bit of plastine modeling clay that I stick the mounted specimen into.
Staging the small specimens at high magnifications has always been quite challenging for the slightest touch to get them into the desired view often moves them completely out of the view of the camera. I measure my time in cups of coffee and the cup is often empty before the job is done.
Although I enjoy my cups of coffee, I purchased a micrometer-controlled stage that has four micrometers that have fine movements of 0.01mm which allow me to move the specimen forward and back, left and right, up and down, and rotate it all without touching the specimen. The stage is commonly referred to as an XYZR positioning trimming stage. I used 3M automotive trim adhesion tape to attach it to the milling table that I use for rough specimen positioning.
I've attached a view of how I use it and a copy of the product description page showing it in more detail. Also, if you look closely, you will see the weevil mounted on the #000 mounting pin on the stage. There is a hole in the center of the rotating stage which I put a bit of plastine modeling clay that I stick the mounted specimen into.

Jan 13, 2024 23:22:12 #

Jan 14, 2024 00:34:29 #


Jan 14, 2024 05:24:16 #

sippyjug104 wrote:
This is a face-on focused stacked image of a flowe... (show quote)
Fantastic image!!!
Great piece of equip. and that clay sure works great, thanks for the tip awhile back.
Jan 14, 2024 07:43:27 #

Jan 14, 2024 08:51:17 #
MosheR
Loc: New York City
sippyjug104 wrote:
This is a face-on focused stacked image of a flowe... (show quote)
You don't go out and buy stuff just for the sake of owning more stuff, Gary, as so many on this forum who complain they don't really have the means to do so do. You see a challenge, determine what kind of equipment will help you overcome said challenge, mull it over, then purchase and, above all, UTILIZE it to its fullest.
The result, in this case, is simply one more truly amazing and eye popping photo. Keep 'em coming.
Jan 14, 2024 09:50:09 #

Jan 14, 2024 10:26:03 #
MosheR wrote:
You don't go out and buy stuff just for the sake of owning more stuff, Gary, as so many on this forum who complain they don't really have the means to do so do. You see a challenge, determine what kind of equipment will help you overcome said challenge, mull it over, then purchase and, above all, UTILIZE it to its fullest.
The result, in this case, is simply one more truly amazing and eye popping photo. Keep 'em coming.
The result, in this case, is simply one more truly amazing and eye popping photo. Keep 'em coming.
Mel, thanks ever so much for the kind words. I'm a DIY fellow whenever possible. I find that I learn more about what works and what does not, which is more important at times. I've been using (and will still use for lower magnifications) a $2.50 steel roller caster that I popped the bearing out of and set on top of the housing. I put a dab of Plasticine modeling clay on it to stick the pin-mounted specimen on and it provides orbiting with pitch and yaw. It's not fastened down so I manually place it "about" where it needs to go.
I set this orbiting stage on a $14 laboratory scissor jack to raise and lower it which is set on top of a $36 milling table which moves it all forward and back and left and right. All in all, a DIY solution for nearly every session for the past five years.
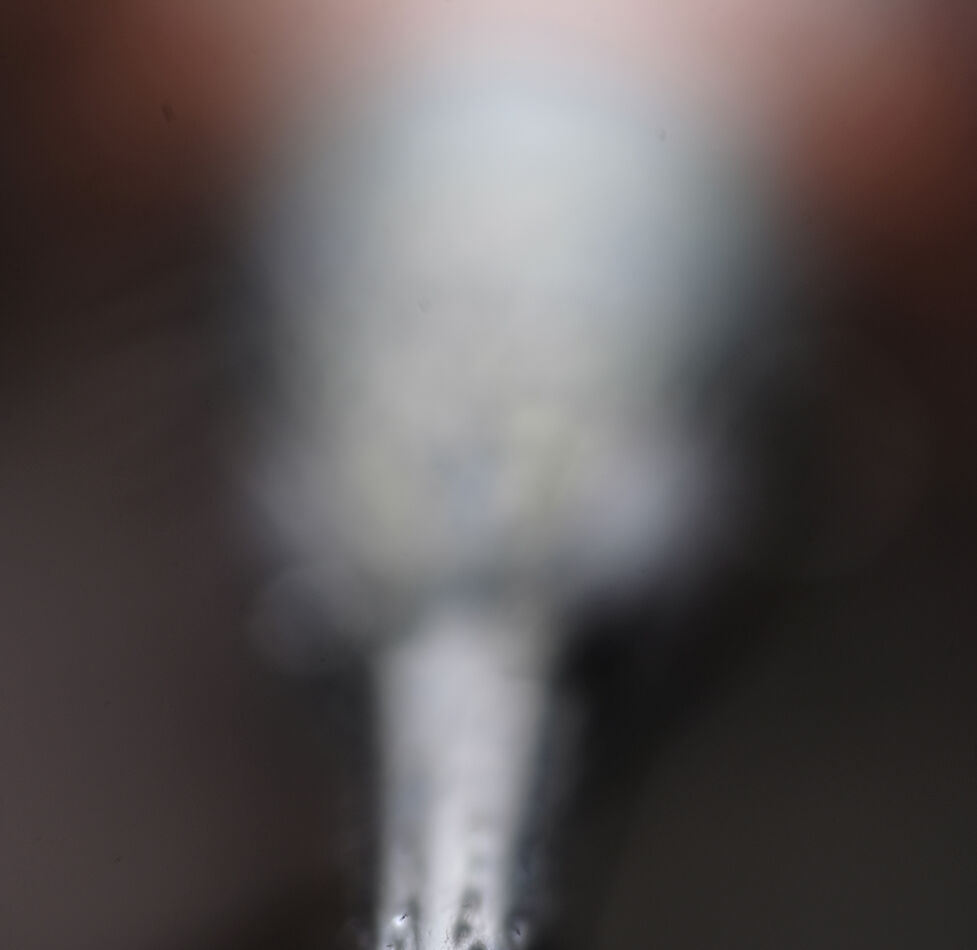
Using a 10X microscope objective posed new challenges for the field of view akin to looking at something closeup through a pinhole not being able to see the entire subject only to be made more difficult with a depth of field of 3.5 microns where everything is a blur except for a small area of focus. Attached is the first of the 415 images taken in the stack to show what I see on the viewfinder screen of the camera.
Jan 14, 2024 11:43:53 #
Jan 14, 2024 11:45:59 #

Jan 14, 2024 13:19:33 #
MosheR
Loc: New York City
sippyjug104 wrote:
Mel, thanks ever so much for the kind words. I'm a... (show quote)
Amazing, Gary. And you have to do that one bit at a time for 415 steps till you get to the far end of the field. Lots of admiration, my friend.
Jan 14, 2024 13:35:46 #
Beautiful as usual Sippy. Do you use the XYZR table to move the specimen for the 100 + shots that make up the final image or do you use the motorized table?
Jan 14, 2024 16:51:48 #
UTMike wrote:
You use your tools very well, Gary!
Thanks, UTMike. It may help save what bit of sanity I may have left.

Jan 14, 2024 16:52:14 #
Jan 14, 2024 16:56:18 #
Manglesphoto wrote:
Fantastic image!!!
Great piece of equip. and that clay sure works great, thanks for the tip awhile back.
Great piece of equip. and that clay sure works great, thanks for the tip awhile back.
Manglesphoto. I've been looking at them for quite some time. These came up for sale on VEVOR (tough tools half price) for $158.00 which is quite a bit less than others that I have searched for. I've bought from them before so I knew they were a reliable source.
If you want to reply, then register here. Registration is free and your account is created instantly, so you can post right away.