Adobe Generative Fill - Change photo into what my mind wanted to remember it as
Jul 12, 2023 02:41:32 #

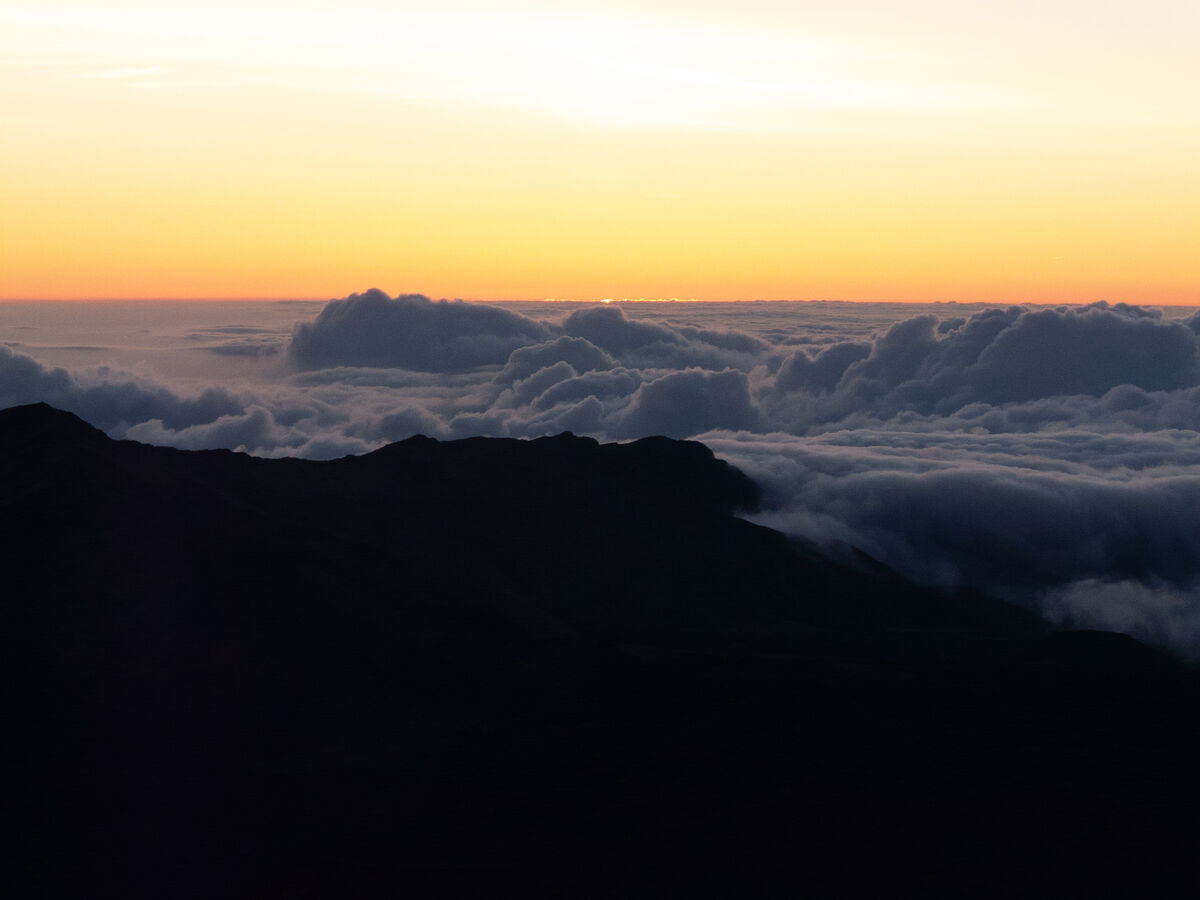
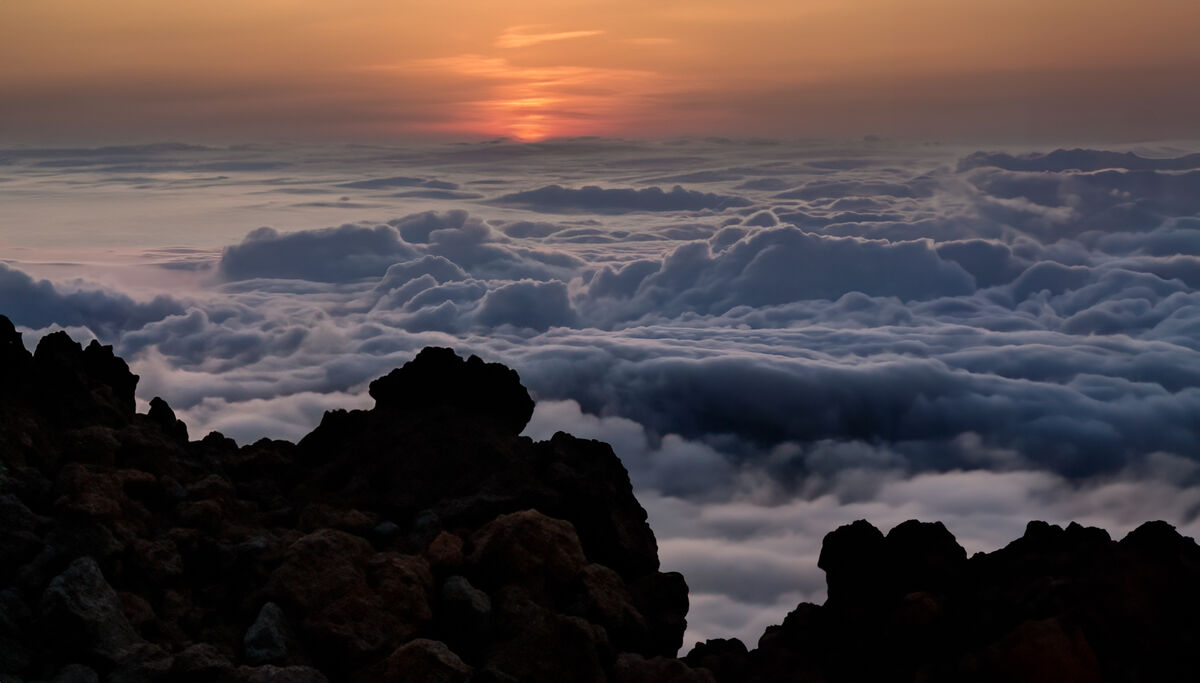
Many of you have likely seen examples or tried it yourself. In this picture of an early morning sunrise on Maui's Haleakala peak, it is high enough to see the sun rise over the tops of the clouds. For this image, the rocks up close are so dark, there is nothing to see in them, and the sunrise is with a clear sky showing a bit of a rising sun, but is not very spectacular.
Generative Fill to the rescue. Of course, those that insist upon a picture has to be the real thing will cry foul. But if you just want to make something that appeals to you (call it art), this is legal too.
Here is the original. Not exactly ready to hang on the wall. Rocks too dark and sky too bright with not any color.
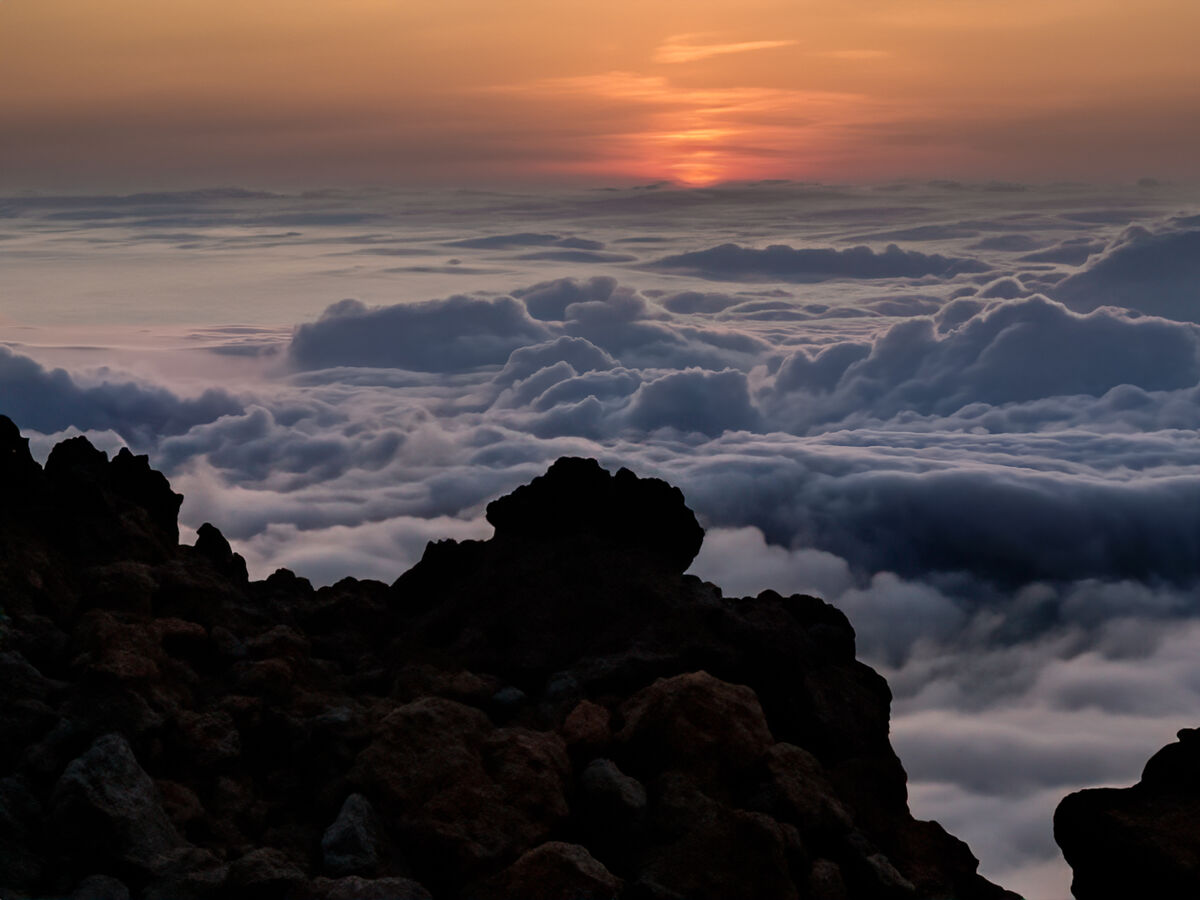
For the 2nd image:
Step 1 with Generative Fill in Photoshop was to draw a selection completely around the rocks going out into the clouds a little bit. The key words I used for Generative Fill were "volcanic rocks" and let it replace the dark rocks with what it though I wanted.
Step 2 with Generative Fill in Photoshop was to draw a selection including the sky and slightly into the clouds. And the keywords I used were "subdued early morning sunrise" and let it give me a different sky and a much subdued sun.
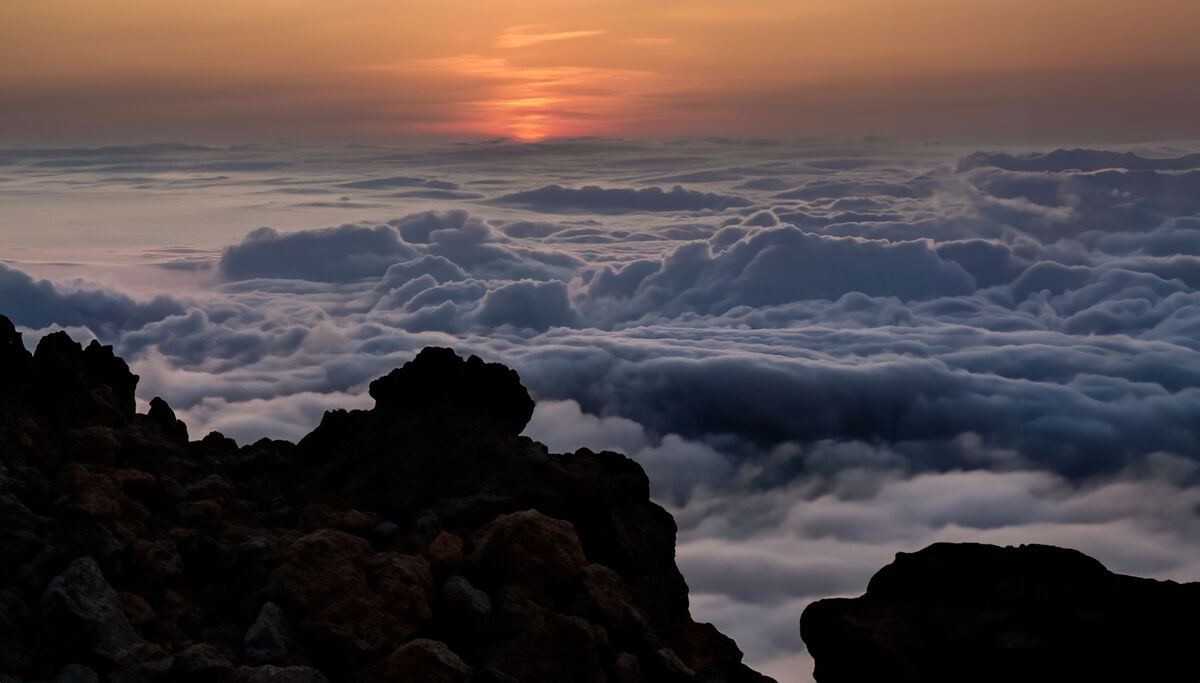
For the 3rd image:
Step 3 with Generative Fill in Photoshop, decided that I wanted a wider angle view. Using Photoshop's Crop Tool, extended the right side a bit and drew a selection around the new area to the right and into the left side of the image just a bit and let it run another time with no keywords. And then repeated a second time to make it even wider.
Generative Fill to the rescue. Of course, those that insist upon a picture has to be the real thing will cry foul. But if you just want to make something that appeals to you (call it art), this is legal too.
Here is the original. Not exactly ready to hang on the wall. Rocks too dark and sky too bright with not any color.
For the 2nd image:
Step 1 with Generative Fill in Photoshop was to draw a selection completely around the rocks going out into the clouds a little bit. The key words I used for Generative Fill were "volcanic rocks" and let it replace the dark rocks with what it though I wanted.
Step 2 with Generative Fill in Photoshop was to draw a selection including the sky and slightly into the clouds. And the keywords I used were "subdued early morning sunrise" and let it give me a different sky and a much subdued sun.
For the 3rd image:
Step 3 with Generative Fill in Photoshop, decided that I wanted a wider angle view. Using Photoshop's Crop Tool, extended the right side a bit and drew a selection around the new area to the right and into the left side of the image just a bit and let it run another time with no keywords. And then repeated a second time to make it even wider.
Jul 12, 2023 05:56:55 #

JimH123 wrote:
Many of you have likely seen examples or tried it ... (show quote)
========================

The Future is Here ~~~
........ As The Old Advertising goes... "Is it Live? or is "it Memorex?"
Cheers
GoldStar46
George Veazey
###
Jul 12, 2023 05:57:25 #
Beautiful final result! I remember seeing it in person long ago. Well worth the early rise and effort to get there at that moment.
Jul 12, 2023 06:40:30 #

Jul 12, 2023 07:27:22 #

Nice results. But I think most of that could have been achieved in PP, except for the added rocks in the foreground.
Jul 12, 2023 08:27:17 #
Interesting results. I've seen some of the discussions about this feature, but since I don't have PS, I have not tried it.
Jul 12, 2023 10:16:31 #

Good morning. Notice the fringe (aka halo) along the edge of the foreground mass. A simple PS technique may remove it for a natural-looking transition.
JimH123 wrote:
Many of you have likely seen examples or tried it ... (show quote)
Jul 12, 2023 12:29:59 #
rwm283main
Loc: Terryville, CT
This came out really well and thanks for the info on how you did it.
Nice job.
Thanks for sharing.
Rich
Nice job.
Thanks for sharing.
Rich
Jul 12, 2023 14:01:32 #
anotherview wrote:
Good morning. Notice the fringe (aka halo) along the edge of the foreground mass. A simple PS technique may remove it for a natural-looking transition.
I do remember seeing a technique in Photoshop for removing the halo, but I think I forgot what it involved.
Thanks
Jul 12, 2023 16:05:31 #

Jul 12, 2023 16:06:24 #
Stunningly spectacular shooting and results - I love how the waves look like clouds 💎👑💎👑💎
Jul 12, 2023 17:32:42 #


Jul 12, 2023 17:38:06 #
joecichjr wrote:
Stunningly spectacular shooting and results - I love how the waves look like clouds 💎👑💎👑💎
Those are clouds! This is a tall mountain on Maui in which the clouds tend to be lower than the top of the mountain and are usually present in the early morning before the sun warms things up. It is a long, winding drive to get to the top and one must leave hours before sunrise to get to the top before the sunrise.
It is really cold at this elevation, and one does not normally bring suitable clothing to stay warm when its still dark. But wow, are those stars bright! But no big telescopes on this mountain. Those are on the big island of Hawaii.
On the big island, the road is only paved to the visitor's center, and it is a dirt road the rest of the way to the top. Rental Car rules say they do not allow their cars to go to the top. And that's as far as I have gone. The astronomers that use those big telescopes do not personally go to the top either, and can do all their work over the internet. Technicians do all the aiming and setup of the scopes.
Jul 12, 2023 22:58:01 #
This one may serve your purpose: https://www.youtube.com/watch?v=8S7vQOvYoIU
It's not the one I used before, but I can't recall exactly how it worked.
It's not the one I used before, but I can't recall exactly how it worked.
JimH123 wrote:
I do remember seeing a technique in Photoshop for removing the halo, but I think I forgot what it involved.
Thanks
Thanks
Jul 13, 2023 00:31:09 #
anotherview wrote:
This one may serve your purpose: https://www.youtube.com/watch?v=8S7vQOvYoIU
It's not the one I used before, but I can't recall exactly how it worked.
It's not the one I used before, but I can't recall exactly how it worked.
Turns out it was not halos. When Generative Fill was working on Rocks or on Clouds, it used some random areas of lighter and darker clouds and sometimes a lighter area looked like a halo. The solution was to use the lasso tool and draw a circle area around the place that looked like a halo and to run Generative Fill again and it would slightly modify the clouds within that area making sure that all the edges matched up with other clouds so it all looked natural.
I did go though the video and had to do a segment at a time and to repeat it over and over until I got it. But the end result was that it had very little effect on this image. That's when I decided to let Generative Fill do its thing.
Thanks for looking that up. It's not exactly Photoshop 101, but I was able to understand it - eventually.
Here is another result where I looked for halo looking places. What you will notice are that some clouds now have changed a bit and even some rocks changed too.
If you want to reply, then register here. Registration is free and your account is created instantly, so you can post right away.