Creating an IR Image using Lightroom and Rob Shea's IR Profiles
Feb 20, 2023 20:38:43 #

I am going to walk through some steps to work on an IR image using Lightroom and Rob Shea's IR Profiles. Setting up Rob Shea's IR Profiles is more involved than I can explain in this thread. But Rob gives very detailed instructions on his website.
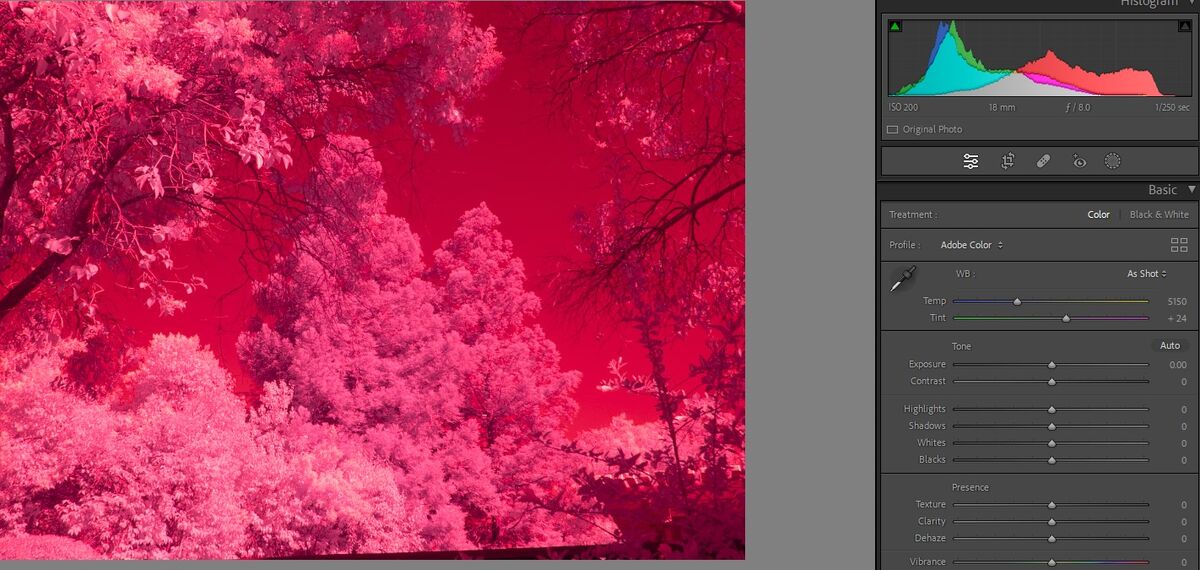
Image 1 is the original RAW file showing everything in Red
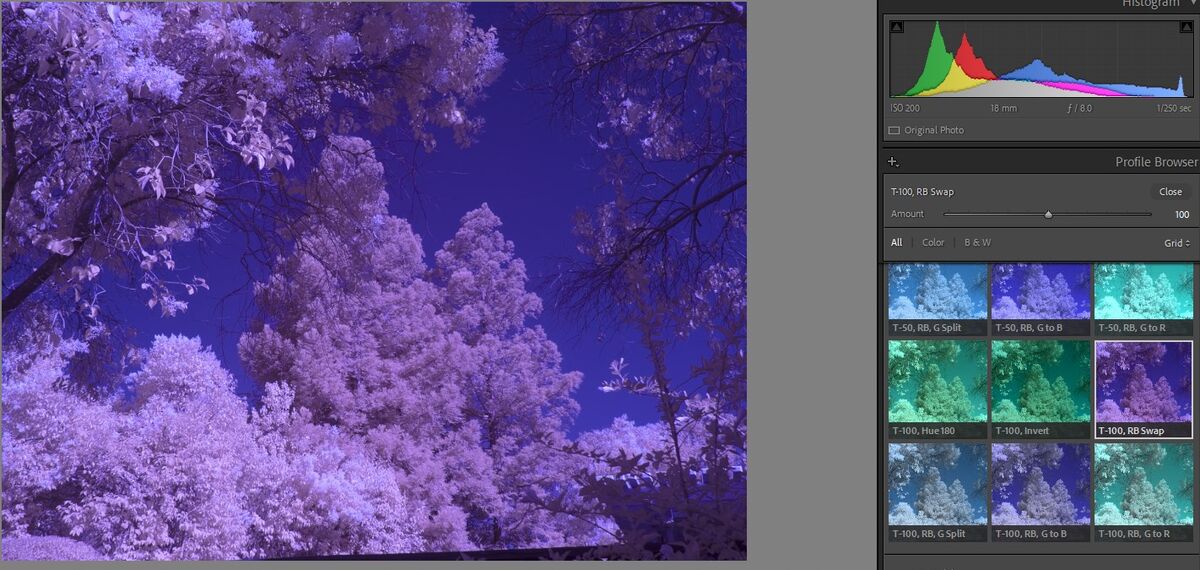
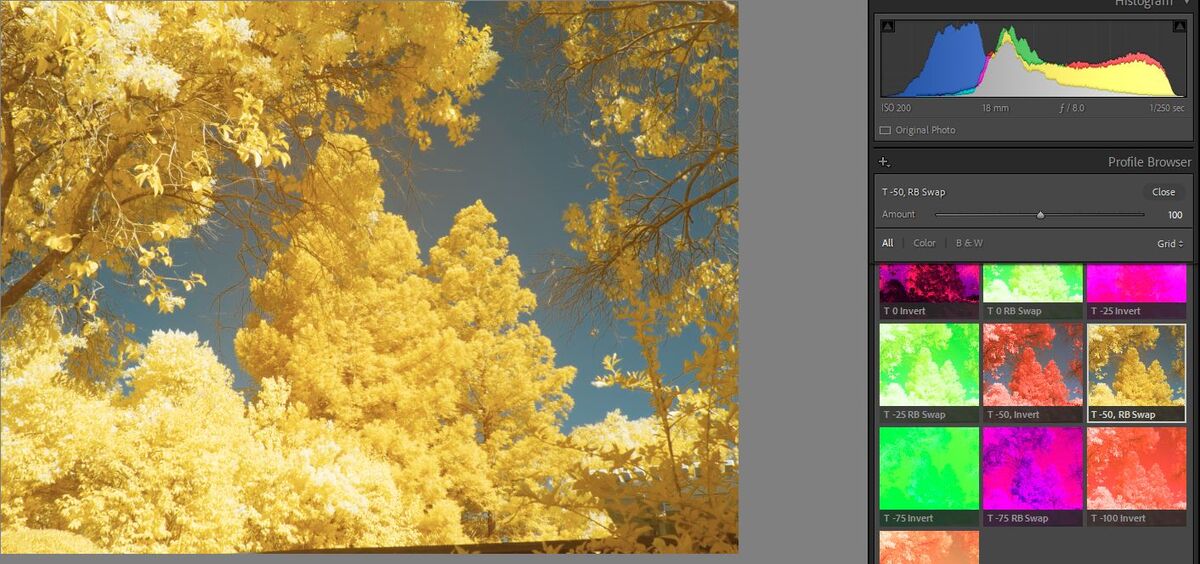
Image 2 shows selecting the T-100, RB Swap. I compress the names of the profiles so that when I look at the Thumbnail on the side, the name isn't cut off because of being too long. T-100 is the Temperature Offset of -100K which is needed since the temp slider in Lightroom has insufficient range. Rob explains this on his web site. And I am doing a Red-Blue Swap. You can also see other choices. You get to this screen by pressing the Profile pull down button and go down far enough to see Rob Shea's IR profiles and pick the one you want.
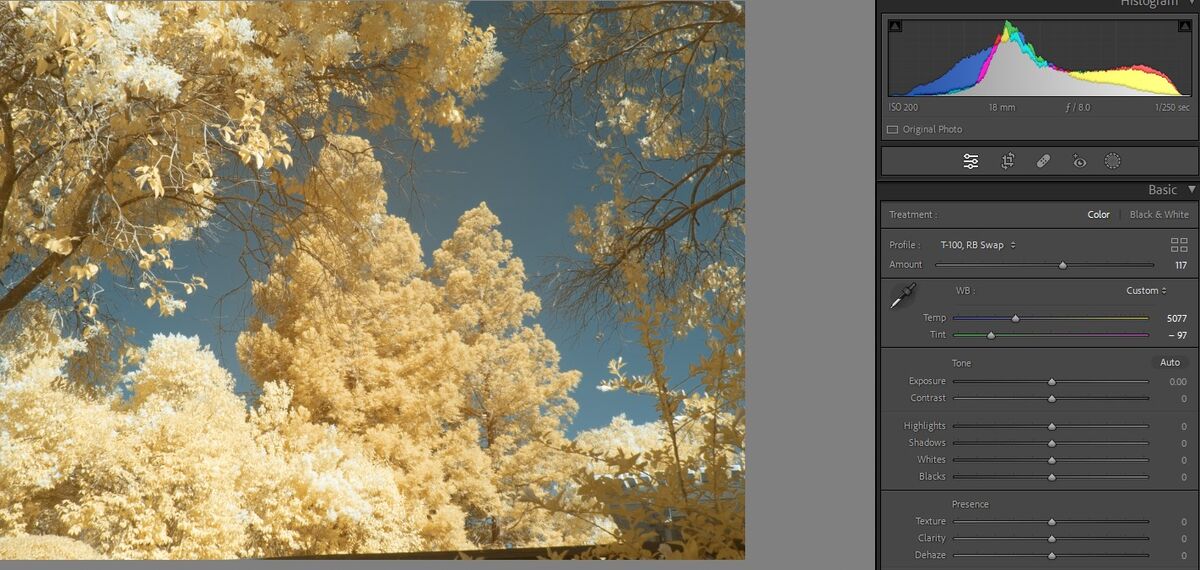
Image 3 shows adjustment of the Temp and Tint sliders to get to the color you want.
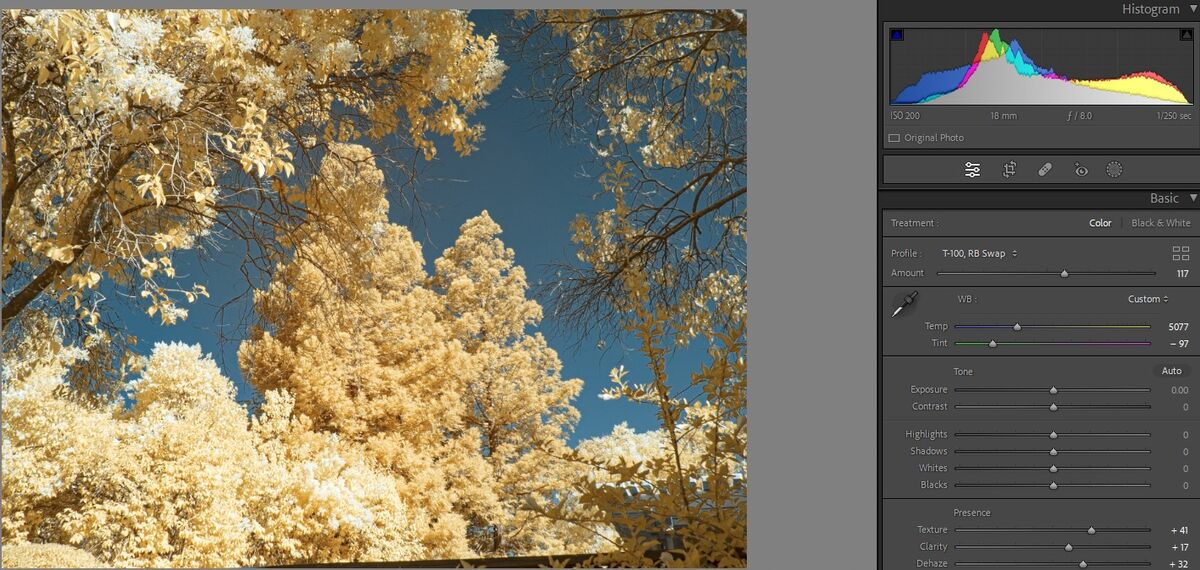
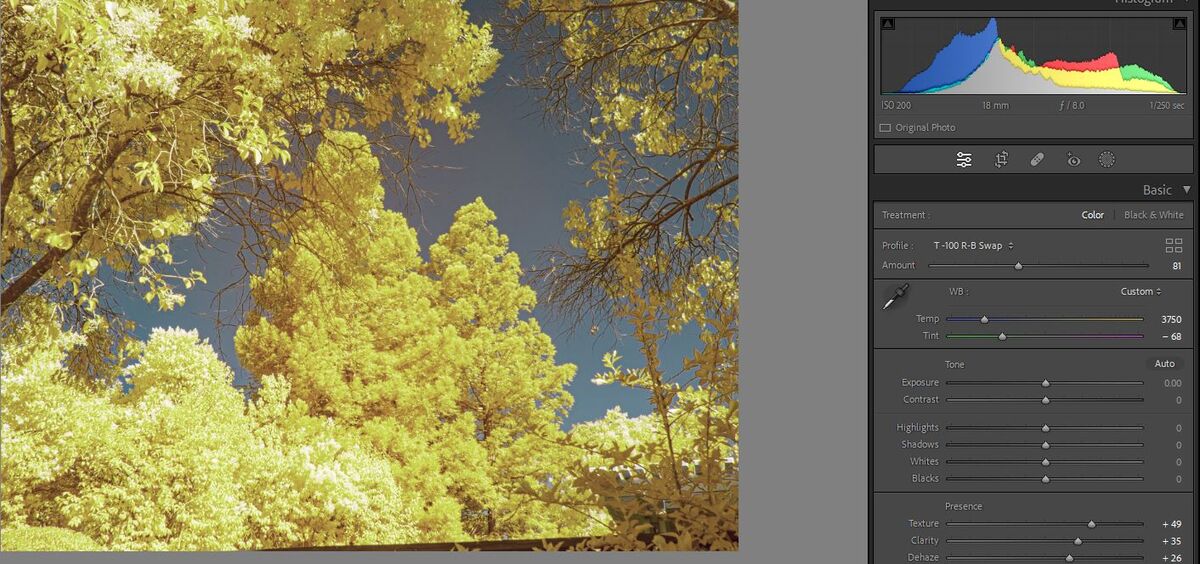
Image 4 shows some adjustments of Clarity, Texture and Dehaze. These adjustments have affect on the purity of the color.
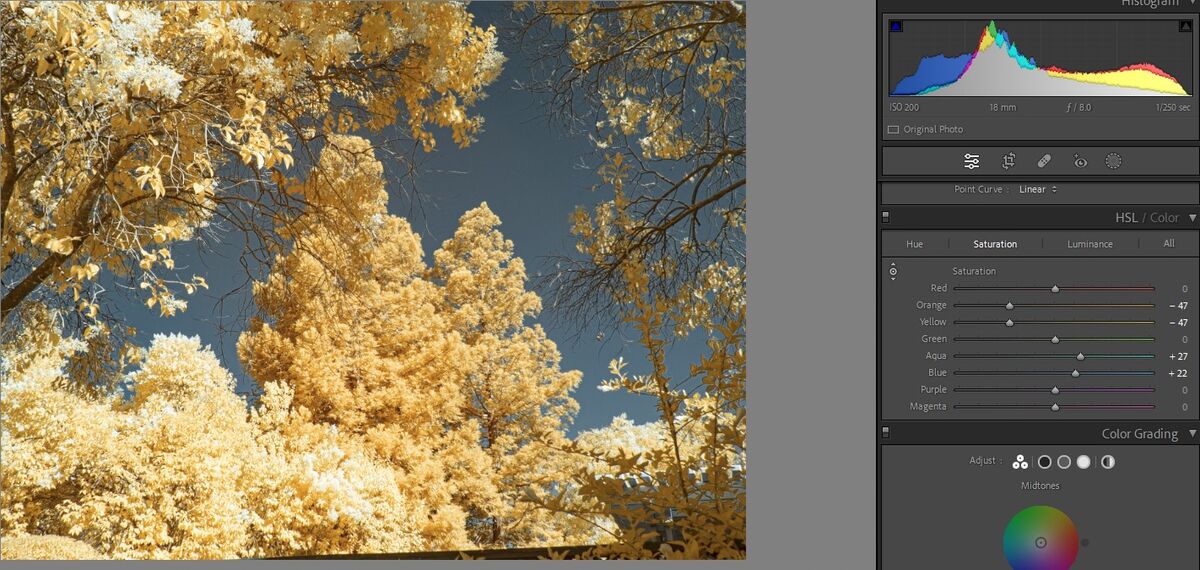
Image 5 is really useful for IR images. Sometimes the colors are too strong, or too weak. Note that symbol in the upper left of this block that once you hit it, you get up/down arrows above and below. If I wanted to work on the yellow, I would select Hue, Saturation or Luminance and as I move the mouse pointer over something in yellow, I can roll the wheel up or down to change the effect. Note that since I have done a channel swap on blue, I would move the blue slider. But using the mouse wheel will change the colored sliders that are affected.
Image 6 shows the effect of doing a White Balance. I tried on the yellow leaves and got one color. Then I tried on tree back and got another color. Then I tried on the sky with the result you see here.
The order of doing these steps can be changed, but I want to go over the tools to be used. Other Lightroom tools that I didn't mention are the Amount Slider use the Profile. And of course, the Highlights, Shadows, Whites and Blacks or the Tone Curve are useful. And also Exposure and Contrast if needed.
And I should also add that this works so much better if RAW files are used.
Once you have done this a few times, the process becomes easy.
********************************************************
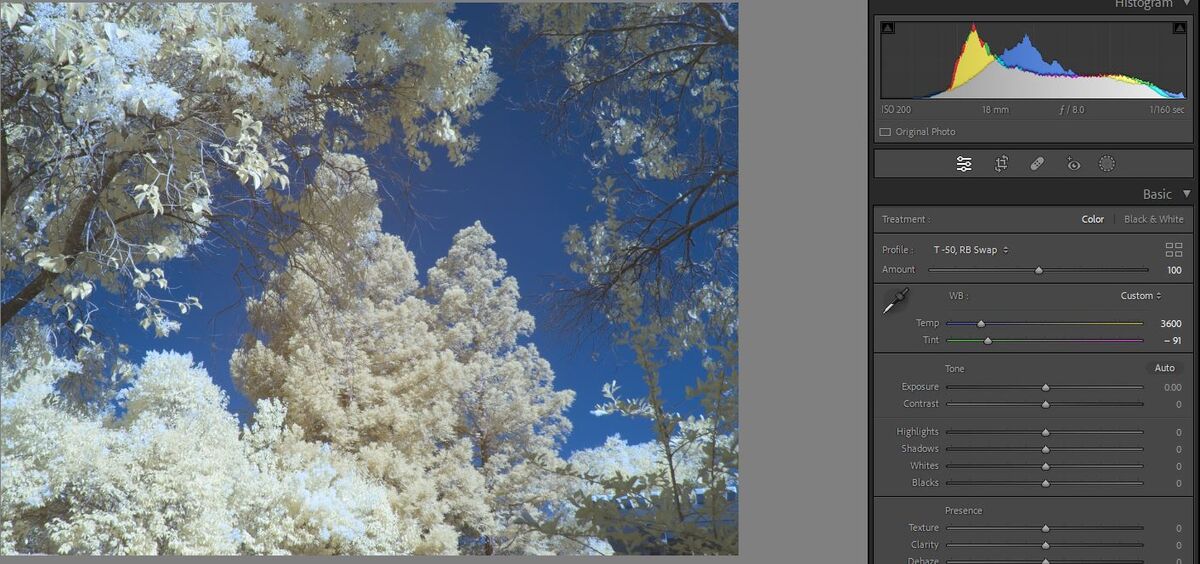
Adding an image 7. This time, I did the White Balance on the sky using the original red image and then chose T-50, RB Swap. And the result is done in 3 steps without other adjustments. And of course, I can still do any of the other adjustments and even another White Balance. No right or wrong way. Just work on getting results you like.
Image 1 is the original RAW file showing everything in Red
Image 2 shows selecting the T-100, RB Swap. I compress the names of the profiles so that when I look at the Thumbnail on the side, the name isn't cut off because of being too long. T-100 is the Temperature Offset of -100K which is needed since the temp slider in Lightroom has insufficient range. Rob explains this on his web site. And I am doing a Red-Blue Swap. You can also see other choices. You get to this screen by pressing the Profile pull down button and go down far enough to see Rob Shea's IR profiles and pick the one you want.
Image 3 shows adjustment of the Temp and Tint sliders to get to the color you want.
Image 4 shows some adjustments of Clarity, Texture and Dehaze. These adjustments have affect on the purity of the color.
Image 5 is really useful for IR images. Sometimes the colors are too strong, or too weak. Note that symbol in the upper left of this block that once you hit it, you get up/down arrows above and below. If I wanted to work on the yellow, I would select Hue, Saturation or Luminance and as I move the mouse pointer over something in yellow, I can roll the wheel up or down to change the effect. Note that since I have done a channel swap on blue, I would move the blue slider. But using the mouse wheel will change the colored sliders that are affected.
Image 6 shows the effect of doing a White Balance. I tried on the yellow leaves and got one color. Then I tried on tree back and got another color. Then I tried on the sky with the result you see here.
The order of doing these steps can be changed, but I want to go over the tools to be used. Other Lightroom tools that I didn't mention are the Amount Slider use the Profile. And of course, the Highlights, Shadows, Whites and Blacks or the Tone Curve are useful. And also Exposure and Contrast if needed.
And I should also add that this works so much better if RAW files are used.
Once you have done this a few times, the process becomes easy.
********************************************************
Adding an image 7. This time, I did the White Balance on the sky using the original red image and then chose T-50, RB Swap. And the result is done in 3 steps without other adjustments. And of course, I can still do any of the other adjustments and even another White Balance. No right or wrong way. Just work on getting results you like.
Original taken with a Red 25A filter. Very similar to a 590nm filter.
(Download)
T-100, RB Swap
(Download)
After dragging the Temp and Tint sliders towards the left
(Download)
Adjustments to Clarity, Texture and Dehaze to taste
(Download)
Adjustments to Hue, Saturation and Luminance
(Download)
White Balance on the sky
(Download)
Alternate flow, starting with original, WB on sky and then T-50, RB Swap Profile
(Download)
Alternate flow, starting with original, WB on branch and then T-50, RB Swap Profile
(Download)
Feb 21, 2023 07:10:30 #

Feb 21, 2023 15:02:14 #
Feb 21, 2023 17:27:56 #
topcat wrote:
I like Rob Shea's actions. They work great
Just making it clear to everyone. Rob Shea releases LUT files for Lightroom and ACR. In addition, he releases action files for Photoshop. They do the same things. You can work completely in Lightroom, or if you prefer, Photoshop.
I have both loaded and I mostly prefer to do my IR in Lightroom.
If you want to reply, then register here. Registration is free and your account is created instantly, so you can post right away.