Check out Digital Artistry section of our forum.
Workflow
Nov 5, 2022 23:12:12 #

I select by flagging. So the "culled' are simply not selected. I further select with the rating system in Lightroom. One of the things that makes it easy to do developing in Lightroom is the previous button. If you use all of the same lighting and the same background, etc., once you get the first one right, then on the next one that you want to develop, you can simply hit the previous button and it will apply all of the same settings to that image. That's how I can go through a lot of images very quickly, by applying the same settings. Then once you've gone through all of them, go back to library snd you can select just the flagged images. You can also select just the rated images. And then I export all of the ones that I want to use, say my flagged and rated images all at the same time because I can set them to export with all the correct parameters and go have a cup of coffee while it's doing that. Hope this helps.
One thing that helps is to use a preset setting when you upload the images into lightroom. If you shoot raw for example, then you know that you're going to have to add contrast and maybe some clarity and some sharpening. So you might put that as your preset. And then many of your images, if you had good lighting, will not need any further development. That can save you a lot of time.
One thing that helps is to use a preset setting when you upload the images into lightroom. If you shoot raw for example, then you know that you're going to have to add contrast and maybe some clarity and some sharpening. So you might put that as your preset. And then many of your images, if you had good lighting, will not need any further development. That can save you a lot of time.
Nov 6, 2022 01:11:06 #
CHG_CANON wrote:
LR is not a good choice for culling a large amount of images. Why? To make an informed decision, you need the 1:1 pixel-level details. This comes from 1:1 previews. Without those previews, it takes a second to a few to render the 1:1 preview. This is very time inefficient. A tool that immediately renders the pixel-level details is better for culling. I don't know if ViewNX is good for Nikon. I use FastRawViewer for culling that supports all camera models / brands.
I had suspected there may have been something to do with speed so have just undertaken a test. Loaded just over 400 Z6 raws into LR, which took just seconds for all the previews to show in the bottom strip. Scrolling through these was smooth and fast. With an image open in the viewing area a cursor click on the subjects face to 100 or 300% was almost instantaneous. Moving the viewing box around there was a very slight lag that would not concern me so I'm happy with that. Comparing to ViewNx, LR loads quicker and responds to 100% about the same.
I've not changed or looked at any defaults w.r.t yet.
CHG_CANON wrote:
I import into LR only the culled results, after 1 or 2 (or more) culling passes in FRV. During the import, I allow LR to create only minimal previews, the fastest import option. I then apply several develop presets and run a batch job to build the 1:1 previews to implement those develop presets.
I've not looked into setting up any presets yet but need to. Whilst I have always used the Nikon STD profile as a starting point, since having the Z6 have found it poor so need to sort that out.
CHG_CANON wrote:
I continuously cull while editing, giving images a... (show quote)
My aim is to produce images, mainly race events, that others want. If we take 250 participants in a race that is spread over 4 hours, 500 finished ones could be only 2 shots of each person. For some strange reason I always seem to get far more than average of the best looking ones

Nov 6, 2022 01:19:15 #
AzPicLady wrote:
I select by flagging. So the "culled' are sim... (show quote)
I have not yet looked at the 'Previous' function just tested the 'Sync'. These methods are the same as I have used in ACR where images taken from the same viewpoint, time period often require almost identical tweaks as a starting point. My previous ACR workflow also used to revolve around breaks such as a cup of coffee or conversation with the dog.
AzPicLady wrote:
One thing that helps is to use a preset setting when you upload the images into lightroom. If you shoot raw for example, then you know that you're going to have to add contrast and maybe some clarity and some sharpening. So you might put that as your preset. And then many of your images, if you had good lighting, will not need any further development. That can save you a lot of time.
That's my next task.
Check out Travel Photography - Tips and More section of our forum.
Nov 6, 2022 05:39:54 #
Chessysailor wrote:
I am an amateur photographer but will often offer ... (show quote)
Perhaps rate them as what do I want to send and delete the rest as you see them as not worth sharing thus showing thus keeping.
Then down size them as you wish from raw to JPEG.
If someone states they want a print in the future then take the processed raw, convert to JPEG then send.
Saves lots of time and space so you do not even have to worry about the lesser photos ever again as they were no good and gone forever.
Nov 6, 2022 07:09:09 #
I cull in LR, have done this for a decade or more. I don’t find any speed problems.
I should also note that I’m using a Mac now. My 8 year old windows machines were starting to have slowdown problems but the MacBook M1 machine is faster than the windows machines were when they were new.
I use color labels and keyboard shortcuts to speed up the culling. I described my workflow back on page 1.
https://www.uglyhedgehog.com/t-756712-1.html#13536625
Nov 6, 2022 07:22:20 #

Grahame wrote:
I had suspected there may have been something to d... (show quote)
The difference might be the software version, the hardware, or maybe the exact technical steps?
When I talked about 1:1 pixel-level details, I mean literally the 100% zoom of the image in the view (library) and / or detail LR modules. Or maybe, "almost instantaneous" is fast enough one and an eternity of delay to another? The only way I get actual instantaneous in my LR6 version is to batch-build the 1:1 previews. When working a large group of images, I regularly drop and rebuild the 1:1 previews as I get through a large group of similar images, many times using the sync of the LR develop settings.
Regarding sync, if not doing already, select / deselect only the relevant settings. My presets apply sharping and noise reduction based on the camera model and ISO level of the image. So, I don't want to sync those settings across images, unless I've made a specific update. So, I usually only sync the WB and toning settings across similar images, or even more selectively sync the specific settings.
Nov 6, 2022 10:28:29 #
Personally, if your images are in RAW, work with them in RAW. There is a reason you are shooting in RAW and a good one, 12-14 bit vs 8 bit images. That’s at least 4,096 tonal per channel values vs 246. Once you complete your editing, you can batch convert and down rez then in LR in PS using export or image processor in PS, saving the new images to a new folder, keeping the original edited photos in lossless format for later use.
Check out Digital Artistry section of our forum.
Nov 6, 2022 11:11:13 #
CHG_CANON wrote:
<re: culling>...When I talked about 1:1 pixel-level details, I mean literally the 100% zoom of the image in the view (library) and / or detail LR modules....
My culling in LR is done at the image fit to screen, not at 100%. My attention is drawn to focus at that level, composition, and subject matter, not much in the way of technical details. There's time to address that during editing. If I have to look at an image at 100%, it's going to take me some time, so I don't do that in culling. Instead, I can do the 100% check during editing, when I'm really getting into the weeds. If I have not tossed an image and at edit time it shows that it needs to be tossed, it's just a matter of removing the red color label on the image. That way it is removed from the pool of images I want to edit.
If an image looks focused in the fit screen view but not at 100%, Topaz sharpen can sometimes redeem it.
Different strokes for different folks. I want to zip through the culling and do the detail work later. YMMV.
Nov 6, 2022 12:21:16 #
DirtFarmer wrote:
My culling in LR is done at the image fit to scree... (show quote)
I repeat about once every other week: if the image isn't in focus at the 1:1 pixel-level details, there's nothing to do with it except <delete>. That's why it takes just 1-second to make a firm and final decision. That's why an immediate zero-second rendering is what is needed to make that assessment. Once you kick the out of perfect focus, you're justified in making other and longer assessments. And with only in-focus images, I don't need more software nor more time / more workflow to perfect the image. Nor failures are redeemed. No souls are saved.
Nov 6, 2022 12:34:39 #
CHG_CANON wrote:
I repeat about once every other week: if the image... (show quote)
Focus isn't everything.
I am not a perfectionist. I consider the value of a photo to be the subject. Good composition is a plus. Good focus and exposure is a plus. But there exist photos that do not fit ALL the criteria but still have value.
When you have a group of people that are at different distances, it's common for one of the people away from the focus point to be soft. I have found that Topaz sharpen can make that person less soft. Probably not perfect, and sometimes even Topaz can't correct the problem. IF I recognize the problem at shutter time, I can actually try focus stacking with several shots. I have done that successfully (and unsuccessfully). If I eliminated the shots based purely on focus, I wouldn't have anything to stack.
Were I selling photos, I would be more concerned about focus. That is not the situation. Most of my current photos are family, and my 'clients' are not picky as long as they contain memories they consider important. They do not pixel peep. That concept is not in their minds. Also, I'm shooting events. They're transient. I have to get the shot NOW. I don't have time to set it up.
Maybe I'm just lucky to have such clients, but I don't think I'm the only one on UHH.
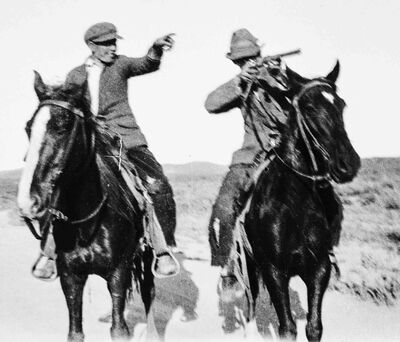
https://www.magnumphotos.com/newsroom/conflict/robert-capa-d-day-omaha-beach/
Nov 6, 2022 12:43:18 #
DirtFarmer wrote:
Focus isn't everything. br br I am not a perfecti... (show quote)
You select your exposure parameters so all the relevant aspects of the image are in focus, seeking to have them in place before you raise your camera to your eye.
You use your camera's continuous focus setting and shot in multiple short bursts to increase the likelihood of capturing multiple images in perfect focus, to pick the best of the best later.
You perfect these fundamentals of digital photography so they are second-nature "muscle-memory" while you give more thought to composition and framing and moving around to get an interesting perspective, being in the right place at the right time with the right settings.
You remember always you are no better than your worst image shared. If you can't succeed, destroy the evidence you tried (and failed).
I shoot events too, so you're not talking to some novice.
Check out True Macro-Photography Forum section of our forum.
Nov 6, 2022 12:51:24 #
I'm off to shoot a family event. Will let you know details later.
Nov 6, 2022 13:22:46 #
amfoto1
Loc: San Jose, Calif. USA
Chessysailor wrote:
I am an amateur photographer but will often offer ... (show quote)
I've shot hundreds of sporting events where I take anywhere from 1000 to 5000 images and sometimes more images with multiple cameras. My workflow:
1. Charge my batteries fully the days before the event (2 batteries in each camera, plus two spares for each).
2. Sync the clocks in my cameras the day before the event.
3. Shoot the event using multiple memory cards (I carry eighteen primary cards and have a dozen of more "spares", just in case).
4. I usually just shoot RAW files and download (copy) them all to a single folder. Originals remain on the memory cards for now (just in case). I use a simple drag and drop process with the computer operating system to download.
6. I then import the images into LR.
7. I have LR set up to automatically add some copyright info and apply some lens corrections to each image.
8. I use Lightroom to sort the RAW files, rename them, back them up and begin reviewing them.
9. For the review process I use LR star and color tag system to sort the images (though the actual sorting comes later). Typically I have to organize by competitor or by class or similar.
10. To choose my "keepers" I use LR white flag/no flag/black flag system. I mark the the images I'll work and share with a white flag, the ones I will keep but not work now (such as duplicates) I don't flag at all and the ones that I can trash (usually just missed shots, poor focus, etc.) get black flagged.
11. While I'm doing that I do minor tweaks with LR... quick exposure adjustments if needed, image straightening, minimal crops, etc. I rarely spend more than 15 or 30 seconds on an image.
12. Once I have worked through the images I "filter" the images using the star/color system... so for example I'll only see the "red/3 star" images, which are all of competitor "John Smith".
13. I then do a batch RAW conversion of the white flagged, filtered images... making "thumbnails" that are no more than 700 or 800 pixels on the long side and are watermarked. These are sorted into folders, one for each competitor (in this example... other times it may be sorted by class or other criteria, depending upon the type of event).
14. Finally I upload those "thumbnails" to online galleries (in this example, each competitor gets their own sub-gallery).
15. Once the images have been reviewed by my customers and they have made their selection(s), I use LR to re-locate the original RAW file of the selected image.
16. Depending upon how it will be used, typically I need to re-crop the image, do some more careful adjustments upon it in LR. Only then is it passed off to Photoshop for retouching and finishing work.
My goal is to do as little work as possible on each image and get them up in their online galleries as quickly as possible. Typically each gallery will have between 25 and 150 images in it and by using the above process, only "working" the images minimally in LR, taking advantage of things like keyboard shortcuts and the "previous" button (which can be used when a series of images are similar enough to use the same LR tweaks), I can get through 1500 to 2000 images per day.
The later "select" images always get more work... noise reduction, sharpening, etc., as needed. This when I use Photoshop and the work on each images varies a lot. It can take 5 minutes or a couple hours, depending upon what needs to be done. It saves a lot of time only doing this level of work to the final, "select" images.
I will later go back and delete the "black flagged" images. I might delete some of the "no flag" too. But more often than not I keep those for a while. You never know when one might come in handy to have. For example, I've had shots that looked great, but there was something off in the background. Or, perhaps someone's eyes are closed in an otherwise perfect shot. In both cases I've "rescued" an image using bits and pieces copied over from other images.
I also usually leave an event's images on my memory cards until I go shoot another event. I don't need them anymore, since I have already determined everything was safely copied onto my computer and those copies have been further backed up. Still, I only format each card as I start to use is it. That only takes a couple seconds and I simply see no reason to spend any time doing it any sooner.
EDIT: Regarding my step 2., syncing my cameras' clocks: This is necessary when shooting with multiple cameras, if I want to be able to sort the images in proper sequence. I've found that all cameras' clocks tend to lose time gradually, but at different rates. It can be a couple seconds different in a week. I use a simple method to sync them using the USB cable to connect to my computer, open the manufacturer's supplied applet that gives access to the camera and use that to sync the camera with the computer. After all the cameras (at least two, sometimes 3 or 4) have been synced to the computer, they're also in perfect sync with each other. Where this gets tricky is when I'm working with other photographers, each with their own camera(s). But I've managed it with as many as six of us shooting a very big event (and using three or four different brands of cameras).
If you want to reply, then register here. Registration is free and your account is created instantly, so you can post right away.
Check out Wedding Photography section of our forum.