Color correcting skin dehaze in LRc
Sep 19, 2022 21:27:43 #
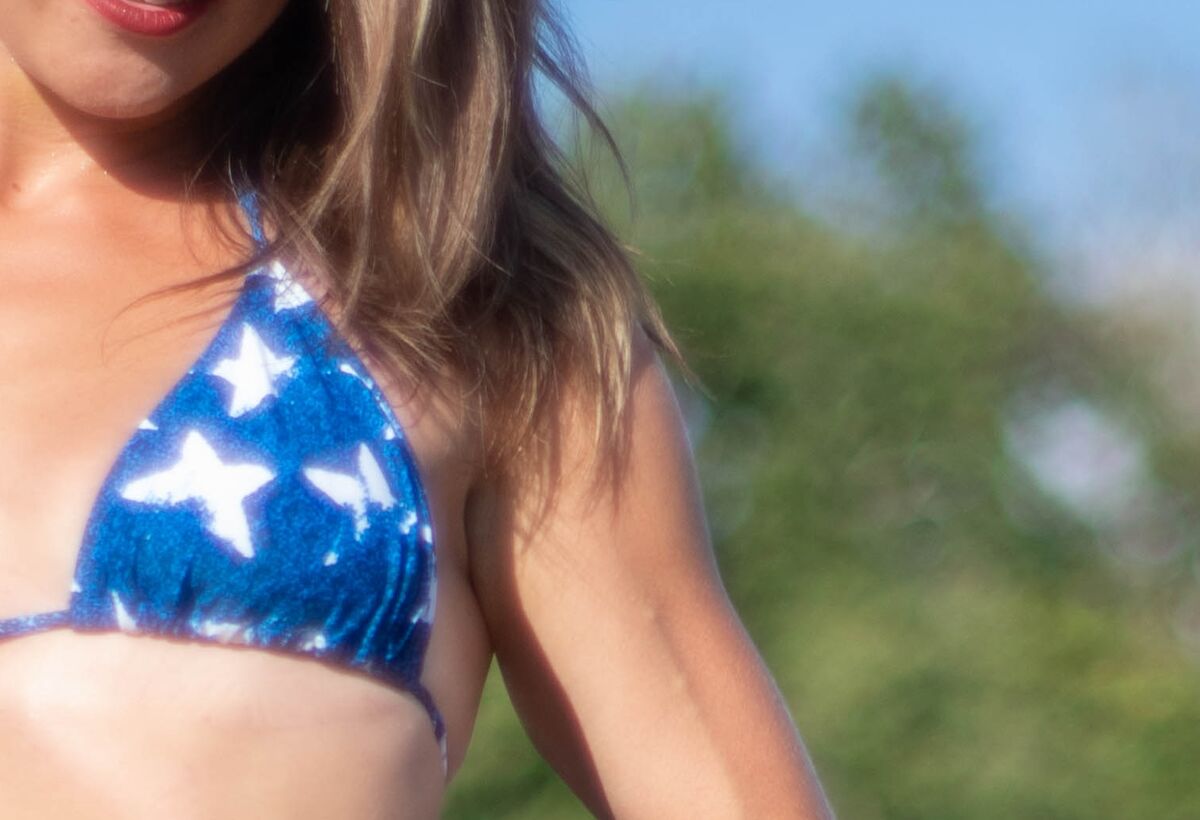
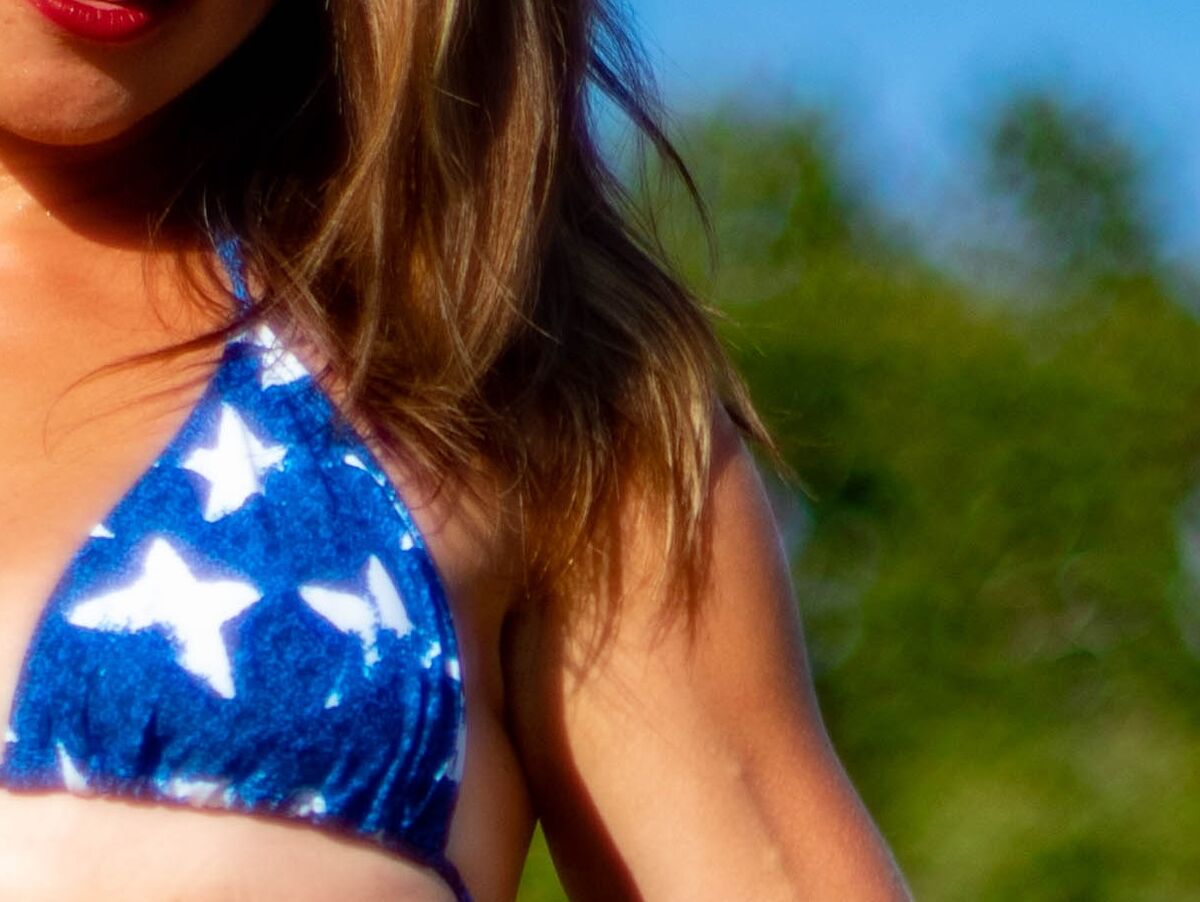
When I use dehaze on an image it has a tendancy to turn the skin tone yellow or orange as demonstrated below. Lowering blacks also has this tendency.
I have been compensating for this by reducing vibrance or cooling the image but I sometimes don't want to change the white balance much or give up vibrance.
I'd appreciate anyone's experience on options. I haven't yet graduated to using the tone curve or reading the histogram but maybe this is the direction I need to head.
Anyway, the first image is just with auto correction and the second image is with an exaggerated dehaze setting to show the effect.
TIA.

Sep 19, 2022 21:43:20 #

Consider trying a feature in Photoshop to help with your issue.
There is a good video showing how to use the technique - https://www.youtube.com/watch?v=na0G3FFeTnE
There is a good video showing how to use the technique - https://www.youtube.com/watch?v=na0G3FFeTnE
Sep 20, 2022 02:11:16 #
Alphabravo2020 wrote:
When I use dehaze on an image it has a tendancy to... (show quote)
May seem simplistic but, lay off the dehaze. You didn't show the OOC, so we could judge if dehaze is even needed.
Sep 20, 2022 04:22:49 #

Whenever you want to push an adjustment (in this case Dehaze) beyond a point that you would consider moderate, you will typically get some changes that you want and some changes that you don't want. If you want to keep the changes that you want, you have to learn how to mitigate the unwanted changes.
In this case it's obvious that pushing Dehaze results in too much saturation, and the answer is obvious (although there are various possibilities such as the Saturation slider, the HSL tool, the Vibrance slider). Another unwanted effect from pushing Dehaze is that the darks can become too dark and solid, and the answer is to lift the Blacks a little.
Pushing an adjustment beyond moderation and then mitigating the unwanted effects is a useful approach that's worth developing. You'll quickly learn the limits of the technique by finding the point beyond which the unwanted effects become uncorrectable. That point will vary depending on the tool/s being used and the image being worked on.
Sep 20, 2022 08:32:55 #
Alphabravo2020 wrote:
...I'd appreciate anyone's experience on options.....
This is what I managed to do to the very small jpg that you posted. Working from raw would give more possibilities for pushing and pulling. The editing involved mainly tweaks using the HSL tool (Hue, Saturation, Luminance) but included lifting the Blacks and Shadows and dropping the Highlights slightly, finishing with a tweak to Contrast to combat the loss of contrast caused by lifting the darks and lowering the brights, and finally lowering global Saturation a touch.
The HSL tool gives the opportunity to tweak the skin colouration (nudging yellow towards orange and nudging orange and red towards yellow plus desaturating and lightening as required). The Shadows slider brought out more detail under the girl's chin. If I was taking it further I'd select the bright patch of skin under the bikini cup to darken it a bit and perhaps globally lower the Whites or Highlights a bit more.
.

Sep 20, 2022 08:58:26 #
fredpnm wrote:
Consider trying a feature in Photoshop to help with your issue.
There is a good video showing how to use the technique - https://www.youtube.com/watch?v=na0G3FFeTnE
There is a good video showing how to use the technique - https://www.youtube.com/watch?v=na0G3FFeTnE
It's funny you recommended this guy. Just yesterday I stumbled across one of his Ps videos on correcting motion blur. I would have said what he did was impossible but there it was.
Sep 20, 2022 09:06:40 #

Great question and perhaps a learning moment. Go ahead and make your global adjustment. Then, take the brush tool (speed key K) and brush over the areas you want to adjust. This creates a mask. Try various sliders that will affect that selected area back to where you would like. I would start off with the temperature and tint sliders. Give it a try and post the result.
Sep 20, 2022 11:32:44 #
Alphabravo2020 wrote:
When I use dehaze on an image it has a tendancy to... (show quote)
If you want the dehaze but not apply it to the skin, use the 'linear gradient' brush and cover the entire image. Then select 'Intersect Mask with' and select 'Brush'. In the brush panel,check the 'invert' box and brush away the linear gradient mask that covers the skin. Then apply your 'dehaze' to the remainder of the linear gradient. The dehaze will be applied to the image except the areas that you brushed away, i.e. the skin areas.
It takes a lot longer to try and describe than to do it.
Sep 20, 2022 13:49:55 #
Alphabravo2020 wrote:
It's funny you recommended this guy. Just yesterday I stumbled across one of his Ps videos on correcting motion blur. I would have said what he did was impossible but there it was.
That guy is really good. Maybe a little hard to watch, but his skill level is phenominal. I tried that colorize neural filter, when it was brand new, on an old B&W of my wife and was completely shocked.
Sep 20, 2022 14:43:07 #
Alphabravo2020 wrote:
It's funny you recommended this guy. Just yesterday I stumbled across one of his Ps videos on correcting motion blur. I would have said what he did was impossible but there it was.
Just who is he? A link to that motion blur video would be nice.
Sep 20, 2022 14:53:47 #
robertjerl wrote:
Just who is he? A link to that motion blur video would be nice.
It took me a bit to find it. Also impressed by that video above.
https://youtu.be/US8yI3ymZEE
Sep 20, 2022 14:57:14 #
bsprague wrote:
That guy is really good. Maybe a little hard to watch, but his skill level is phenominal. I tried that colorize neural filter, when it was brand new, on an old B&W of my wife and was completely shocked.
Yes on all counts. He is almost a charactiture. 😝
If you want to reply, then register here. Registration is free and your account is created instantly, so you can post right away.