Check out Photo Critique Section section of our forum.
ND Graduated Filters
Jan 26, 2022 18:47:36 #
photoman022
Loc: Manchester CT USA
David Martin wrote:
Graduated ND filters work best with the horizon is basically a straight line, as Longshadow said. None of the horizons in the photos you posted is straight.
If you (preferably) shoot in RAW, and reduce exposure a bit to avoid blowing out the highlights in the brightest areas, you can accomplish the same effect in post-processing software.
If you (preferably) shoot in RAW, and reduce exposure a bit to avoid blowing out the highlights in the brightest areas, you can accomplish the same effect in post-processing software.

Jan 26, 2022 20:12:59 #
A polarizer does a lots of goods. A ND filter will take light away and you may need to use a tripod, remote release. For my first try I got an eBay breakthrough ND 3,6 stops. Was an older version.
Jan 26, 2022 21:40:39 #
I think you misunderstand when and why to use ND filters. ND filters slow down the shutter speed which may allow you to use a wider aperature. I have several filters of different shades of darkness and use them primarily to slow down water such as from a waterfall or ocean waves. They also work great to diminush ripples on a body of water like a lake to get the "mirror" effect.
They would have no effect on the pictures you posted as a slower shutter speed wouldn't make any difference. As other have already stated, a good polarizer filter would help a lot. If you do go with ND filters, spend the money and get good ones. What's the point of having an expensive lens and then putting a cheap piece of glass on the front. B&W and Hoya are good choices.
They would have no effect on the pictures you posted as a slower shutter speed wouldn't make any difference. As other have already stated, a good polarizer filter would help a lot. If you do go with ND filters, spend the money and get good ones. What's the point of having an expensive lens and then putting a cheap piece of glass on the front. B&W and Hoya are good choices.
Check out Bridge Camera Show Case section of our forum.
Jan 26, 2022 23:46:14 #
mflowe
Loc: Port Deposit, MD
Deecee wrote:
I think you misunderstand when and why to use ND f... (show quote)
You are the one who misunderstands. The OP was talking about nd grads.
Jan 27, 2022 02:31:48 #
The LEE filter system is the gold standard in my opinion. Check it out here... https://www.leefilters.com/index.php/camera
Jan 27, 2022 08:27:21 #
GWBELL345
Loc: Allentown PA
That's a good point. However, the Haida GND's are 4x6 which allows for significant adjustment that avoids the constraint that you note. I never considered the limitation you note when I selected the Haida Filters. I lucked out.
Jan 27, 2022 13:53:30 #
amfoto1
Loc: San Jose, Calif. USA
pdsilen wrote:
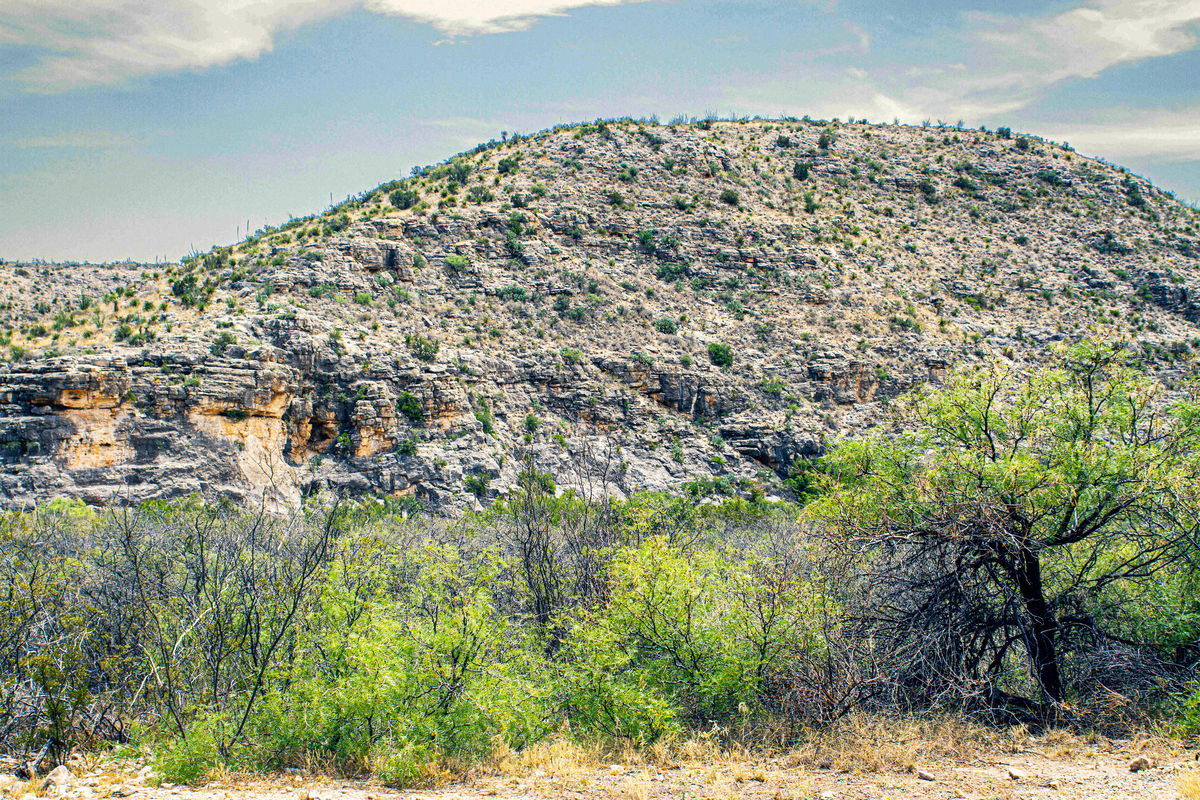
I do a lot of landscape photography, mostly desert and some mountains and forests. I just read an article about landscape shooting. And it was suggested that I use an ND graduated filter. I looked at the KEH website to see what is available only to find that there are all different kinds. Attached are a few landscape photos. I am open to feedback for suggestions as to what kinds of filters to buy.
I stopped using graduated ND filters years ago.
They are unnecessary with digital imaging. I used them with film. But after switching to digital nearly exclusively found better ways of accomplishing the same thing.
Learn to use layers and masks in post-processing and you can do a MUCH better job than the filters ever could.
Frankly, none of your image examples are ideal to demonstrate this, though I will try with one of them.
However first note that every graduated ND filter made has a transition line straight across it. How many of your images have a straight horizon line? None. So any graduated ND used to make those images would either only correct part of the sky or would overlap the rest of the scene where you don't want it. That was always a problem shooting film and still is with digital.
A far better solution with digital imaging is to...
1. Make two images: one exposed for the sky, the other exposed for the rest of the scene (multiple images also can be used for focus stacking or other reasons).
2. Or double process a single image in two ways: Adjusting one version for the sky, the other for the rest of the scene.
With these first two methods you later use layers and masks in post-processing to combined the "correct" portion from each of those versions into a final, finished image.
Here's an example where I used #2 method, because a moving subject and fast shooting situation made it impossible to make two images. In this case there were both exposure and color balance problems. The subject was in shade, with a bright sunlit background behind them. Working in Lightroom I created two copies of the image. One was adjusted for exposure and color balance for the subject and shaded interior. The other was adjusted for the sunlit outdoor background. Then layers and masks in Photoshop were used to combine portions of each to make the final image on the right. (Note: Other image editing software can do this too... I just happen to use LR and PS.)


I use the above technique quite often when finishing images. I usually don't keep all the versions once the job is done, but made a point of doing so with this image in order to illustrate the technique.
You could never accomplish the above with any filter.
The method above is best done working from an original RAW file and kept in 16 bit mode until the finished image is compiled and downsized for it's final use. Working with 8 bit JPEGs (like yours) doesn't work as well.
If you look closely, you'll notice that the background in the final image on the right above is slightly lighter than in the version where the background was adjusted. Once I compiled to final image, I felt the background was becoming a little to dominant, so I dialed in a little transparency to reduce it. In addition to the difference in exposure, the interior/foreground color balance was adjusted for shade, while the outdoor/background was adjusted for full sun.
Note that the finished image above may appear slightly over saturated on some monitors. This was deliberate due to the printing process that was going to be used.
it's also possible to...
3. Select only the portion of the scene that needs adjustments in a single image. This is what I've done with your image below below. Because they are JPEGs and already downsized to some extent, your images are not very good candidates for this adjustment (would have been better to make two different exposures at the time they were taken... and would be better if they were RAW files... or at least 16 bit TIFFs).
See what you think. It's not perfect, but I think it illustrates what is possible without any need for actual graduated ND filters.
Check out People Photography section of our forum.
Jan 27, 2022 14:30:42 #

If you want to reply, then register here. Registration is free and your account is created instantly, so you can post right away.
Check out Commercial and Industrial Photography section of our forum.