Photo montages
Apr 9, 2021 12:20:35 #
I enjoy making photo montages from some of my trips or attending an event.
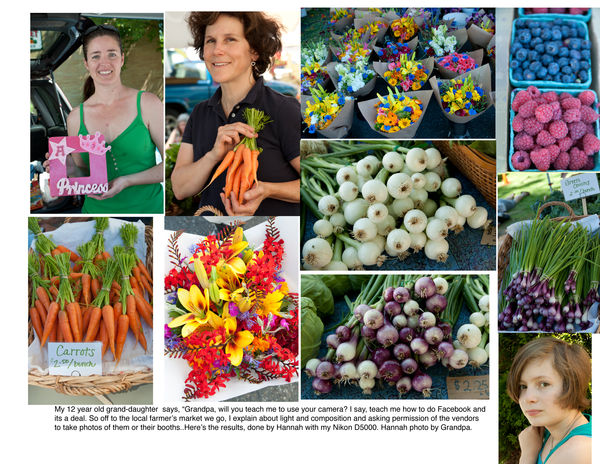
This montage is special. The photos were taken by my then 12 year old Grand Daughter who asked me to teach her to use my camera. The caption explains her first time taking photos.
This montage is special. The photos were taken by my then 12 year old Grand Daughter who asked me to teach her to use my camera. The caption explains her first time taking photos.
Apr 9, 2021 12:27:42 #
Ed Chu
Loc: Las Vegas NV
Seabastes wrote:
I enjoy making photo montages from some of my trips or attending an event.
This montage is special. The photos were taken by my then 12 year old Grand Daughter who asked me to teach her to use my camera. The caption explains her first time taking photos.
This montage is special. The photos were taken by my then 12 year old Grand Daughter who asked me to teach her to use my camera. The caption explains her first time taking photos.
How do you create these montages?
Apr 9, 2021 12:33:40 #
[quote=Seabastes]I enjoy making photo montages from some of my trips or attending an event.
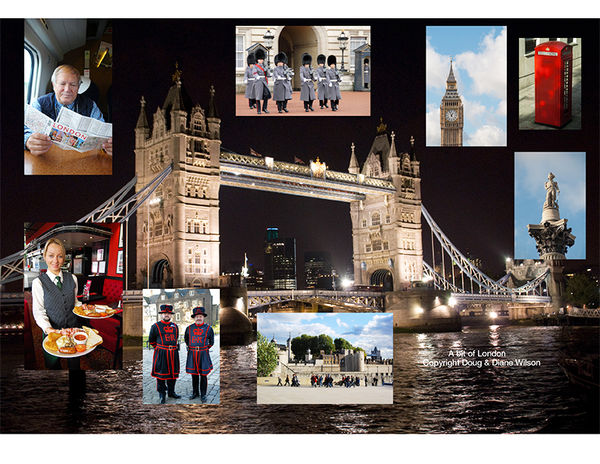
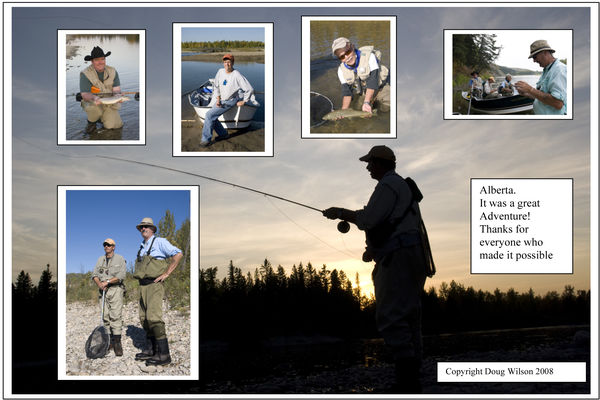
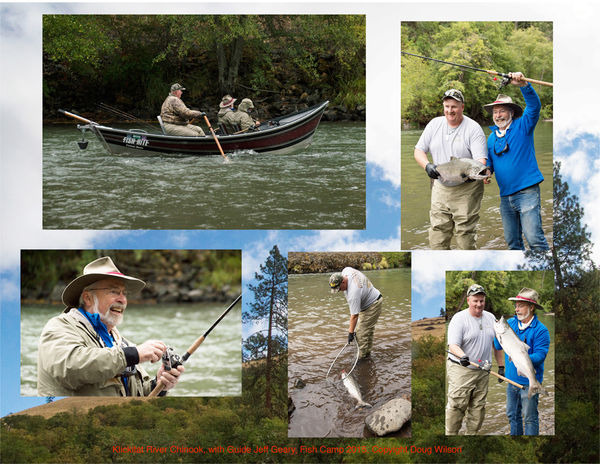
Here are a few Montages from my travels.
Here are a few Montages from my travels.


Apr 9, 2021 13:07:07 #
Ed Chu wrote:
How do you create these montages?
I do them in MS Word, usually putting an image that will fill the project as a background photo, then drag
addition images onto the background photo. If you are on a Mac I use Pages, which is the word processor for Macs.
Here is the process, sorry for such a long post. The sample shown here was done on a Mac,using Pages
1
Making Photomontages, Note Cards, and Postcards With Your Word Processor
Whether you want to produce photomontages, note cards or postcards cards, for
your own personal use or business promotion, with a little practice you can do all of these
things on your computer using your word processor.
They can then be printed on your ink jet printer, or with a few more steps
converted to files that you can email, post on Facebook or other social media.
Granted there are software packages that are designed specifically for doing
these projects and you may want to consider purchasing one, but for the moment let’s
learn to use your Word Processor for doing these projects.
Many computer users have Microsoft Word as their word processing software so
we will start with it, and then discuss Apple’s word processing software.
Both will create the desired product, but there are slight differences in creating
your project.
Here is an example of a photomontage created in Microsoft Word.
First set the page orientation to the desired. In this case we will use the landscape
format.
2
Once you have set the page orientation of a new document, the next step is to use
the insert menu going down the menu and clicking on insert text box.
Draw the text box to fill a nearly full page. You can then insert a photo for your
background. This should always the first image inserted in your layout.
Next, go back to the insert menu and click on text box. You can then insert a
smaller image on top of the background photo. If you wish you can draw several more
text boxes and then insert your chosen images for your layout. Drag a photo from your
desktop to the blank text box and it will appear in the text box. Click your mouse to lock
the photo in the layout.
If you need to resize the text box and photo, click on the photo and place your
curser on the right corner bottom of the text box. When you see a two headed arrow, you
can change the size of t he text box with your curser by dragging it down to enlarge or
pushing up to reduce the text box. You may need to click on the photo to resize it with
your curser in the same manner as you did with the text box.
3
It is good idea to save the file as you prepare it at each new step.
While you can import any size file into the layout, reducing the image size with
your graphic program will make the inserting faster.
Programs like Adobe Photoshop or Elements work well in dealing with digital
photos, but you may have software that came with your camera that will work for you.
There are also free graphic software programs that can be downloaded from the
Internet.
Once you have completed you montage save it to your desktop and it is ready for
printing on photo paper or heavy weight matte paper designed for printing photographs.
If want to send the montage as an email attachment, there are additional steps that
are necessary to prepare the file as your word file with a number of digital images may be
to large for emailing.
The first step is to convert your layout to a PFD and save it. Most likely the PDF
file will be too large to email as an attachment. It will be necessary to convert your PDF
to a jpg file.
Open the PDF in Photoshop and it will first rastorize the PFD so it can be saved
as a Photoshop file. Usually saving the file as a jpg is best.
Save one copy as a 300-ppi file, and then change the image size to 72 ppi and
save it as another jpg, adding -72 to your file name.
Working with Apple’s Pages program is slightly different than Microsoft Word.
For MAC users the process is similar to Word, but some steps are handled different ly.
Inserting photos does not require the use of a text box. Open a file, set the
orientation, then drag your background photo on to the page. The image may be smaller
or larger, depending on the image file size. Resize it to fill the page, then double click to
lock the image into the layout. Continue to drag photos onto background photo. You will
need to resize the images, by moving the arrows on a corner of the image, Click
background image to lock the newly placed photo it into your layout. You can resize as
needed by clicking on the image, then using the curser.
If you want to add text, open a text box. It will probably lie in the middle of the
layout but can be moved with the curser. Input your desired text and move to the location
it best fits. Resize the text box by using the curser if you want a single line of text as
shown in the sample below.
4
MAKING PHOTO CARDS
Making photo cards gives you the opportunity to use your photographs to send a
special card for special occasions or just for correspondence. They can also be used for
promotional purposes for a person’s business.
Using Word with a vertical photograph is very easy. Open a file setting the page
layout as landscape, insert a text box on the right hand side of the page, then drag a photo
into the text box. The text box may resize itself requiring you to move the text box and
possibly resize it to fit on the right had side of the page.
Insert a second text box in the middle of the left hand side of the layout so you
can type in te location of the photo and your name and copyright notice.
Doing a horizontal card is a little more complicated if you want information on
the backside of the folded card. If you are not concerned about type on the back, you can
easily do a card layout by drawing a text box at the bottom of the page, sizing it so it will
be sized so that it folds evenly.
If you want to have text on the back of the card, the text box to hold the photo
should be placed at the top of the page on your computer screen.
The photo needs to be rotated 180 degrees so that photo is upside down in the text
box. Make a second text box on the lower half of the layout and input your text.
Using Pages on MAC is pretty much the same, except you don’t have to draw a text box
for the image. You will need to do a text box for the back side of the card.
Doug Wilson
If you want to reply, then register here. Registration is free and your account is created instantly, so you can post right away.