Found a new way to increase resolution
Apr 21, 2020 16:06:32 #

I have been playing with some software to process astrophotography images and find that using RAW files produces images with a lot more detail. But, Nebulosity is a niche type product, and the demosaicing process it tuned for detail, and not for color accuracy. And the color accuracy is actually horrendous with the image being skewed heavily towards green since there 2 green pixels for every 1 red and 1 blue and apparently, it doesn't do anything with that information. But the results are really detailed, and the difference is the demosaicing algorithm being used.
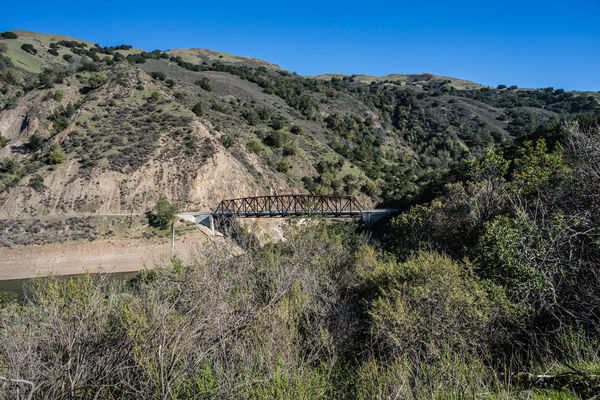
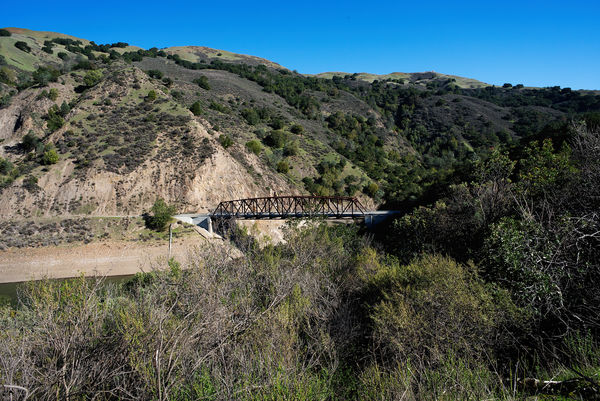
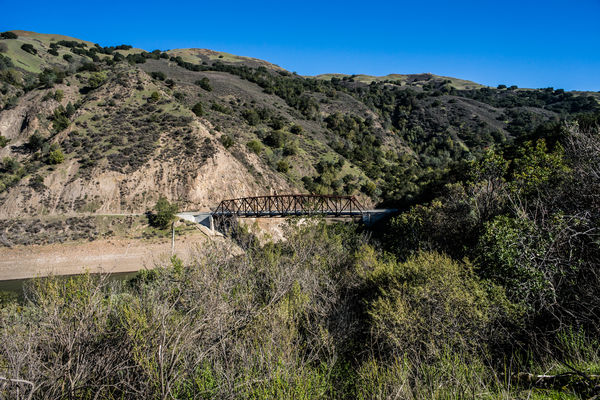
I will go through an example. First image is the original. I used Lightroom to convert the RAW to JPEG and am posting the JPEG without additional processing.
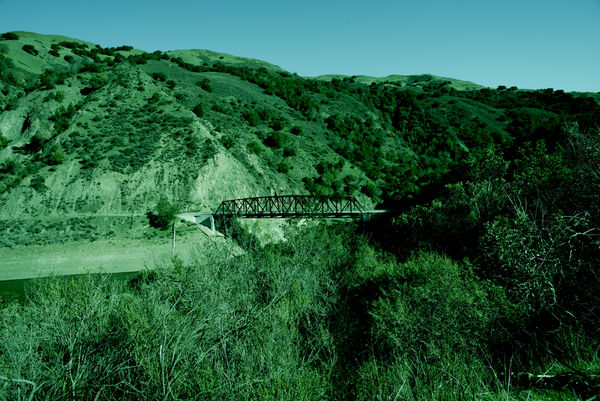
Second image is the nebulosity output, use the same RAW file as input. The output is very green, but it doesn't matter for what I'm going to do.
Third image is the processed image where the resolution of the Nebulosity file has been transferred to the color image using Hi Pass. And here is how it was processed. Both the original RAW and a Nebulosity TIFF file where loaded into Photoshop. For the RAW, lens correction is turned off. I then caused the 2 images to be loaded as layers with the Nebulosity image on top. Then did an auto align. Next, selected only the top image and set it to "Soft Light". Then went to Filters/Others/ and selected Hi Pass. Set the radius to 3.0. When done, flattened the image and saved it.
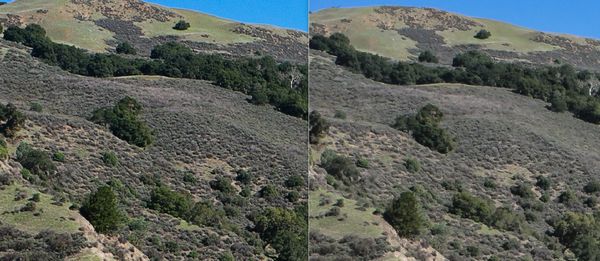
The last image is a side by side with the processed image on the left and original on the right. It is a heavy crop showing a small region of the image. The original at this crop level seems a bit smeared whereas the processed file still shows detail.
I will go through an example. First image is the original. I used Lightroom to convert the RAW to JPEG and am posting the JPEG without additional processing.
Second image is the nebulosity output, use the same RAW file as input. The output is very green, but it doesn't matter for what I'm going to do.
Third image is the processed image where the resolution of the Nebulosity file has been transferred to the color image using Hi Pass. And here is how it was processed. Both the original RAW and a Nebulosity TIFF file where loaded into Photoshop. For the RAW, lens correction is turned off. I then caused the 2 images to be loaded as layers with the Nebulosity image on top. Then did an auto align. Next, selected only the top image and set it to "Soft Light". Then went to Filters/Others/ and selected Hi Pass. Set the radius to 3.0. When done, flattened the image and saved it.
The last image is a side by side with the processed image on the left and original on the right. It is a heavy crop showing a small region of the image. The original at this crop level seems a bit smeared whereas the processed file still shows detail.
original
(Download)
Nebulosity output
(Download)
Processed File

(Download)
processed on left / original right
(Download)
Apr 21, 2020 16:30:03 #
What you are doing is increasing contrast on the green channel, not resolution.
Working from a single image, there is no way to digitally increase resolution. You can't really increase image information which is not already there.
Working from a single image, there is no way to digitally increase resolution. You can't really increase image information which is not already there.
Apr 21, 2020 16:56:49 #
rook2c4 wrote:
What you are doing is increasing contrast on the green channel, not resolution.
Working from a single image, there is no way to digitally increase resolution. You can't really increase image information which is not already there.
Working from a single image, there is no way to digitally increase resolution. You can't really increase image information which is not already there.
I could show you images of stars that are perfect in Nebulosity and with smeared colors beyond the edges of stars with convention RAW editors such as Lightroom, or DxO, or others. It is the demosaicing process that is lowering resolution. It is not pulling detail that is not already there. Its releasing detail in the RAW that is there.
Apr 21, 2020 16:59:23 #
Apr 21, 2020 17:26:36 #
In the case of a mono sensor, of the same size, and same number pixels, will exceed the resolution of a Bayer Matrix sensor. The process of debayering does lose resolution. There are many variations of demosaicing algorithms, with each attepting to over come some weakness of demosaicing, which in itself is a lossy process.
It so happens that the used by Nebulosity keeps more of the resolution by sacrificing the color accuracy.
Side note: RawTherapee provides an option of using something like 12 or 13 different demosaicing algorithms. They each have pluses and minuses, but fact is that they all sacrafice some detail or resolution for the benefit of better color accuracy. The Bayer Matrix is a brilliant idea that makes it possible to record images in colors. But, the process requires interpolation in various ways that reduce resolution, and can introduce artifacts.
Apr 21, 2020 18:06:45 #
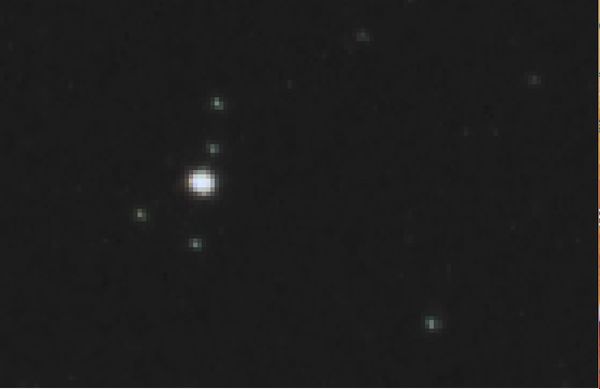
I am going to show two extremely cropped images of a few stars. They are both taken from the same RAW image.
First Image used Lightroom to produce an extremely cropped JPEG. Take a look at the ugly smearing around it and the visible artifacts. The edge from black to white happens over just a couple pixels, which is considered a high frequency signal, which demosaicing has trouble with.
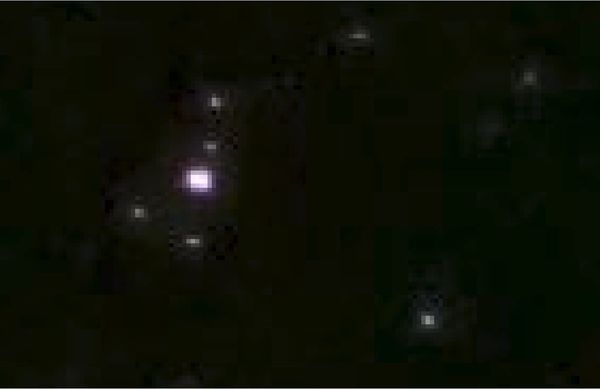
The Second image was done using Nebulosity with a different Debayering algorithm. Note how clean the image is. Stars tend to twinkle due to the atmosphere and you are seeing that effect in that more pixels than just the central pixel are lit up. If I could have been at a higher elevation, this effect would be reduced.
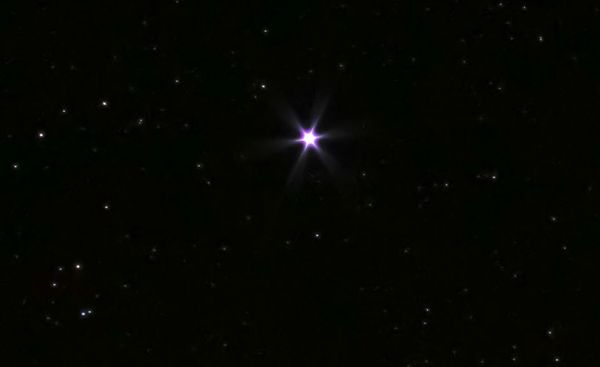
Image 3 is a very bright star, Deneb, and the spikes are due to the aperture blades of the lens. Notice the chromatic aberration also. This is with Lightroom. In fact, this is from the same RAW as the first two images and is just a lessor crop.
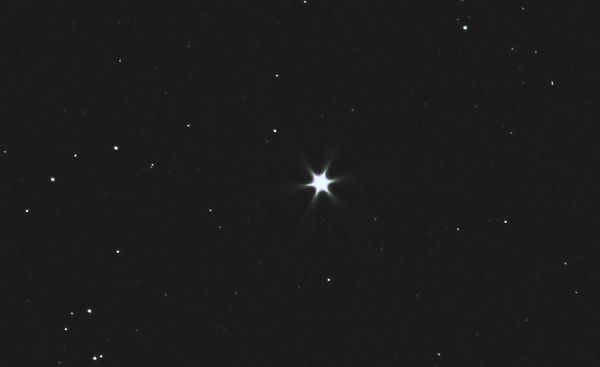
Image 4 is with nebulosity and the CA is gone, as well as spill over from the vanes.
Hopefully, you can see from these that Debayering is not an exact science. There are major tradeoffs and best color vs best detail are tradeoffs. For most applications, the Debayering is considered "Good Enough".
And as you can see in my earlier example, it can be improved.
By the way: Demosaicing = Debayering. You may find it called by either name.
First Image used Lightroom to produce an extremely cropped JPEG. Take a look at the ugly smearing around it and the visible artifacts. The edge from black to white happens over just a couple pixels, which is considered a high frequency signal, which demosaicing has trouble with.
The Second image was done using Nebulosity with a different Debayering algorithm. Note how clean the image is. Stars tend to twinkle due to the atmosphere and you are seeing that effect in that more pixels than just the central pixel are lit up. If I could have been at a higher elevation, this effect would be reduced.
Image 3 is a very bright star, Deneb, and the spikes are due to the aperture blades of the lens. Notice the chromatic aberration also. This is with Lightroom. In fact, this is from the same RAW as the first two images and is just a lessor crop.
Image 4 is with nebulosity and the CA is gone, as well as spill over from the vanes.
Hopefully, you can see from these that Debayering is not an exact science. There are major tradeoffs and best color vs best detail are tradeoffs. For most applications, the Debayering is considered "Good Enough".
And as you can see in my earlier example, it can be improved.
By the way: Demosaicing = Debayering. You may find it called by either name.
Debayered in Lightroom
(Download)
Debayered in Nebulosity
(Download)
Debayered in Lightroom
(Download)
Debayered in Nebulosity
(Download)
Apr 21, 2020 19:05:23 #

Apr 22, 2020 06:20:28 #

Apr 22, 2020 06:42:56 #

We all know that the AA filter on top of the sensor is responsible for the softness of most images. I have no experience using cameras without the filter.
Sharpening the image in post to my satisfaction has not been that difficult. I am using Topaz Clear Ai and I have been satisfied with its performance. At times I use primarily the high pass filter at low setting. If the file will end up for use in the Web I am not as careful sharpening as I am when I am going to take the file to a professional lab for an enlargement.
The secret, in my humble opinion is not to oversharpen the file.
Apr 22, 2020 08:15:53 #
Another "must buy." I'm all bought out. 
https://optcorp.com/products/stark-labs-nebulosity-software
http://www.stark-labs.com/nebulosity.html
https://optcorp.com/products/stark-labs-nebulosity-software
http://www.stark-labs.com/nebulosity.html
Apr 22, 2020 08:34:15 #
NCMtnMan
Loc: N. Fork New River, Ashe Co., NC
Looks more like you're just sharpening the picture. What was the resolution on the original versus the final?
Apr 22, 2020 08:58:02 #
Apr 22, 2020 11:30:27 #
NCMtnMan wrote:
Looks more like you're just sharpening the picture. What was the resolution on the original versus the final?
Just sharpening won't do it. The plants are too fuzzy on the edges. And both the before and after are about 6000 x 4000.
But about 1 year ago, Adobe added a new feature to Lightroom and Camera RAW called Enhanced Details. It is designed to overcome weaknesses in demosaicing. For instance, from Lightroom, Right Click on any RAW file, and look for a choice called "Enhance Details". It will bring up a screen with an estimate of how long it will take to generate a new .DNG file, and then you accept it and wait for the file to generate and automatically appear in Lightroom.
Here is something Adobe had to say about this:
https://theblog.adobe.com/enhance-details/?red=a
I have created a new compare file shown below using the same RAW file as yesterday and zooming way in on the image. The middle top is the image I used Nebulosity to get the detail. Upper right is the new Enhanced Detail showing that it is almost as good. Bottom left is the original with the smeared look. Bottom middle is Topaz's Denoise AI Clear which doesn't look so good on this image (I find that some images do better with Sharpen AI and some with Clear AI - and this image doesn't benefit with AI Clear). And finally to the right is Sharpen AI - Focus Mode. It started with the original and it is better than the original, but I think in this case, I prefer the Enhanced Details option.
The second image compares the Adobe Enhanced Details with Sharpen AI - Focus Mode on the left, original Nebulosity version in the center and and using the Nebulosity Version with Sharpen AI Sharpen mode on the right.
The third image is the whole image of the Nebulosity version sharpened with Sharpen AI - Sharpen Mode.
The 4th image is the unsharpened Enhanced Detail image.
Finally, the 5th image is the Nebulosity Hi Pass image posted yesterday for comparison.

(Download)

(Download)
Nebulosity Hi-Pass with Sharpen AI - Sharpen Mode
(Download)
Enhanced Details - part of Lightroom
(Download)
Nebulosity Hi-Pass with no extra sharpening

(Download)
Apr 22, 2020 12:27:08 #
NCMtnMan
Loc: N. Fork New River, Ashe Co., NC
JimH123 wrote:
Just sharpening won't do it. The plants are too f... (show quote)
Maybe I'm confused. You said that both the before and after were 6000 X 4000. Doesn't that mean they're the same resolution? So what you are actually doing is increasing detail and sharpness. Resolution stayed the same, correct? Not trying to be critical. Just trying to clarify what you're doing.
Apr 22, 2020 12:35:07 #
NCMtnMan wrote:
Maybe I'm confused. You said that both the before and after were 6000 X 4000. Doesn't that mean they're the same resolution? So what you are actually doing is increasing detail and sharpness. Resolution stayed the same, correct? Not trying to be critical. Just trying to clarify what you're doing.
Yes, I used the wrong term. I was increasing Detail, not Resolution. The point I have been pursuing is that Demosaicing (also called Debayering) decreases Detail. And that Detail is still in the RAW file.
And once that file is Demosaiced, that it is hard to reclaim the detail. But if the Demosaicing can be done in a better way, the detail can be recovered.
And what I have found is that Nebulosity can Demosaic without losing that Detail. And, Adobe's Enhance Detail, also recovers that Detail. I actually hadn't realized that Enhance Detail was even there until I started this experiment.
I should add that Demosaicing does not lose much detail when the image detail is not very busy. Or more technically, it is not high frequency conversion. It is when the image gets really busy like in the remote bushes in the image where the problem shows itself the most with the smearing look to them.
If you want to reply, then register here. Registration is free and your account is created instantly, so you can post right away.