Need help and suggestions on adding creative text to images
Mar 5, 2020 15:41:29 #
Some time back I ran a challenge called "It's only a word" which
was an exercise in adding text to images.
I used Photoshop Elements v18, and used the "Guided" tab to
create quite a few different images, but when I did, the main
or original image was always muted as you'll see below.
With encouragement from Linda, who recently posted "Adding
text to photos" in this forum, I tried bringing the main image
back to prominence without destroying the text. My first attempt
was to bring back the image with the text and playing with the
shadows sliders, as well as the black, white and the clarity, which
seemed to deliver better results.
Then I started all over and tried doing it using layers, and somehow
I wound up with five or six layers (I thought I'd only have two) and
then after playing with them, I finally got what I wanted.
So, the question becomes, what are better, or easier ways to do this.
Please feel free to download and manipulate as needed and then repost
and let me know the steps you took to achieve your result.
And thank you in advance for all your support.
Tim
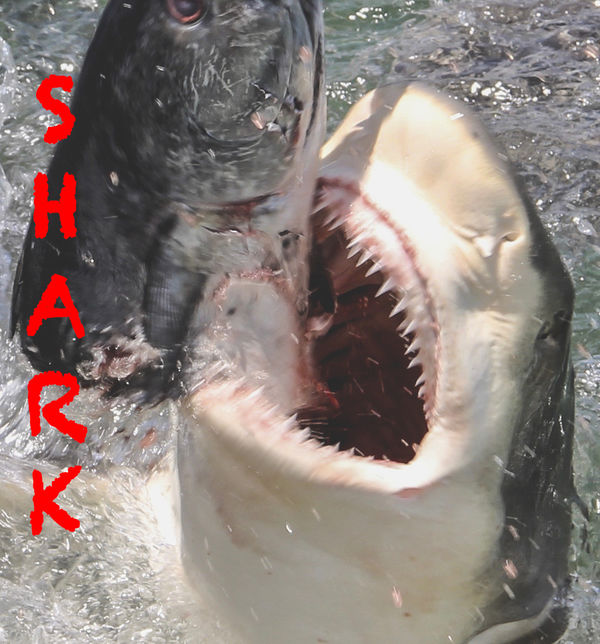
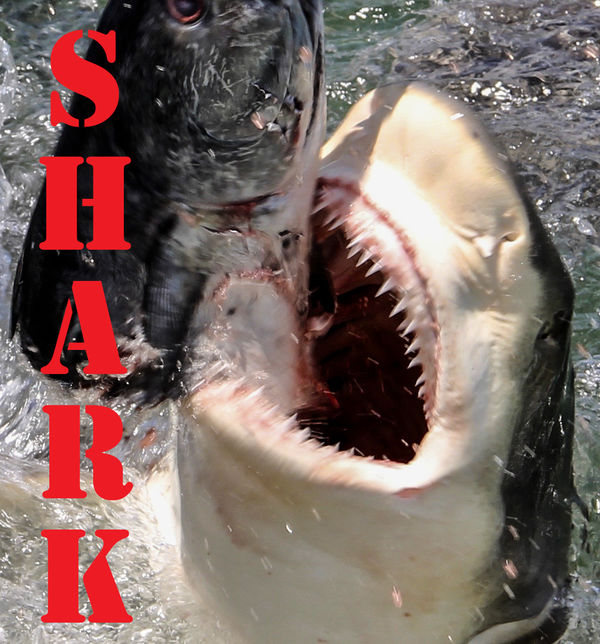
Original image
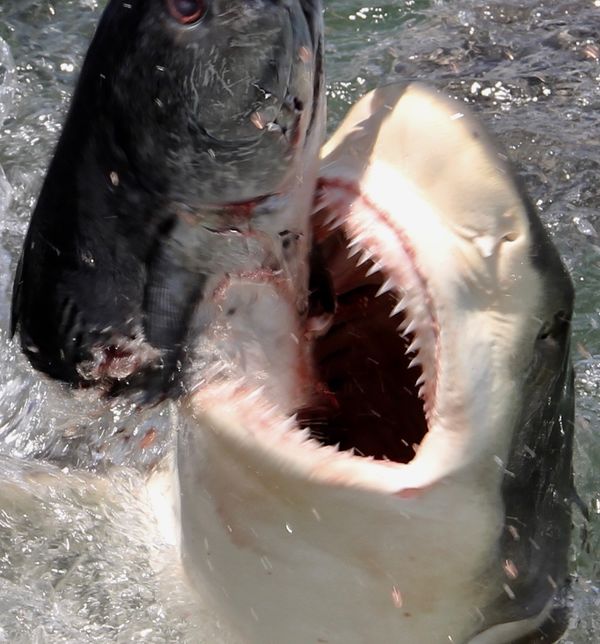
(Download)
Using "Guided" tab in Elements really made the original image fade out
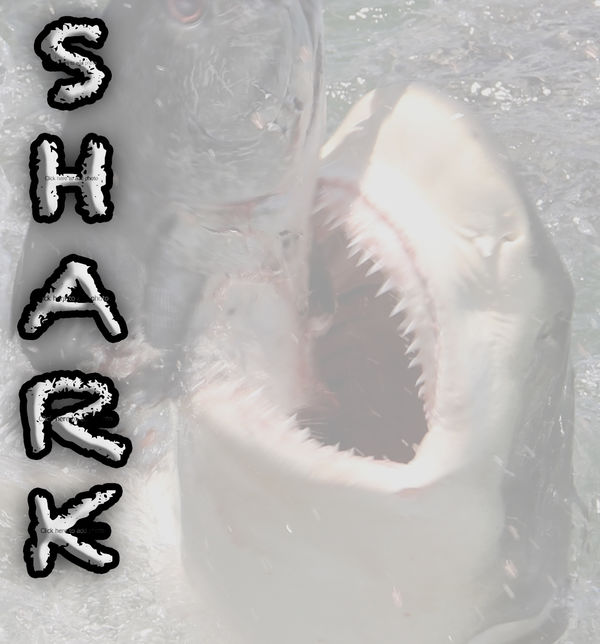
(Download)
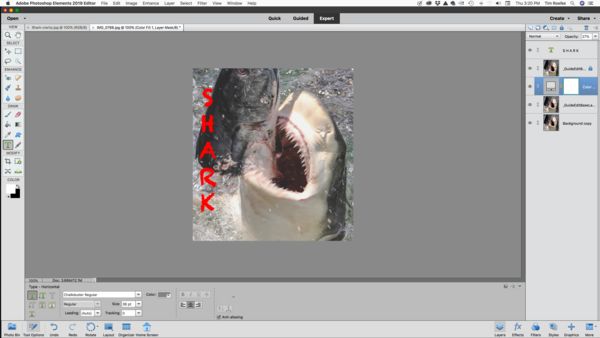
So I played with clarity, white, black and shadow sliders, but the word was also changed
(Download)
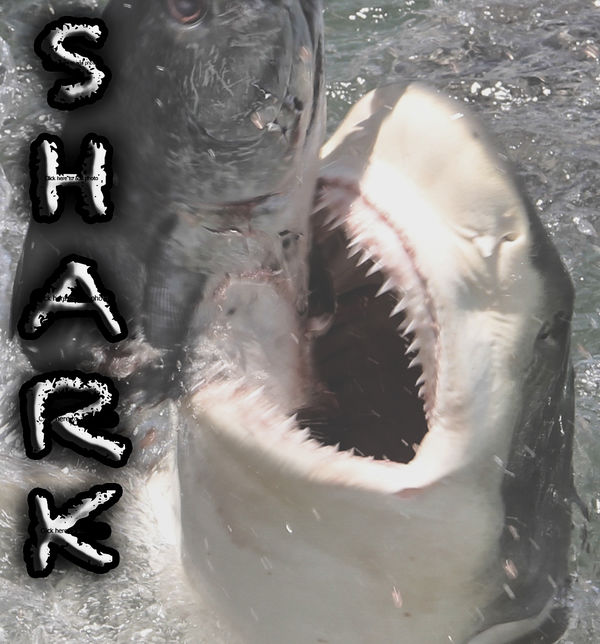
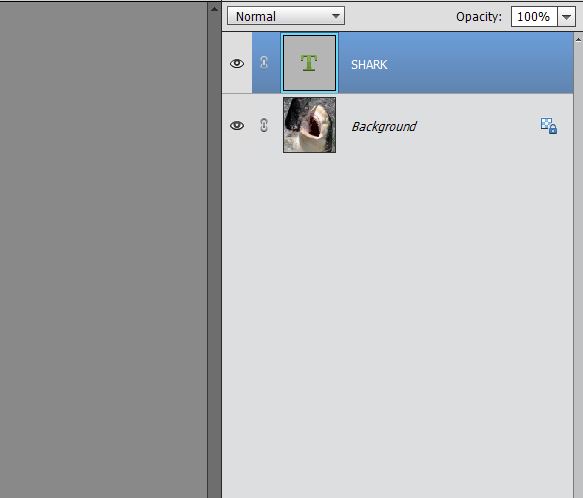
Finally got closer to what I originally envisioned by playing with layers
(Download)
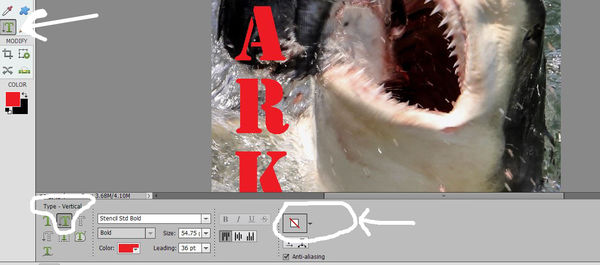
Screen grab of setting used in PSE Elements 2019
(Download)
Mar 6, 2020 07:33:12 #

In PSE 2018 the only guided edit I could find for text was the clipping mask where your letters are filled with another image.
For simple text, open a photo in expert mode. Go to top to layer drop-down menu. Click add new layer (not duplicate; this will be an empty layer). Then click on the text tool and go to work. It's just a two-layer function, as you suspected.
Since the text is on a separate layer, you can re-size and move it at any time. I was interested to learn there is a button for vertical text, as well as a "styles" drop-down menu with lots of cool looks.
Thanks Tim!
Mar 6, 2020 12:01:37 #
Linda From Maine wrote:
In PSE 2018 the only guided edit I could find for ... (show quote)
Thanks so much, Linda...this is MUCH easier for adding simple text. I'm pretty sure I used PSE 2018, but maybe not. I'm currently using PSE 2019 which has both "Multi Photo Text" and "Photo Text" where your text sets on top of one image and you have the ability to make the main image "disappear."
I'm not very good at explaining the difference, but here are two examples:
Tim
"Multi Photo Text"
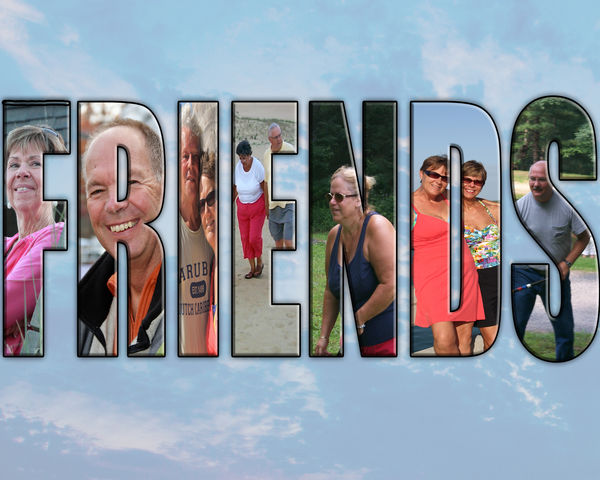
(Download)
"Photo Text" using a single image of the sky, then I changed the background to UHH Yellow by changing RBG values to 236, 235, and 201 respectively
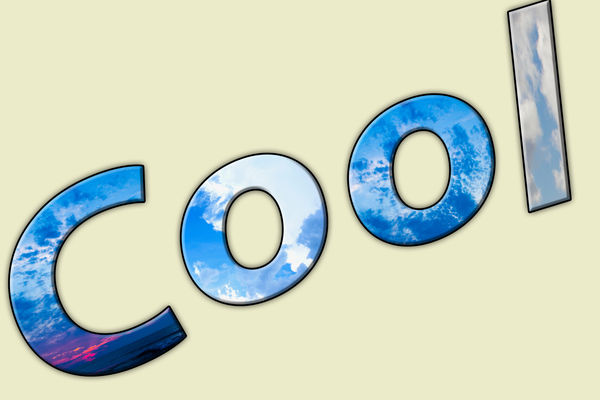
(Download)
Mar 6, 2020 12:15:07 #
Rolk wrote:
Super examples, thanks Tim! I like how you and a few folks with their profile pics have erased any distinction between where your image ends and UHH yellow begins Thanks so much, Linda...this is MUCH easier for adding simple text. I'm pretty sure I used PSE 2018, but maybe not. I'm currently using PSE 2019 which has both "Multi Photo Text" and "Photo Text" where your text sets on top of one image and you have the ability to make the main image "disappear."
I'm not very good at explaining the difference, but here are two examples:
Tim
I'm not very good at explaining the difference, but here are two examples:
Tim

Now that I've dabbled a bit with clipping masks (thanks to you and bleirer!), I would want to do these in expert mode with layers so that I could control right from the beginning.
Mar 6, 2020 12:30:40 #
Linda From Maine wrote:
Super examples, thanks Tim! I like how you and a few folks with their profile pics have erased any distinction between where your image ends and UHH yellow begins
Now that I've dabbled a bit with clipping masks (thanks to you and bleirer!), I would want to do these in expert mode with layers so that I could control right from the beginning.
Now that I've dabbled a bit with clipping masks (thanks to you and bleirer!), I would want to do these in expert mode with layers so that I could control right from the beginning.
So glad you liked these, Linda, and I can't wait to see what you come up with!
Please be sure to keep me posted.
Tim
If you want to reply, then register here. Registration is free and your account is created instantly, so you can post right away.