A few more portraits
Nov 27, 2019 06:46:42 #

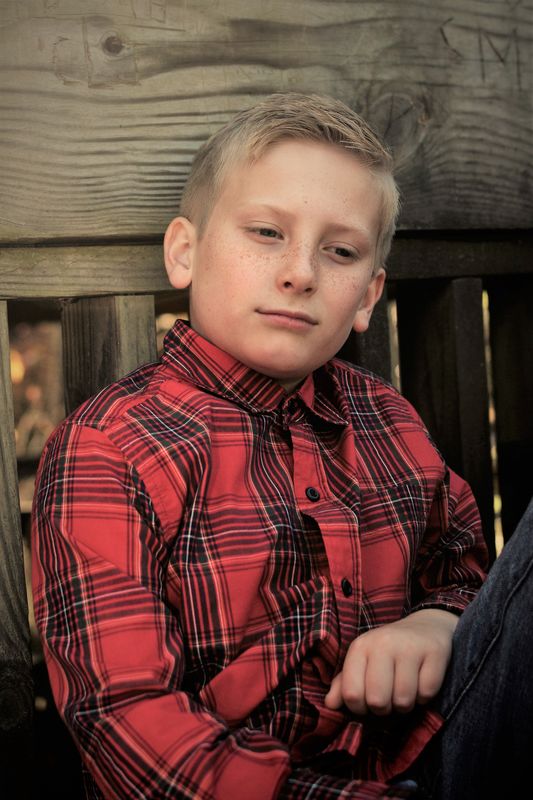
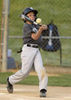
Here are a few more from my photo shoot last week. All were taken on Nikon D3300 with 35mm f/1.8G lens set at f/2.8. I think I had my ISO at either 200 or 400. Not sure what the shutter speed was but I think I had it set somewhere around 1/500. Any suggestions for what I might have done different or better are welcome. I really want to learn as much as I can. I greatly appreciate all the tips and comments on the previous picture I posted. I have made prints of several of these as I was very pleased with them. I know the main thing is pleasing the client (lol). However, I always want to improve. Thank you for taking time to look and respond. Have a great day and a Happy Thanksgiving!

Nov 27, 2019 09:31:43 #

Hi Maggie!
Here's my critique of your images.
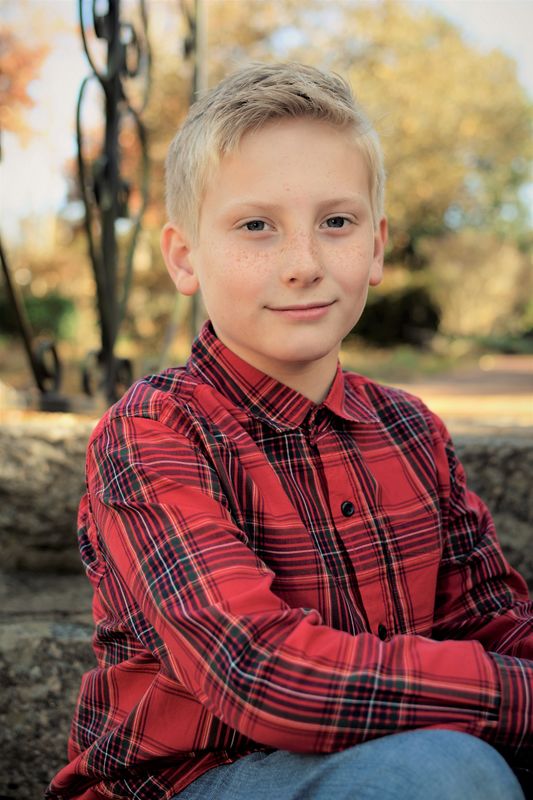
You have made good use of the natural light by back-lighting the subject and exposing for a good skin tone. You have some nice natural expressions.
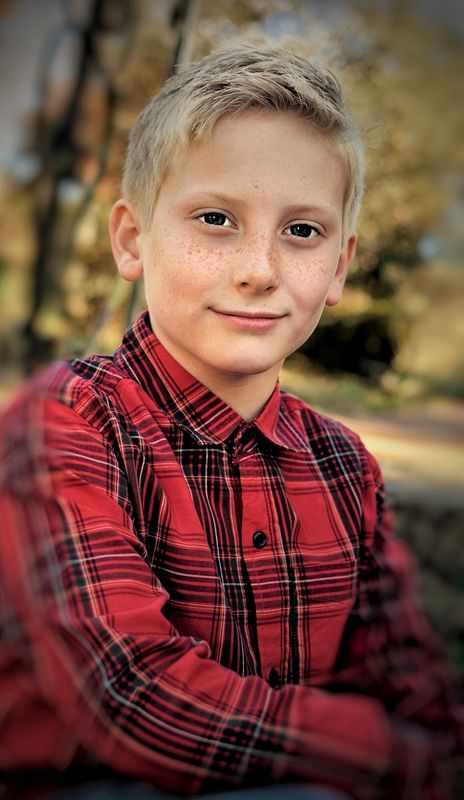
The lighting ratio, that is, the contrast between the highlights and shadows is somewhat flat. On some of the images, there is insufficient lighting in the subject's eyes- the close-up image has a better sparkle in the eyes. Both of these issues can be addressed and solved with some simple lighting control as I will explain and you don't need to invest in any costly gear to do this on your next shoot.
My suggestion is to make a few simple reflectors by crumpling and re-expanding some aluminum foil and fixing it to some lightweight material such as white Foam-Cor board or Cor-Plast material. A 20x24 reflector should do the job wit one side with the foil and the other side white. The technique is to either mount the reflector on a ligh stand or have an assistant hold it. The method is to have some of that back-light strike the reflector and redirect the light toward the subject and create a light pattern as you would with a studio light. If you expose for the highlight side of the face the shadows will become a bit denser and you will have achieved more modeling, roundness and a 3-dimensional feeling. This will better illuminate the eyes and place catch-lights in the pupils. If the catch-lights, those are the reflections of the reflector in the eyes, are at the 1 O'clock or 11 O'clock position in the pupils that is one indication of
a good lighting. position.
There is another method that involves a GOBO, which is a black piece of the above mention materials used to BLOCK light. This works well on hazy or overcast days by helping to create a shadow on one side of the face, When you expose for the highlights, you will achieve better modeling as well.
You mentioned that you have not, as yet, acquired any lighting gear. With this method, you can take control of out-of-doors natural light or window light from a North lighted window and get some awesome lighting. In fact, I prefer reflector use to flash when working with natural light- what you see is what you get!
So. To illustrate some of my points I did some quick edits to address composition, contrast, and calm down the backgrounds. When you back-light, you get a nice highlight in the subject's hair but that kind of light also strikes surfaces in the background and may case distracting lines and highlights so you have to watch the background.
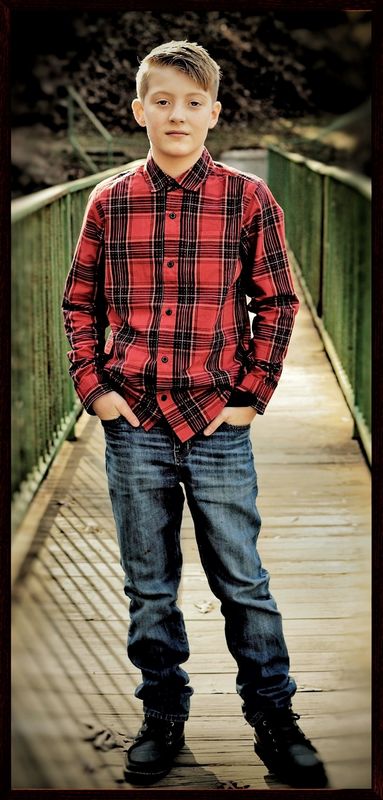
Your selective focus using a wide aperture is very good- I blurred and darkened the background a bit more to place more emphasis on the subject- and cropped. On the full-length shot, I decided to make a "slim-Jim" panel. In a large print, for instance, you can make a 10 or 12 X 24 rather than a 20x24, etc.
EYES: I did not edit the shots where the boy's eyes were partially closed. EYES are important in portraits, so besides the lighting, the eyes need direction. Sometimes I work with the camera on a tripod so my hands are free to direct the eyes. In a full-face image, I try to show eye contact with the viewer by having the subject related above the lens. I observe the eyes through the lens to make sure they are directed properly. In a 2/3 face view, I make sure the subject is focused on something so they don't have a blank stare.
In my edits, I brightened the eyes and in the full length, I enlarged them slightly. I increase the contrast to help with the modeling.
I am not in my studio and on an out-of-town job so I did theses edits on my tablet- quick and dirty, just ti give you some ideas. The edits I have done are what I would normally do in post-processing and custom printing.
Pose: You have some nice natural poses. Try a few were the subject is not standing square to the camera with the body at an angle and watch the position of the hands.
You are definitely on the right track and I am sure you have a happy client! You have the right attitude! Customer satisfaction is good business but always strive to satisfy yourself and keep improving and keep up the good work!
I hope this helps! if you have any question about this critique, let me know, I will be pleased to follow up with you!
Ed
Here's my critique of your images.
You have made good use of the natural light by back-lighting the subject and exposing for a good skin tone. You have some nice natural expressions.
The lighting ratio, that is, the contrast between the highlights and shadows is somewhat flat. On some of the images, there is insufficient lighting in the subject's eyes- the close-up image has a better sparkle in the eyes. Both of these issues can be addressed and solved with some simple lighting control as I will explain and you don't need to invest in any costly gear to do this on your next shoot.
My suggestion is to make a few simple reflectors by crumpling and re-expanding some aluminum foil and fixing it to some lightweight material such as white Foam-Cor board or Cor-Plast material. A 20x24 reflector should do the job wit one side with the foil and the other side white. The technique is to either mount the reflector on a ligh stand or have an assistant hold it. The method is to have some of that back-light strike the reflector and redirect the light toward the subject and create a light pattern as you would with a studio light. If you expose for the highlight side of the face the shadows will become a bit denser and you will have achieved more modeling, roundness and a 3-dimensional feeling. This will better illuminate the eyes and place catch-lights in the pupils. If the catch-lights, those are the reflections of the reflector in the eyes, are at the 1 O'clock or 11 O'clock position in the pupils that is one indication of
a good lighting. position.
There is another method that involves a GOBO, which is a black piece of the above mention materials used to BLOCK light. This works well on hazy or overcast days by helping to create a shadow on one side of the face, When you expose for the highlights, you will achieve better modeling as well.
You mentioned that you have not, as yet, acquired any lighting gear. With this method, you can take control of out-of-doors natural light or window light from a North lighted window and get some awesome lighting. In fact, I prefer reflector use to flash when working with natural light- what you see is what you get!
So. To illustrate some of my points I did some quick edits to address composition, contrast, and calm down the backgrounds. When you back-light, you get a nice highlight in the subject's hair but that kind of light also strikes surfaces in the background and may case distracting lines and highlights so you have to watch the background.
Your selective focus using a wide aperture is very good- I blurred and darkened the background a bit more to place more emphasis on the subject- and cropped. On the full-length shot, I decided to make a "slim-Jim" panel. In a large print, for instance, you can make a 10 or 12 X 24 rather than a 20x24, etc.
EYES: I did not edit the shots where the boy's eyes were partially closed. EYES are important in portraits, so besides the lighting, the eyes need direction. Sometimes I work with the camera on a tripod so my hands are free to direct the eyes. In a full-face image, I try to show eye contact with the viewer by having the subject related above the lens. I observe the eyes through the lens to make sure they are directed properly. In a 2/3 face view, I make sure the subject is focused on something so they don't have a blank stare.
In my edits, I brightened the eyes and in the full length, I enlarged them slightly. I increase the contrast to help with the modeling.
I am not in my studio and on an out-of-town job so I did theses edits on my tablet- quick and dirty, just ti give you some ideas. The edits I have done are what I would normally do in post-processing and custom printing.
Pose: You have some nice natural poses. Try a few were the subject is not standing square to the camera with the body at an angle and watch the position of the hands.
You are definitely on the right track and I am sure you have a happy client! You have the right attitude! Customer satisfaction is good business but always strive to satisfy yourself and keep improving and keep up the good work!
I hope this helps! if you have any question about this critique, let me know, I will be pleased to follow up with you!
Ed
Nov 27, 2019 12:19:15 #
E.L.. Shapiro wrote:
Hi Maggie! br br Here's my critique of your image... (show quote)
Thank you for all the suggestions! I will definitely put them to use on my next attempt 😊. This is really my first attempt at an actual dedicated photo shoot. I got lucky in my boys were being very cooperative which is not always the case.
Nov 28, 2019 12:26:50 #
You're not going to get better advise than from ED, yet I do have something to add. In my view, these portraits are wonderful, except your choice of focal length. As can be expected from a 35, the nose is accentuated. Also, I'd be careful to not look up the nostrils. Personally I prefer an 85, and lately a 105 for this work as I have both Nikon F1.4 versions. The Nikon 85 F1.8 would also be a good and much less expensive choice for you. As an aside, I have been playing with a Z6 85/1.8S combo and I like that as well. Have fun with it. Best of luck.
Dec 3, 2019 10:52:06 #

Megag, here are the settings you used for the first shot...
Manual exposure, 1/640 sec, f/2.8, ISO 100, Compensation: -7/3
Manual exposure, 1/640 sec, f/2.8, ISO 100, Compensation: -7/3
Dec 3, 2019 20:15:12 #
charlienow wrote:
Megag, here are the settings you used for the first shot...
Manual exposure, 1/640 sec, f/2.8, ISO 100, Compensation: -7/3
Manual exposure, 1/640 sec, f/2.8, ISO 100, Compensation: -7/3
Yeah, the exposure compensation was an oversight. I was wondering why I was having such a hard time with metering. It wasn't till I got home that I realized I had the exposure comp set. I had done that previously when playing around one day. My bad for not checking all of my settings.
Dec 3, 2019 22:21:30 #
maggiemae wrote:
Yeah, the exposure compensation was an oversight. I was wondering why I was having such a hard time with metering. It wasn't till I got home that I realized I had the exposure comp set. I had done that previously when playing around one day. My bad for not checking all of my settings.
It’s easy to do. I’m an old guy so having so many options sometimes has my head spinning and wonder why my shots don’t look so good..and have a hard time fixing it.
Keep up the good work. I enjoy your photos
Chuck
Dec 4, 2019 06:38:43 #
charlienow wrote:
It’s easy to do. I’m an old guy so having so many options sometimes has my head spinning and wonder why my shots don’t look so good..and have a hard time fixing it.
Keep up the good work. I enjoy your photos
Chuck
Keep up the good work. I enjoy your photos
Chuck
Thank you.
If you want to reply, then register here. Registration is free and your account is created instantly, so you can post right away.