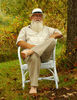
Portrait of a Boy
Nov 26, 2019 06:51:11 #

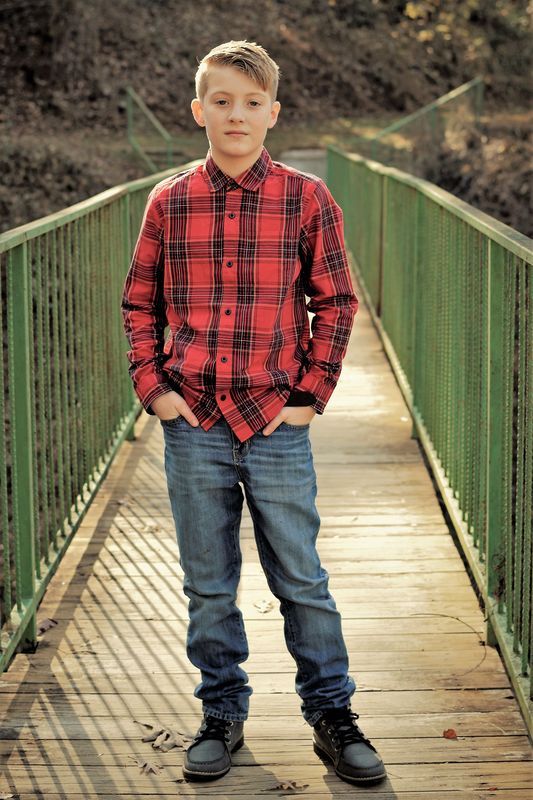
I posted this in the people section a few days ago, but I just came across this topic and thought I would post a few of the photos I took of my children the other day. I am definitely not a professional but I love doing portrait work and would love to learn as much as I can. This was taken with a Nikon D3300, 35mm f/1.8 G lens in natural light. I was using a large difuser to battle the sun on many of my shots but I don't think it was used in this shot due to their not being a place for my "assistant" (my 9 yo son lol) to stand with it. I took several shots that day that I was very happy with but would like to hear some professional opinions on what I might have done better. I don't have any lighting equipment as of yet so most of my work is done in natural light. I am just going to post my favorite shot of the day on this topic. I may start another topic with a couple other of my favorites. Thank you for taking the time to look and provide me with any knowledge.
Nov 26, 2019 07:24:01 #
There's a section here on UHH called "Professional and Advanced Portraiture". Mr Shapiro and Captain C manage the section and give expert critique.
I think it's very good except for a couple of things. The top of the railing on the left side intersects with his shoulder. I would want some space there like it is on the right side. It looks like you took this from standing height. Maybe a slightly lower camera angle.
I think it's very good except for a couple of things. The top of the railing on the left side intersects with his shoulder. I would want some space there like it is on the right side. It looks like you took this from standing height. Maybe a slightly lower camera angle.
Nov 26, 2019 10:22:53 #

CO wrote:
There's a section here on UHH called "Professional and Advanced Portraiture". Mr Shapiro and Captain C manage the section and give expert critique.
I think it's very good except for a couple of things. The top of the railing on the left side intersects with his shoulder. I would want some space there like it is on the right side. It looks like you took this from standing height. Maybe a slightly lower camera angle.
I think it's very good except for a couple of things. The top of the railing on the left side intersects with his shoulder. I would want some space there like it is on the right side. It looks like you took this from standing height. Maybe a slightly lower camera angle.
I agree with these quibbles - it's a great shot, though, and those issues are things only a pro would notice.
Andy
Nov 26, 2019 12:24:35 #
CO wrote:
There's a section here on UHH called "Professional and Advanced Portraiture". Mr Shapiro and Captain C manage the section and give expert critique.
I think it's very good except for a couple of things. The top of the railing on the left side intersects with his shoulder. I would want some space there like it is on the right side. It looks like you took this from standing height. Maybe a slightly lower camera angle.
I think it's very good except for a couple of things. The top of the railing on the left side intersects with his shoulder. I would want some space there like it is on the right side. It looks like you took this from standing height. Maybe a slightly lower camera angle.
Thank you. I thought I did post it in the professional and advanced portraiture section. I agree with you on the railing I was thinking that I wished I had moved him over just slightly. Hindsight...next time I will use the lower camera angle. I did try to make most of my shots from their eye level. He is only slightly shorter than me ( maybe a few inches) so with the standing shot I didn't think to get lower. Thank you for the advice.
Nov 26, 2019 12:26:05 #
AndyH wrote:
I agree with these quibbles - it's a great shot, though, and those issues are things only a pro would notice.
Andy
Andy
Thank you. I really enjoy doing portrait work and want to improve. I have limited subjects however and I was so happy that my boys agreed to be my subjects/assistants this day. They were both great.
Nov 26, 2019 18:29:04 #
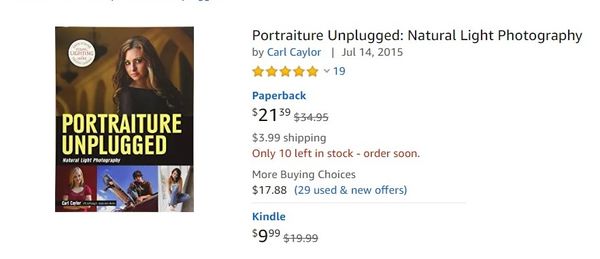
You mentioned that you like to use natural light. I got the book "Portraiture Unplugged: Natural Light Photography" by Carl Caylor. The whole book is about doing portraiture with natural light. The author shows how to position your model and also how to set up reflectors. He will do that often for fill light. You can do a "Look Inside" on Amazon. If you do the "Look Inside" go to pages 18-23. Those pages show the window and reflector placement.
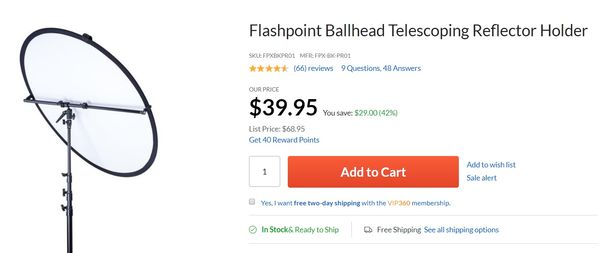
Here's a great reflector holder I got from Adorama Camera. It's the Flashpoint Ballhead Telescoping Reflector Holder. It has a ball joint that allows the user to quickly adjust the reflector and lock it in place. You can put the reflector in just about any position. I got a 6' light stand and 42" reflector that I use with it.
Here's a great reflector holder I got from Adorama Camera. It's the Flashpoint Ballhead Telescoping Reflector Holder. It has a ball joint that allows the user to quickly adjust the reflector and lock it in place. You can put the reflector in just about any position. I got a 6' light stand and 42" reflector that I use with it.
Nov 26, 2019 18:40:04 #
CO wrote:
You mentioned that you like to use natural light. ... (show quote)
I will look in to both. I have a reflector that has four color options and can also be used bare as a diffuser. My kids held it for me on that shoot but they are not always willing or available. A stand would be helpful.
Nov 27, 2019 05:52:24 #
maggiemae wrote:
I will look in to both. I have a reflector that has four color options and can also be used bare as a diffuser. My kids held it for me on that shoot but they are not always willing or available. A stand would be helpful.
Make sure you use a sand bag (5-10#) on the bottom of the stand when shooting outdoors since a very slight breeze can and will tip everything over. Been there done That!! many yrs ago.
Nov 27, 2019 06:08:20 #
Manglesphoto wrote:
Make sure you use a sand bag (5-10#) on the bottom of the stand when shooting outdoors since a very slight breeze can and will tip everything over. Been there done That!! many yrs ago.
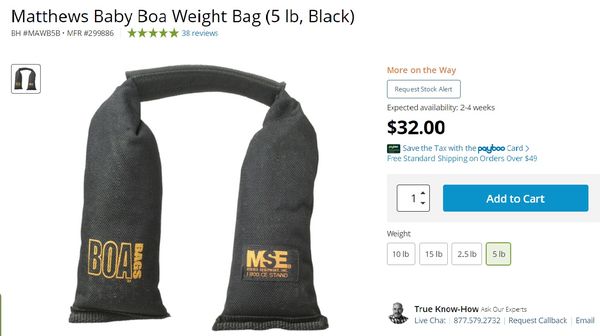
 That's a good tip. I got this 2.5lb. Boa Bag. I hang it on the light stand where the vertical column and legs intersect. I like that it's filled with steel shot instead of sand. A 5lb. bag would be better if it's windy outside.
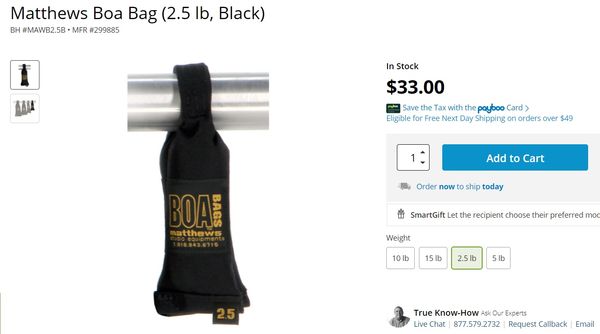
Nov 27, 2019 06:08:51 #
Manglesphoto wrote:
Make sure you use a sand bag (5-10#) on the bottom of the stand when shooting outdoors since a very slight breeze can and will tip everything over. Been there done That!! many yrs ago.
Yeah those reflectors are like giant kites lol. There was some wind blowing this day and my younger son had a bit of trouble with it sometimes.
Nov 27, 2019 06:13:49 #
CO wrote: That's a good tip. I got this 2.5lb. Boa Bag. I hang it on the light stand where the vertical column and legs intersect. I like that it's filled with steel shot instead of sand. A 5lb. bag would be better if it's windy outside.
That's a good tip. I got this 2.5lb. Boa Bag. I hang it on the light stand where the vertical column and legs intersect. I like that it's filled with steel shot instead of sand. A 5lb. bag would be better if it's windy outside.I made my first sand bags out of old pants legs and heavy baggies to keep the sand dry and from shifting through.
Nov 27, 2019 06:28:27 #
Manglesphoto wrote:
I made my first sand bags out of old pants legs and heavy baggies to keep the sand dry and from shifting through.
I guess sand is alright if it's contained well enough. Since you put the sand in baggies, that would prevent it from escaping out. I like the Boa Bags because the steel shot is bigger and is less likely to leak out.
Nov 27, 2019 07:03:58 #
CO wrote:
I guess sand is alright if it's contained well enough. Since you put the sand in baggies, that would prevent it from escaping out. I like the Boa Bags because the steel shot is bigger and is less likely to leak out.
I liked the price, and when I did this commercial bags were not readily available.
I later got some used medical sand bags (heavy vinyl coated)
I did use sandbags on all of my light stands in the studio even the very heavy roll around boom stand.
Better safe than sorry and sued.
Nov 27, 2019 12:49:38 #
Alafoto
Loc: Montgomery, AL
CO wrote:
You mentioned that you like to use natural light. ... (show quote)
I, too, use an adjust to any position reflector stand. My wife. An indispensable accessory. She used to excel also at holding a second flash for wedding photography back in the day. Sure glad I don't do THAT anymore.
Nov 27, 2019 12:50:47 #
Alafoto
Loc: Montgomery, AL
CO wrote: That's a good tip. I got this 2.5lb. Boa Bag. I hang it on the light stand where the vertical column and legs intersect. I like that it's filled with steel shot instead of sand. A 5lb. bag would be better if it's windy outside.
That's a good tip. I got this 2.5lb. Boa Bag. I hang it on the light stand where the vertical column and legs intersect. I like that it's filled with steel shot instead of sand. A 5lb. bag would be better if it's windy outside.Camera bag placed near the intersection of the stand's cross braces will work.
If you want to reply, then register here. Registration is free and your account is created instantly, so you can post right away.