Bob Asked Me to Describe My Process
Oct 2, 2019 07:39:49 #
I need to preface this thread and say I love Photoshop. When I work with photoshop I go into a zone and I don't pay much attention around me. The TV can be on and I don't hear it or pay any attention to it. Because of this I probably use more layers than the normal person. Layers for me are Non Destructive, simple and quick. What I learned has been over the past 5 years mostly on YouTube. If I get hung up on a process I go to YouTube and type in let's say, Photoshop Blend-If, into the header and bingo you have 5 videos describing you subject.
OK so......
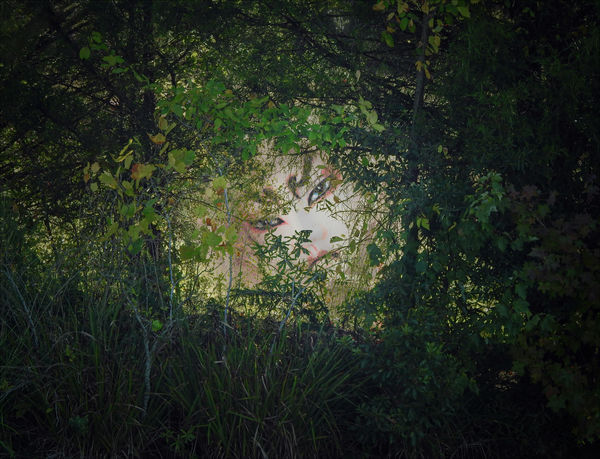
First- Picture is finished picture.
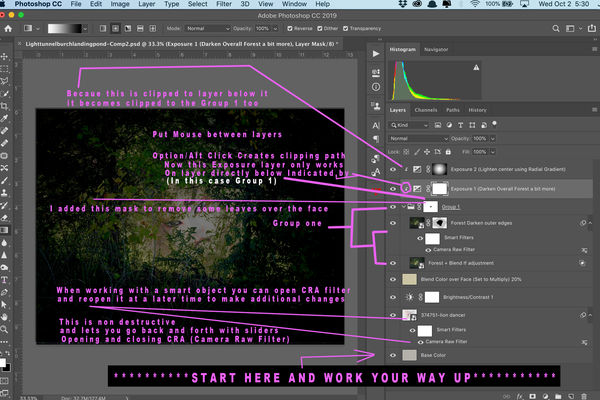
Second- Picture is trying to let you know what each layer is used for
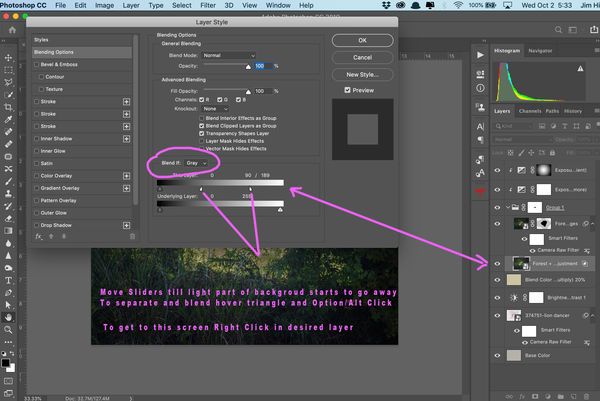
Third- Picture is showing you the Bend-If screen used to remove the cream colors letting in the woman's picture
Just needed to mention the second forest layer is also bringing back the cream colors on the outer edges that the previous Blend-If removed.
OK Im not the best teacher or comunicator but if you have questions I will try to answer them.😗
OK so......
First- Picture is finished picture.
Second- Picture is trying to let you know what each layer is used for
Third- Picture is showing you the Bend-If screen used to remove the cream colors letting in the woman's picture
Just needed to mention the second forest layer is also bringing back the cream colors on the outer edges that the previous Blend-If removed.
OK Im not the best teacher or comunicator but if you have questions I will try to answer them.😗
Oct 2, 2019 23:04:25 #

Thank you Jim. As you have said many times, there are many, many ways to arrive at a similar result. Like you, I have spent about 5 years getting to know Photoshop and I still consider myself an Enthusiast.
Oct 3, 2019 06:55:47 #

I second that thank you Jim. It was not until I watched a lesson in a scrapbook craft site that Layers was demystified. Prior to that Layers was explained at levels that catered to those already familiar with how to use Layers. I will recommend your post to a friend who knows in her mind that Layers is not a subject she wants to tackle, far too difficult. Perhaps this post will change her mind... "is that all there is?" One must stick their toe in as a first step to skillful swimming.
What program did you use for the screen capture and notation? I use Lightshot which is a free program.
What program did you use for the screen capture and notation? I use Lightshot which is a free program.
Oct 3, 2019 07:32:18 #
dpullum wrote:
What program did you use for the screen capture and notation? I use Lightshot which is a free program.
I work on a Mac so to copy anything on my screen I use (Command + Shift + 4) At that time a cross hairs becomes visible and you place it with the mouse at a starting point and drag it over the area you want to cover then let go. It will automatically make a file of the desired area that will open in Preview or Photoshop and other programs.
Oct 3, 2019 13:28:52 #
Thank you for the tutorial, the screen shots really helped me to understand what you did and how you got there. So much to learn in PS
If you want to reply, then register here. Registration is free and your account is created instantly, so you can post right away.