How do I edit this picture orjust have re-shoot it? HELP!!!???
Jul 12, 2019 08:58:57 #
ggab
Loc: ?
Herbie1924 wrote:
In the 1st place - it's someone else's art work & if entered in competition, it's bound to be rejected - unless
you just want to have the pic because you know the artist who made it.
you just want to have the pic because you know the artist who made it.
Seriously????

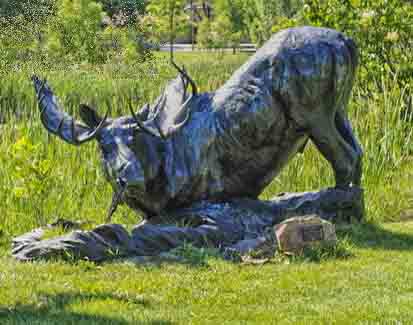
Or, perhaps it's an interesting sculpture in a public environment and he felt like taking a picture of it.
Jul 12, 2019 09:12:19 #
Bobspez wrote:
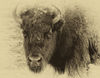
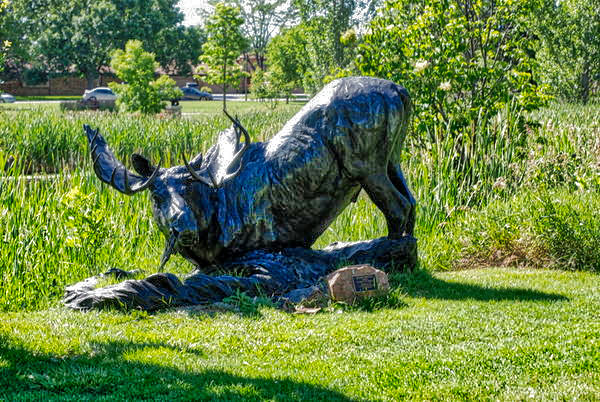
Attached was the best I could do with PS shadows and highlights adjustments. Problem is the shadow on the right side of the animal's face is too dark to bring out any meaningful detail. The heavy shadow obscures half of the face.
Plus you are working with a very small file. If they had stored the original you would have more pixels to work with and maybe a brush in shadow would help.
Jul 12, 2019 09:12:27 #
gvarner
Loc: Central Oregon Coast
In the future, fill flash will be your savior, emphasis on "fill". At close range, even your pop-up flash can do a decent job for fill flash (that’s about all it’s good for).
Jul 12, 2019 09:14:06 #

Learn to "chimp" when you take shots. Best to catch your mistakes as you make them.
Jul 12, 2019 09:44:50 #

Re-shoot with flash fill. There is too much contrast/range of exposure between the blown out sections due to sun reflections and the dark shadows. P/S nor Lightroom can bring the detail you need back.
Jul 12, 2019 10:25:59 #

stuparr935 wrote:
Re-shoot with flash fill. There is too much contrast/range of exposure between the blown out sections due to sun reflections and the dark shadows. P/S nor Lightroom can bring the detail you need back.
If you shoot raw, expose for the highlights to avoid blowing them out, the adjustments to darker areas to be able to extract detail shouldn't be a problem with this image. In fact there is even enough detail in the highlights in the posted thumbnail to make an acceptable image.
I did a quick and dirty adjustment in Photoshop, but a better, though lengthier approach would be to use Luminosity Masking to isolate and target the darkest and next to darkest tones to bring out detail and contrast, and the brightest highlights to bring out some additional detail.
Here is a far more "impossible" light situation, much more contrast and very deep shadows. Same image file.
.
Jul 12, 2019 11:11:28 #
photoman022
Loc: Manchester CT USA
I did an hdr (I couldn't recover any of the blown out highlights).
I cloned out some of the background (there were digital artifacts in the cloning, probably due to file compression).
I used NIK on it.
Then I finally cropped it to 11x14.
I cloned out some of the background (there were digital artifacts in the cloning, probably due to file compression).
I used NIK on it.
Then I finally cropped it to 11x14.
Jul 12, 2019 13:12:38 #

You asked "or do I have to shoot it again". Apparently you are able, so I would suggest shooting again. If shooting the same time of day use a polarizing filter as the shadows would indicate a 90 degree angle from the sun. Check histogram for proper exposure.
Jul 12, 2019 16:49:32 #
This picture has good interest BUT the dymanic range of light values is too great to allow it to be made outstanding. Was it shot in RAW to facilitate the camera's response to the dynamic range of the scene? The post processing done by other photographers helps the photo but it still falls short.
My advice would be fill in flash or retake the photo. The best way to get a better photo out of his scene would be to shoot on a day with softer light ie. overcast . Hard light is very difficult to work with. I watched a very accomplished photographer at a garden wedding last weekend in bright sunshine. All the photos were staged in shaded areas lit by open skylight but shielded from direct sun. Also, as Mark Sturtevant mentioned, shooting from a lower angle might help obscure the eyesnags in the background. I've heard it said that a photographers best tool is their knees. (I think though that it's the brain telling the photog that a lower camera position by Kneeling down may improve a picture)
I can appreciate that returning to the scene may not be convenient. But it's something to keep in mind on the next overcast or rainy day. You will have to be the judge of whether or not the photo justifies a trip solely dedicated to photographing this scene or whether it should be wrapped into a neat package with the other reasons (excuses) to visit the place again in better lighting IE Shopping, visit a friend, enroute to another destination etc. etc. etc.
I like the concept of the photo. Keep working at it!
Jul 12, 2019 17:00:59 #
Jul 12, 2019 18:57:52 #
mlkddk wrote:
I shot this picture yesterday at 401 PM, Nikon D80... (show quote)
Open it in Camera Raw from Bridge. You can probably get it where you want using the Targeted Adjustment Brush - click on the Brush, then Clarity and start "painting" the subject. This will bring out the subtle midtones and detail of the statue. You can also adjust the exposure in specific areas this way. There are some good tutorials on youtube that show you this process in detail.
Jul 12, 2019 19:25:46 #
I did a one layer HDR in Aurora. Took all of about 20 seconds. Here is what I got without doing any other Post Processing.
Jul 12, 2019 19:29:28 #
Bronze is inherently a lot more contrasty by nature than our vision would suggest. Given Lightroom, you might just try the various shadow/highlight and white/black controls. Then on to the radial suggestion if that's not enough.
Jul 16, 2019 02:42:00 #
Jul 16, 2019 08:39:04 #
John Sh wrote:
To paraphrase Steve Perry "show it the delete button"
Or . . .
Use a less than perfect image as an opportunity to learn new post processing skills.
One can give up too easily because it is so easy to hit "delete" in disgust. I personally won't do delete until I have exhausted all possible avenues to improve an image.
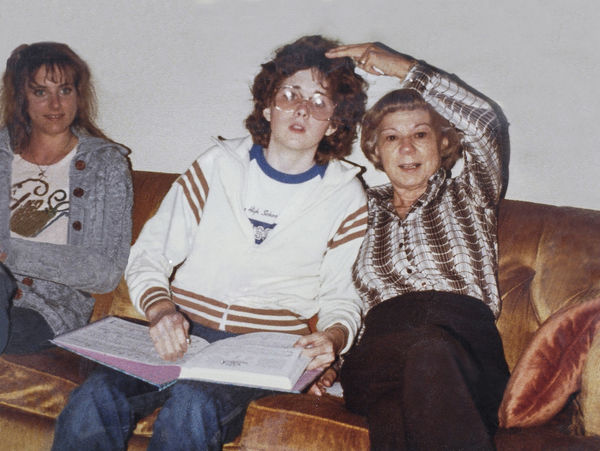
Case in point. I used to do retouching work for a fashion photographer who was working on her portfolio, so she could not afford the big-ticket, Madison Ave level retouchers. Having done some of that work in the past, I would help out from time to time with that task. It would not be unusual for me to spend anywhere from 60-120 minutes on a single headshot in Photoshop. She was a good photographer and usually had a good MUA to properly prep the model(s) - so the work was relatively straightforward. However, to make an image that would be convincing to a prospect, the images ALL needed a retoucher's magic to make it happen. None of those images were even close to being trash-bin worthy, but none were presentable to highly critical creative directors.
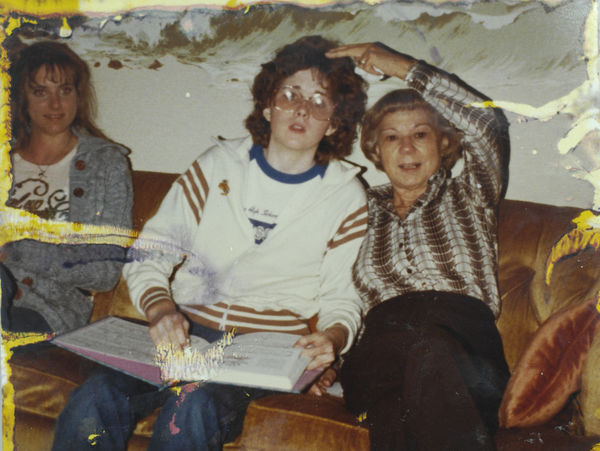
The other case is when you are doing photo restoration. You may have a badly faded or damaged print to work with, and again, you'd need to explore whatever toolboxes are available to you to make something nice happen.
This image was the result of about an hour's worth of work. It was from a 4x6 print that was pulled out of a flooded home. Trash bin or delete was not an option. Just sayin'
The more challenges/learning opportunities you take on, the deeper your skill set becomes, making it easier to actually recognize the difference between a "delete" and a "let me see what I can do with this image" moment. There is a certain feeling of accomplishment, not to mention the joy when you hand over a restored image to a client that is completely priceless.
If you want to reply, then register here. Registration is free and your account is created instantly, so you can post right away.