black white and grey cards, does anyone have a clue?
Apr 23, 2019 11:53:27 #

Ok I recently got an xrite color passport photo with its 3 cards and they pretty much make sense
The white balance card is designed to set a custom white balance. The main macbeth grid is used to sort out your cameras response so the colors are correct the third card mostly is an effects card so if you white balance of these patches you can add a warming or cooling effect.
Then today I got 3 cards on a lanyard white, mid grey (mid gray we have a slight language barrier here), and black.
Ok the Grey is what you are supposed to meter off to get a correct exposure for mid grey.
Why mid grey? thats what cameras with built in light meters assume the world to be on average, fairly often it isn't, hence the card.
Some people will try to use it as a white balance card but that may not be successful depending on the light, reflected light sources can play tricks on you. The xrite white balance patch is better in its response to light and the signal is much stronger so sensor noise can not effect the result (of course being brighter the xrite color balance patch is useless for exposure).
So what about the white and black cards what are they for? It seems youtube is stumped, everybody seems to skip over these 2 cards.
I even watched a review where the lady talked about the lanyard and the thickness of the cards and did not actually say what any of the cards were for.
I did find one video where a fella used a black card to block the sky in a long exposure for 17 out of a 20 second exposure. kind of a Graduated neutral density effect. That may be completely wrong unless you are using a very strong ND filter, but sky's are often too bright compared to the subject.
It might be interesting to block the foreground and leave the sky to reveal the stars more strongly than the foreground. With the Pentax K1 the sensor can track the stars without turning them into streaks but that also blurs the foreground so this might be an interesting technique for long star exposure with less foreground blurring.
The white card might be usable for white balance maybe...
What are the black and white cards for then?
Maybe to help set black and white points in post.
Measuring highlights and shadows?
What are they used for?
Apr 23, 2019 11:58:49 #
These YouTube videos are pretty good, at least the first two from Xrite. Don't bother with Theoria Apophasis, he is the most annoying YouTube photographer.
https://www.youtube.com/results?search_query=x+rite+colorchecker
https://www.youtube.com/results?search_query=x+rite+colorchecker
Apr 23, 2019 12:28:41 #
rgrenaderphoto wrote:
These YouTube videos are pretty good, at least the first two from Xrite. Don't bother with Theoria Apophasis, he is the most annoying YouTube photographer.
https://www.youtube.com/results?search_query=x+rite+colorchecker
https://www.youtube.com/results?search_query=x+rite+colorchecker
This ones pretty good for the passport and color balance
https://www.youtube.com/watch?v=V39n1J8IgpA
Still leaves the 3 exposure cards and how best to use them.
To be fair the color checker passport has a prerequisite to give good results and that is the exposure. If that is off then the passport can give poor results.
Apr 23, 2019 12:57:22 #
Those 3 cards would be useful with the zone system where the black card would be zone 0 or 1, the grey zone 5 or 6, and the white card zone 9 or 10.
That's my WAG.
Let's see how many pages your question generates.
That's my WAG.
Let's see how many pages your question generates.
Apr 23, 2019 12:57:24 #
Apr 23, 2019 12:58:16 #
Apr 23, 2019 13:05:19 #
PGHphoto
Loc: Pittsburgh, PA
blackest wrote:
Ok I recently got an xrite color passport photo wi... (show quote)
I don't know specifically if the black card is meant for it but on higher end (tv) video cameras there is also a black balance setting/adjustment. Often black can take a green or blue hue if not correctly set. Most cameras just take that reading with a closed shutter though.
The zone explanations sound probable to me as well.
Apr 23, 2019 13:41:36 #

Back when I shot 2 1/4 film I tried to learn the Zone system. I had black and white cards. I never did get it figured out.
Apr 23, 2019 15:01:41 #

blackest wrote:
... The white balance card is designed to set a custom white balance. ...
Only if the card and the subject are illuminated by the same light. If the light is mixed (some sunlight and some skylight or a mixture of light sources and reflections) that's not going to work.
blackest wrote:
... the Grey is what you are supposed to meter off to get a correct exposure for mid grey. ...
Same issue. You are better off learning how to use an incident light meter.
blackest wrote:
... So what about the white and black cards what are they for? It seems youtube is stumped, everybody seems to skip over these 2 cards. ...
Everybody skips over them because they are relatively useless, pretty much for the same reason I already mentioned.
The white and black card reflect a specific percentage of the light incident upon them. Their % reflectance is constant.
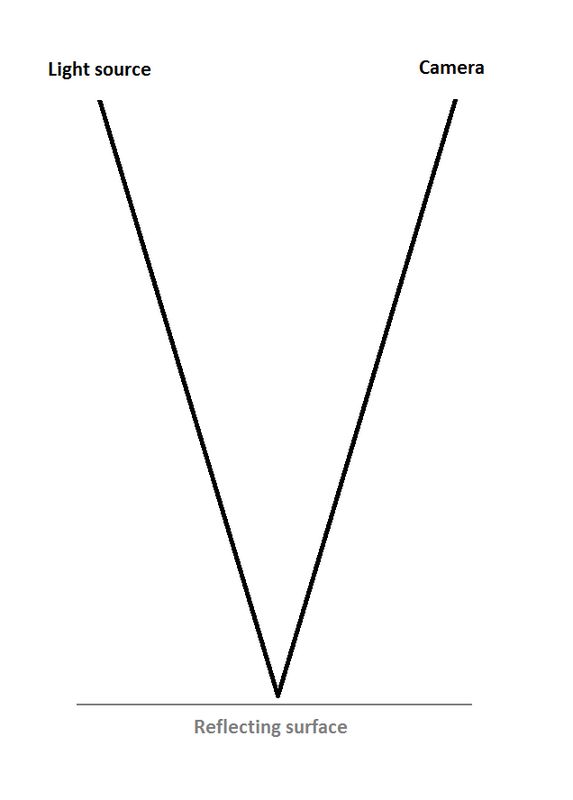
But some of the light reflected from the card is specular - depending on the shininess of the surface. When the angle of incidence equals the angle of reflection the apparent brightness reaches its maximum.
This is what happens when you photograph an egg. There is one spot where the white is brightest. Even when you photograph a flat surface you can see the difference in brightness unless the surface has no "shine", i.e., no specular reflection.
Apr 23, 2019 15:12:47 #
Linary
Loc: UK
blackest wrote:
Ok I recently got an xrite color passport photo wi... (show quote)
This article may throw some light on the subject:
http://photo.stackexchange.com/questions/77315/why-do-gray-cards-come-with-a-black-card-and-a-white-card
Apr 23, 2019 16:10:55 #

Maybe to get the right 'white balance' for a shiny black object when the light is neither sunny nor cloudy. Vice versa for the white card. We 'expect' colors to be 'as we want them' but a 'black' or 'pure white' is rare in nature. Only when you have a 'known' white does the eye accept tints and hue 'differences'. Jet black,Coal black, Black flint, etc all have a different colour.
just a guess
just a guess
Apr 23, 2019 17:11:00 #
G Brown wrote:
Maybe to get the right 'white balance' for a shiny black object when the light is neither sunny nor cloudy. Vice versa for the white card. We 'expect' colors to be 'as we want them' but a 'black' or 'pure white' is rare in nature. Only when you have a 'known' white does the eye accept tints and hue 'differences'. Jet black,Coal black, Black flint, etc all have a different colour.
just a guess
just a guess
To cloud the issue a little more, the white balance of the specular portion of the light coming from a gray or white card is determined by the color of the light source, often the sun.
Only some of the whiteness of the non-specular light is due to the light source. The rest is determined by all of the competing sources like the sky and the clouds.
That's why I don't bother with white balance at all when I am shooting. I just set the camera to Daylight WB and correct if necessary (almost never) in PP.
Apr 24, 2019 05:30:01 #
rgrenaderphoto wrote:
These YouTube videos are pretty good, at least the first two from Xrite. Don't bother with Theoria Apophasis, he is the most annoying YouTube photographer.
https://www.youtube.com/results?search_query=x+rite+colorchecker
https://www.youtube.com/results?search_query=x+rite+colorchecker
Theoria is alright for Fuji users( taken with a grain of salt) those Northrop’s are the annoying ones
Apr 24, 2019 07:42:14 #

I have the three cards to which you refer. I also have the Macbeth Color Card. The three cards travel with me the vast majority of the time. The Macbeth card is used only in the lab. It's also the first thing I photograph with any camera that is new to me.
If needed, I meter off the white card and place that value in the Zone I wish. I use a custom WB action in processing in PS.
--Bob
If needed, I meter off the white card and place that value in the Zone I wish. I use a custom WB action in processing in PS.
--Bob
blackest wrote:
Ok I recently got an xrite color passport photo wi... (show quote)
Apr 24, 2019 09:03:40 #

blackest wrote:
Ok I recently got an xrite color passport photo wi... (show quote)
I use a similar implementation of the same idea, which is the Photovision One Shot Digital Calibration Target. It's available in several sizes (6", 14", 24", and maybe still 32").
https://www.bhphotovideo.com/c/search?Ntt=photovision%2024%22%20one%20shot%20digital%20target&N=0&InitialSearch=yes&sts=ps
The idea of the One Shot Target is to fill the frame with equal parts of black, gray, and white. Then take a meter reading for 100% manual exposure. Next, put the camera in Custom or Manual or Preset White Balance mode (It's called various things by different manufacturers). Follow your camera's procedure to set the custom white balance. The resulting JPEG will be very close to a normal exposure for whatever the same light is illuminating.
You can also expose the target in raw mode, and use it to achieve accurate white balance later, during post production. Use the eyedropper tool in Lightroom, etc. to set it with the gray patch. Then adjust the sliders to bend the shadows and highlights a bit.
Photo paper cannot reproduce a full histogram of tonal values from 0-255. Most silver halide processes can show detail from, at best, 12-242, and typically about 18-236. High end 8 to 12 color inkjet can do a bit better, but consistently only 12-242. Anything lower is plugged up black, while anything higher is perceived as burned-out specular highlight paper white.
That's where the highlight and shadow (white and black) tiles or panels or stripes come in. If you look closely, you'll notice that they are not absolutely white and black, and that's on purpose. The camera's custom white balance tool will not slam them up against the left and right side of the histogram when you set a normal exposure. Instead, when your exposure is accurate, you'll see them at the ends of the ranges listed in the last paragraph. They will ensure that you have some thread detail in a white shirt, and some texture in a black wool sweater, for instance.
Of course, if you want to eyedropper them and adjust curves for neutral color in shadows and highlights, that's okay, too. And, if your final image will be viewed only on screens, you can expand the contrast a bit to fill a full histogram and provide a bit more brilliance.
If you need the most accurate color you can get, use the ColorChecker Passport system with Lightroom and print to a high end Epson with a 16-bit printer driver, directly from Lightroom. You need a 10-bit video card and monitor, properly calibrated and profiled with a hardware/software kit, and your working color space should be set to the wide gamut ProPhoto RGB. Lr will convert your images directly to the profile for the printer/ink/paper in use. Many museums and ad agencies and high end professionals use this sort of workflow for their best prints.
If you want to reply, then register here. Registration is free and your account is created instantly, so you can post right away.