Raw Raw - Getting the dynamic range.
Apr 8, 2019 11:01:49 #
Hi All,
I would like to start this topic off with a video.
https://www.youtube.com/watch?v=RW7AFP8wnR8
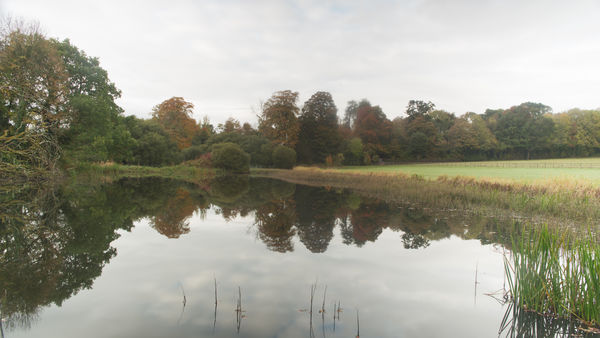
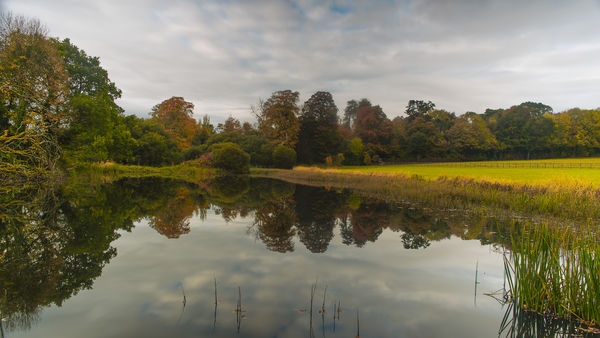
Ok so you see the problem? Honestly watching the video will help. Ok Your camera can capture a huge dynamic range but adobe expects you to use a small proportion of that. So they apply an S curve to your raw file. This stops you recovering highlight detail and shadow detail.
3D lut creator can in later versions create a camera profile without that S curve, which helps you get the best detail from your raw file.
but that's going to cost $250.
Adobe DNG converter does have a custom setting that will let you convert to a linear conversion without the S curve. This might help.
It is free (which is a help).
http://dcptool.sourceforge.net/Introduction.html
This is a free tool which should decompile an adobe dcp file to xml let you edit it and then recompile. You should then be able to apply this profile in lightroom / photoshop and get the detail adobe took away.
OK here are some experiments.
first an xrite profile for my k1 decompiled I find
<ProfileHueSatMapEncoding>0</ProfileHueSatMapEncoding>
ok its a big table but it's only color correcting a photo of my macbeth chart to make the swatches the correct color. The hue twists mentioned on the video and dcptools home page.
That's about what you would expect.
If you decompile some of adobes dcp files you find other tables including the contrast curve , delete that and recompile and you have a linear profile that you can work with.
On Windows:
Save DCPs to:
C:\Users\_Username_\AppData\Roaming\Adobe\CameraRaw\CameraProfiles
Load base DCPs from:
C:\ProgramData\Adobe\CameraRaw\CameraProfiles
Save Lightroom presets to:
LR7.2 and below C:\Users\_User name_\AppData\Roaming\Adobe\Lightroom\Develop Presets
LR7.3 and above C:\Users\_Username_\AppData\Roaming\Adobe\CameraRaw\Settings
On Mac:
Save DCPs to:
/Users/_User name_/Library/Application Support/Adobe/CameraRaw/CameraProfiles
Load base DCPs from:
/Library/Application Support/Adobe/CameraRaw/CameraProfiles
Save Lightroom presets to:
LR7.2 and below /Users/_User name_/Library/Application Support/Adobe/Lightroom/Develop Presets
LR7.3 and above /Users/_User name_/Library/Application Support/Adobe/CameraRaw/Settings
Have fun. You do need to save the profiles to the right location or they don't turn up in lightroom, they do seem tied to camera model, which is probably a good thing.
Apr 8, 2019 19:09:41 #
Thank you for another important and comprehensive topic, blackest! Don't hate me for not watching the video, but I'm curious enough to ask this question: if PS ACR applies this limiting action and it is a significant drawback to retaining detail, why is it part of the software to begin with?
Many thanks for a non-technical reply, if possible
Many thanks for a non-technical reply, if possible

Apr 8, 2019 21:00:49 #
Linda From Maine wrote:
Thank you for another important and comprehensive topic, blackest! Don't hate me for not watching the video, but I'm curious enough to ask this question: if PS ACR applies this limiting action and it is a significant drawback to retaining detail, why is it part of the software to begin with?
Many thanks for a non-technical reply, if possible
Many thanks for a non-technical reply, if possible

The video would help. :)
The S curve gives contrast and it works pretty well if there is not too much dynamic range. There can be a lot of detail in the highlights that we don't see due to the top of the curve. You might see it in a sky perhaps where it looks white but if you pull the exposure down you see there is blue there as well. trouble is then you have the rest of your photo in shadow and too dark. Color can be incredibly complicated.
If you watch the video with the sound down even. You should get to appreciate that the adjustments you can make in lightroom are limited and with these techniques a better result can be obtained.
Apr 9, 2019 11:06:34 #
OK, I viewed. Wasn't nearly as painful as I thought it would be  Very interesting information for those who enjoy as much control as possible over their software.
Thanks again for posting!
 Very interesting information for those who enjoy as much control as possible over their software.
Thanks again for posting!
Apr 9, 2019 13:10:12 #
blackest wrote:
Hi All, br I would like to start this topic off wi... (show quote)
I watched the video, downloaded the DCPTool, followed your instructions, and created new profiles for my Canon G16, Canon 60D, and Canon 80D.
I played with several photos and uniformly across the board noticed a more centered histogram. I also noticed more detail in the shadows, and more vibrant colors.
I think it’s a pretty cool tool to add to the arsenal.
To use the DCPTool you do have to be comfortable working through the command window on Win 10. I created batch files following DCPTool’s usage page.
To edit the xml file I used Brackets text editor.
It can be downloaded here: http://brackets.io/
Thanks for sharing!
Apr 9, 2019 16:27:36 #
You do realize that a LUT is only a profile and is therefore only a shortcut? In effect, all those silly camera jpg settings like "natural", "vibrant", "vivid", "landscape", "portrait", etc are just LUTs.
Using the sliders for the various parameters in Lightroom or ACR you have total control of your raw data, but you have to do the adjustments manually. That video is only an ad for the LUT program. LUTs are handy but hardly necessary, and you really don't want a linear profile, since it looks very flat and lifeless. You will want some soecues of S curve, with modifications depending on the look you want and the characteristics of the image file.
Using the sliders for the various parameters in Lightroom or ACR you have total control of your raw data, but you have to do the adjustments manually. That video is only an ad for the LUT program. LUTs are handy but hardly necessary, and you really don't want a linear profile, since it looks very flat and lifeless. You will want some soecues of S curve, with modifications depending on the look you want and the characteristics of the image file.
Apr 9, 2019 21:34:37 #
kymarto wrote:
You do realize that a LUT is only a profile and is... (show quote)
The point of a linear profile is to give the greatest flexibility in creating the look you want. Applying a curve to a curve tends to result in a complicated curve. From what i've seen so far LUts can do a lot although sometimes you have to ask if this is what you want.
Oleg Sharonov has created a very powerful tool, i am still figuring out if its useful to me, several videos on his channel show things hard if not impossible to do in photoshop. You don't need his software to use LUTs and there are thousands available.
They are a bigger thing with Video than photography especially if you need to match footage from different cameras.
Apr 10, 2019 00:09:24 #
blackest wrote:
The point of a linear profile is to give the great... (show quote)
For video a LUT is good for prosumers, to burn in an approximate grading while shooting log gamma, which does give some advantage over shooting in a normal gamma. For pros, the LUT is useful in getting an approximation of grading for setting the exposure while shooting by applying the LUT to the viewfinder but recording in log gamma. From there it goes to grading, which is a bit like post processing in a raw editor for video, where everything is set by hand.
For still work it seems a whole lot of overkill to me, as you can season the raw to your taste and create a preset. Why pay good money for what you can do yourself rather easily?
The main thing to remember is that raw data is not affected at all by the LUT. OK, maybe some guys spend some time creating custom camera profiles based on the particularities of a given sensor, but even then they are just more fancy averages of what the camera does in camera. You can do the same thing yourself and to your taste quite easily.
Apr 10, 2019 08:31:07 #
kymarto wrote:
For video a LUT is good for prosumers, to burn in ... (show quote)
3D Lut creator is way too expensive, although he does do sales. Affinity Photo creates LUT's too. You don't need to use 3D Lut Creator.
Taken individually Photos can be styled as you please but in groups it works better when there is some consistency.Nothing wrong developing a style.
Apr 11, 2019 01:56:42 #
blackest wrote:
3D Lut creator is way too expensive, although he does do sales. Affinity Photo creates LUT's too. You don't need to use 3D Lut Creator.
Taken individually Photos can be styled as you please but in groups it works better when there is some consistency.Nothing wrong developing a style.
Taken individually Photos can be styled as you please but in groups it works better when there is some consistency.Nothing wrong developing a style.
You can do custom presets in LR and ACR with no sweat.
If you want to reply, then register here. Registration is free and your account is created instantly, so you can post right away.


