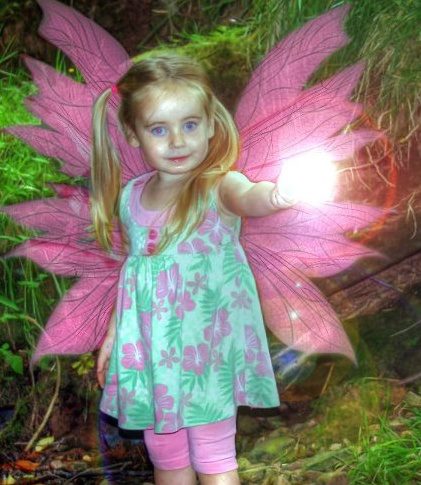
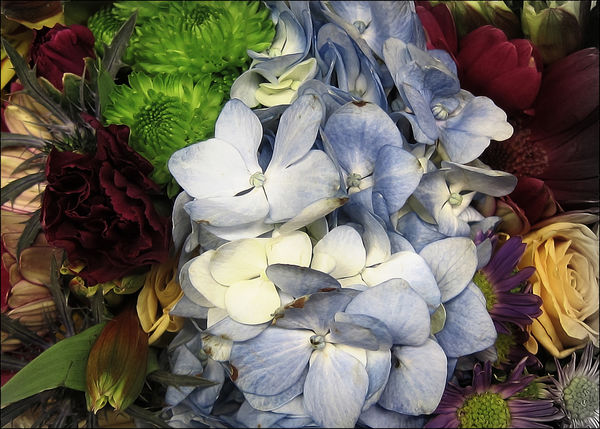
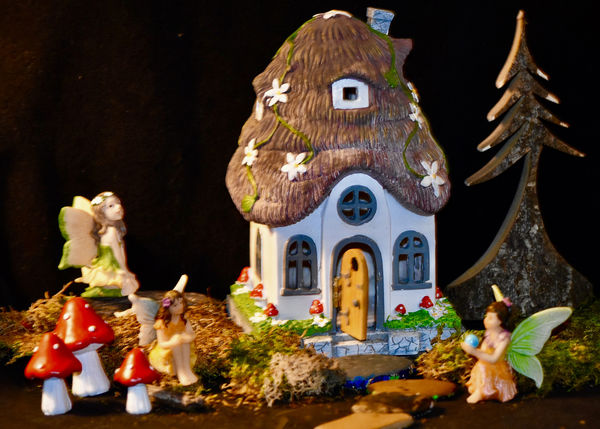
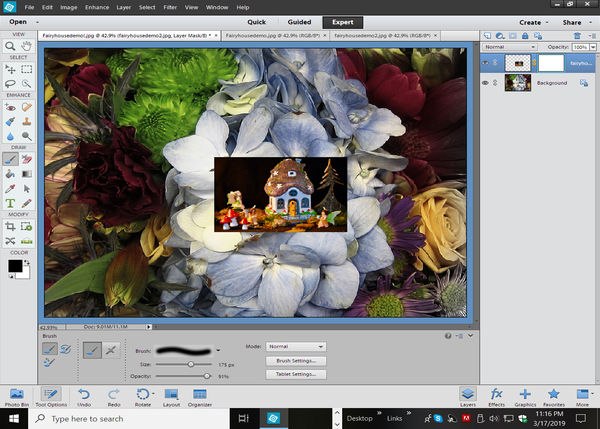
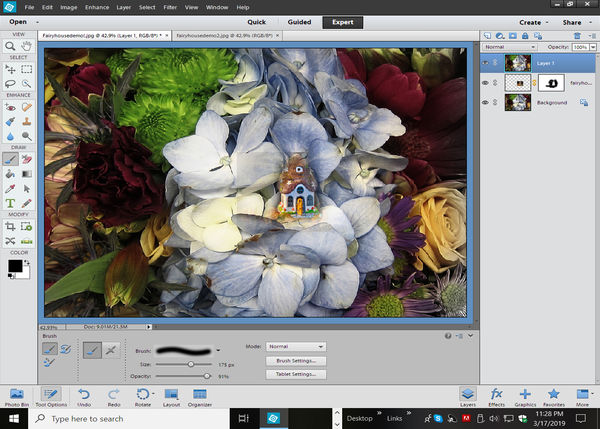
Start by getting two photos that go well together. They can be any type. I use flowers and a Hobbit house from Annie, with her permission. I’m using Element 12 for processing. Be sure to resize each photo so they are the same size and fully process each of them. Now you’re ready to load both photos into your editing program. Make sure the first photo in the viewing area is the flower! Then drag the home up and onto the flower. If they are the same size, the home should cover the flower completely! Next hit the ctrl and T button for the transform tool. Now click on the alt and shift keys. Put your cursor in the upper left corner and when you see a diagonal arrow drag the cursor slowly down to the lower right until the home is the right size you want and place it in the spot you want; then click the green check mark! Next look on the very top of your screen in the upper right and click on the third icon, this is the layer mask! See photo 3! The mask should be White! White reviles! In the lower left of your tool list you’ll see two squares; one Black and one White! Black conceals! Click the Paintbrush tool and set opacity to 100%! Adjust the size of the circle using the Bracket keys and paint over the House photo erasing the part of the house you want to hide. If you make a mistake click the box so that the White box is on top and paint back what you erased! When your done click Alt>ctrl>shift > E and save as a jpg! Photos 4 and 5!
Have fun,
Snap Shot
Bill, beautifully done. Thanks for sharing your processing techniques, it’s very generous of you.
joehel2 wrote:
Bill, beautifully done. Thanks for sharing your processing techniques, it’s very generous of you.
Thanks so much Joe! I hope others use this! Others have shown how to do this and the more we share the better off we all are!


Snap Shot wrote:
Start by getting two photos that go well together. They can be any type. I use flowers and a Hobbit house from Annie, with her permission. I’m using Element 12 for processing. Be sure to resize each photo so they are the same size and fully process each of them. Now you’re ready to load both photos into your editing program. Make sure the first photo in the viewing area is the flower! Then drag the home up and onto the flower. If they are the same size, the home should cover the flower completely! Next hit the ctrl and T button for the transform tool. Now click on the alt and shift keys. Put your cursor in the upper left corner and when you see a diagonal arrow drag the cursor slowly down to the lower right until the home is the right size you want and place it in the spot you want; then click the green check mark! Next look on the very top of your screen in the upper right and click on the third icon, this is the layer mask! See photo 3! The mask should be White! White reviles! In the lower left of your tool list you’ll see two squares; one Black and one White! Black conceals! Click the Paintbrush tool and set opacity to 100%! Adjust the size of the circle using the Bracket keys and paint over the House photo erasing the part of the house you want to hide. If you make a mistake click the box so that the White box is on top and paint back what you erased! When your done click Alt>ctrl>shift > E and save as a jpg! Photos 4 and 5!
Have fun,
Snap Shot
Start by getting two photos that go well together.... (
show quote)
I did this a few years ago of my Niece, not as clever as your image though. Used Brushes in Ps.
 CLF
Loc: Raleigh, NC
CLF
Loc: Raleigh, NC
Snap Shot wrote:
Start by getting two photos that go well together. They can be any type. I use flowers and a Hobbit house from Annie, with her permission. I’m using Element 12 for processing. Be sure to resize each photo so they are the same size and fully process each of them. Now you’re ready to load both photos into your editing program. Make sure the first photo in the viewing area is the flower! Then drag the home up and onto the flower. If they are the same size, the home should cover the flower completely! Next hit the ctrl and T button for the transform tool. Now click on the alt and shift keys. Put your cursor in the upper left corner and when you see a diagonal arrow drag the cursor slowly down to the lower right until the home is the right size you want and place it in the spot you want; then click the green check mark! Next look on the very top of your screen in the upper right and click on the third icon, this is the layer mask! See photo 3! The mask should be White! White reviles! In the lower left of your tool list you’ll see two squares; one Black and one White! Black conceals! Click the Paintbrush tool and set opacity to 100%! Adjust the size of the circle using the Bracket keys and paint over the House photo erasing the part of the house you want to hide. If you make a mistake click the box so that the White box is on top and paint back what you erased! When your done click Alt>ctrl>shift > E and save as a jpg! Photos 4 and 5!
Have fun,
Snap Shot
Start by getting two photos that go well together.... (
show quote)
Bill, excellent as usual.
Greg
steveastro wrote:
I did this a few years ago of my Niece, not as clever as your image though. Used Brushes in Ps.
Thanks for posting! Nice job steveastro! Thanks for sharing! It's always nice to see a new visitor!
CLF wrote:
Bill, excellent as usual.
Greg
Thanks so much Greg! I really appreciate that!
Snap Shot wrote:
Thanks for posting! Nice job steveastro! Thanks for sharing! It's always nice to see a new visitor!
Thanks very much Snap Shot, I have joined many forums over the years, and left, but really liking this one.
Thanks Jerry! I hope you try it!
Snap Shot wrote:
Start by getting two photos that go well together. They can be any type. I use flowers and a Hobbit house from Annie, with her permission. I’m using Element 12 for processing. Be sure to resize each photo so they are the same size and fully process each of them. Now you’re ready to load both photos into your editing program. Make sure the first photo in the viewing area is the flower! Then drag the home up and onto the flower. If they are the same size, the home should cover the flower completely! Next hit the ctrl and T button for the transform tool. Now click on the alt and shift keys. Put your cursor in the upper left corner and when you see a diagonal arrow drag the cursor slowly down to the lower right until the home is the right size you want and place it in the spot you want; then click the green check mark! Next look on the very top of your screen in the upper right and click on the third icon, this is the layer mask! See photo 3! The mask should be White! White reviles! In the lower left of your tool list you’ll see two squares; one Black and one White! Black conceals! Click the Paintbrush tool and set opacity to 100%! Adjust the size of the circle using the Bracket keys and paint over the House photo erasing the part of the house you want to hide. If you make a mistake click the box so that the White box is on top and paint back what you erased! When your done click Alt>ctrl>shift > E and save as a jpg! Photos 4 and 5!
Have fun,
Snap Shot
Start by getting two photos that go well together.... (
show quote)
Nice Photoshop work, Snap Shot.
Snap Shot wrote:
Start by getting two photos that go well together. They can be any type. I use flowers and a Hobbit house from Annie, with her permission. I’m using Element 12 for processing. Be sure to resize each photo so they are the same size and fully process each of them. Now you’re ready to load both photos into your editing program. Make sure the first photo in the viewing area is the flower! Then drag the home up and onto the flower. If they are the same size, the home should cover the flower completely! Next hit the ctrl and T button for the transform tool. Now click on the alt and shift keys. Put your cursor in the upper left corner and when you see a diagonal arrow drag the cursor slowly down to the lower right until the home is the right size you want and place it in the spot you want; then click the green check mark! Next look on the very top of your screen in the upper right and click on the third icon, this is the layer mask! See photo 3! The mask should be White! White reviles! In the lower left of your tool list you’ll see two squares; one Black and one White! Black conceals! Click the Paintbrush tool and set opacity to 100%! Adjust the size of the circle using the Bracket keys and paint over the House photo erasing the part of the house you want to hide. If you make a mistake click the box so that the White box is on top and paint back what you erased! When your done click Alt>ctrl>shift > E and save as a jpg! Photos 4 and 5!
Have fun,
Snap Shot
Start by getting two photos that go well together.... (
show quote)
Great explanation of the process, Bill. If I get some flowers, I might try using your instructions.
 Sylvias
Loc: North Yorkshire England
Sylvias
Loc: North Yorkshire England
Thank you very much Bill for taking the time to explain your excellent work.
steveastro wrote:
Thanks very much Snap Shot, I have joined many forums over the years, and left, but really liking this one.
Thank you so much steveastro! I think we need more helpers on this site! We only have a few!
Thank you Jerry! Much appreciated!
If you want to reply, then
register here. Registration is free and your account is created instantly, so you can post right away.


