How to make a white sky blue w/Adobe
Jan 29, 2019 11:40:12 #

MikWar wrote:
Here in the gloomy gray winter Michigan I'm still ... (show quote)
Just so you know, Landscape Pro can do what you want.
Jan 29, 2019 15:59:06 #
Jan 29, 2019 16:04:23 #
amfoto1
Loc: San Jose, Calif. USA
I would discourage trying to do this as a batch process.
It would be much better done on an image-by-image basis.
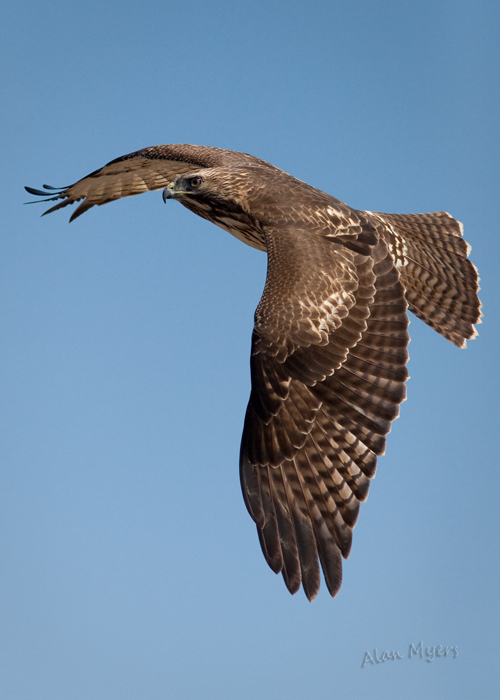
For example, I adjusted the sky separately from the hawk in the above shot, using Photoshop. Especially with a plain sky like this, it's super easy to select it and only make changes to the sky. I just used the Magic Wand tool in PS, fine tuned the selection slightly using other tools to add or subtract from the selection, then made the adjustments to the selected area. Next I inverted the selection and made different adjustments to the bird.
I did something similar for the shot of the mule deer below (nothing special... I was experimenting with stacking 1.4X and 2X teleconverters on a 500mm lens, all on an APS-C camera for 2240mm full frame equivalent focal length)...
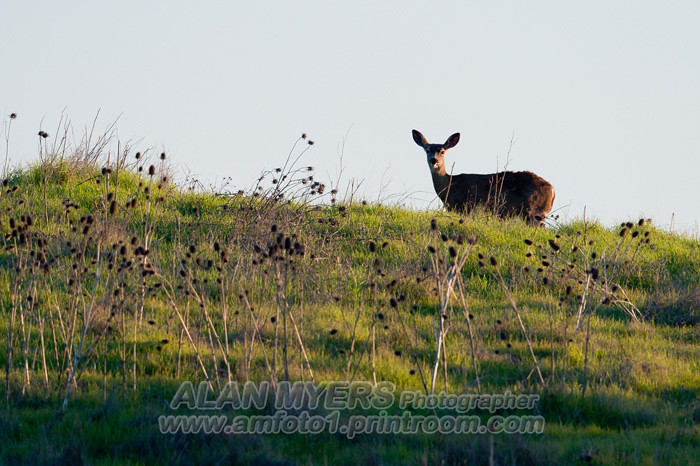
I tried several things for the above shot, ended up "dialing it back" to just a slight tint of color because everything else I tried looked faked.
It's a very common problem for the sky to be overexposed in shots like these.
I've also compiled a "library" of skies to use as replacements, if I wish (as someone mentioned doing, in an earlier response).
It would be much better done on an image-by-image basis.
For example, I adjusted the sky separately from the hawk in the above shot, using Photoshop. Especially with a plain sky like this, it's super easy to select it and only make changes to the sky. I just used the Magic Wand tool in PS, fine tuned the selection slightly using other tools to add or subtract from the selection, then made the adjustments to the selected area. Next I inverted the selection and made different adjustments to the bird.
I did something similar for the shot of the mule deer below (nothing special... I was experimenting with stacking 1.4X and 2X teleconverters on a 500mm lens, all on an APS-C camera for 2240mm full frame equivalent focal length)...
I tried several things for the above shot, ended up "dialing it back" to just a slight tint of color because everything else I tried looked faked.
It's a very common problem for the sky to be overexposed in shots like these.
I've also compiled a "library" of skies to use as replacements, if I wish (as someone mentioned doing, in an earlier response).
Jan 29, 2019 18:16:11 #
lesdmd wrote:
The problem will be the bulk processing you would ... (show quote)
————-
Shoot in RAW format. In lightroom move highlight slider to extreme left, then Shadow slider to extreme right, to simulate extending dynamic range, then adjust exposure slider to center histogram. Vibrance slider to right, Saturation slider to right, Selectively decrease ’blue’ luminance slider, and selectively incresase ‘blue’ saturation. In general be careful not to blow out the highlights, erring slightly on the underexposure side is easier to fix. If all of the above fails, copy a nice caribbean blue sky in background with photoshop.
Jan 29, 2019 19:08:12 #
I assume that the sky is not white because you have blown it out. If it’s over exposed, you will have to replace the blown areas with new sky.
Next time you are out under a nice blue sky with white puffy clouds, take some pics and store them to be used as backgrounds for other photos you take.
Best of fun.
RL
Next time you are out under a nice blue sky with white puffy clouds, take some pics and store them to be used as backgrounds for other photos you take.
Best of fun.
RL
Jan 30, 2019 11:35:40 #

jerryc41 wrote:
If only we could do this in real life. : )
https://www.photoshopessentials.com/photo-editing/replace-sky/
https://www.photoshopessentials.com/photo-editing/replace-sky/
Being very much the novice with Photoshop I found the above tutorial the best for layering a blue sky. I also found that with BIF (a bird with a dull gray/white background) I was able to use Select/Subject to successfully select only the bird in order to mask it. The pretty much eliminated the need to use the Blend If command. I'm still experimenting but feel like I'm making good progress, thanks to everyone's help.
Jan 30, 2019 12:16:22 #
Any time you shoot a landscape with a nice view of the sky, take another shot of just the sky. Keep those sky shots all together and you can replace dull uninteresting skies in other photos with them using Photoshop.
Jan 31, 2019 13:58:35 #
If you prefer to capture your subject while allowing the background to blow out, I suggest taking a properly exposed sky after your initial shot, then blend that image with the original image in post. This will also allow for color change of the sky with a more natural look.
If you want to reply, then register here. Registration is free and your account is created instantly, so you can post right away.