Challenge: Free Sunday - December 30, 2018
Dec 30, 2018 02:17:54 #
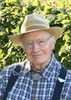
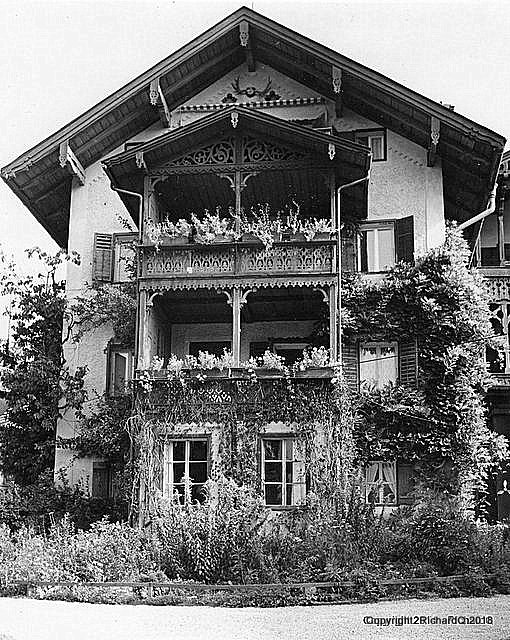
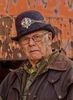
Here's another of my 70-year-long trips down memory lane. This September, 1948(!) view of my honeymoon hotel was taken in Berchtesgaden, in the Bavarian Alps. The quaint but oddly fetching enthusiastic gardening approach probably would have been spectacular in color, but the medium-format color negative films of the time were horribly unreliable.
Dec 30, 2018 02:25:11 #
RichardQ wrote:
Here's another of my 70-year-long trips down memory lane. This September, 1948(!) view of my honeymoon hotel was taken in Berchtesgaden, in the Bavarian Alps. The quaint but oddly fetching enthusiastic gardening approach probably would have been spectacular in color, but the medium-format color negative films of the time were horribly unreliable.
the lens ,, the camera ,,, the time ,,,)
the format was grinded out not simple
you know the diff and what it was then
the ideas flow around like water now))
you are a Master of the Lens in time}}
Bill
Dec 30, 2018 02:26:06 #
Steve DeMott
Loc: St. Louis, Missouri (Oakville area)
Here it is Sunday morning.
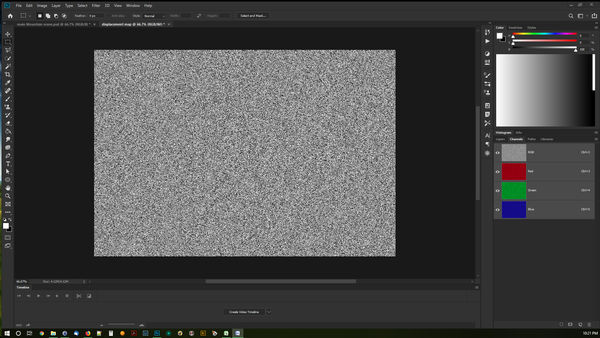
Part 2 of Water Reflections. This part is a lot shorter then the first.
Let's create another Photoshop image.
File\New... Remember the Canvas setting. Name: displacement map, Width: 1450 pixels, Height 994 pixels, Resolution 150 pixels,
Color Mode: RGB Color 8bit
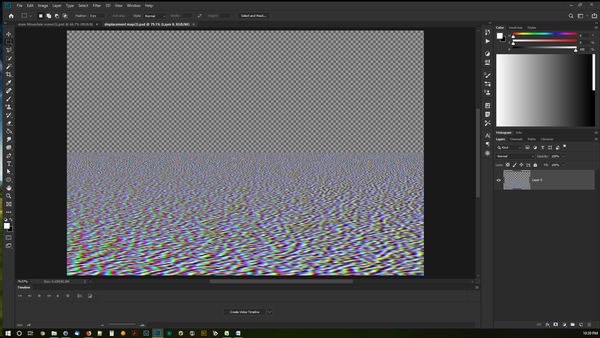
Next, Filter\Add Noise Amount: 400, Gaussian Blur, Monochromatic, OK
Next Select Channels. Windows\Channels
{photo1.jpg}
Select the RED channel then Filters\Stylize\Emboss. Angle: 90, Height: 1, Amount 150
Select the GREEN channel then Filters\Stylize\Emboss. Angle: 180, Height: 1, Amount 150
Select the RGB channel then Windows\layers
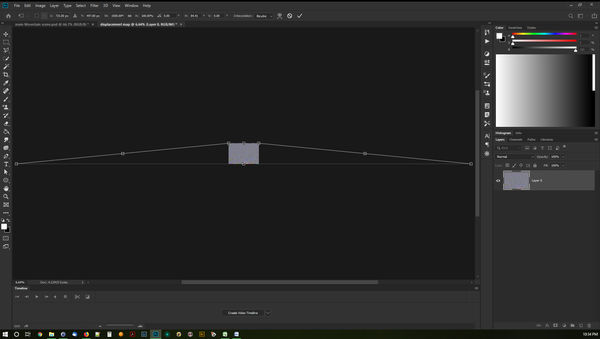
Next, Select the zoom tool and zoom out to about 5%. We'll use the perspective tool and will need lots of room.
Edit\Transform\Perspective.. Select one of the lower control handles and drag to about 1500 pixels. Press enter
{photo2.jpg}
Next zoom out and select Edit\Free Transform. Hold the shift key down and drag the top middle control handle to a little past midpoint.
Enter and save as "displacement map.psd"
{photo3.jpg}
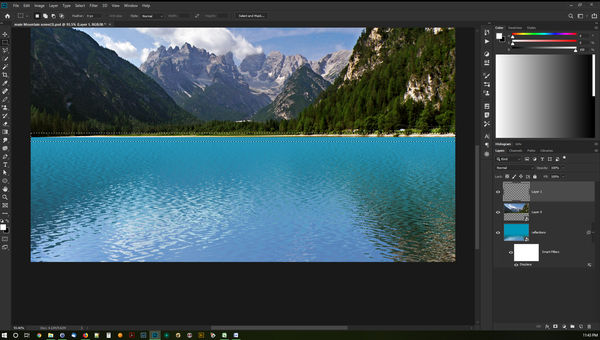
Here's where the magic happens.
open your original file if it's not already open and select reflections
Select Filter\Distort\Displace.. Horizontal Scale: 30, Vertical Scale: 60, Stretch to fit, Repeat edge Pixels
Select OK. Choose the displacement map we just created.
One more thing to tidy up a bit.
Select the top layer and add a new layer. Layer\New\Layer..
Use the rectangular marquee tool and draw a square around the shore line.
{photo11.jpg}
Select Select\Modify\Feather. Feather Radius about 20
Press Alt + Delete. If the results are white then press Ctrl + Delete. The Band should be dark.
Next in the layers panel. Where is says Normal, change that to Soft Light
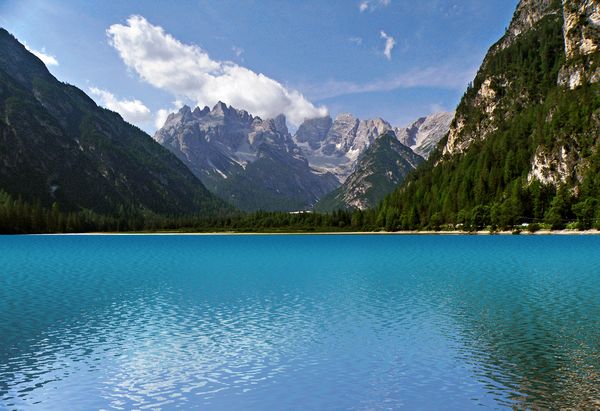
Well, That's it. A lot of the setting can be changed for different effects depending on the resolution and image. Try different setting for the displacement map, you have to make a new one and redo all the steps. It's worth the effort.
Happy New
Part 2 of Water Reflections. This part is a lot shorter then the first.
Let's create another Photoshop image.
File\New... Remember the Canvas setting. Name: displacement map, Width: 1450 pixels, Height 994 pixels, Resolution 150 pixels,
Color Mode: RGB Color 8bit
Next, Filter\Add Noise Amount: 400, Gaussian Blur, Monochromatic, OK
Next Select Channels. Windows\Channels
{photo1.jpg}
Select the RED channel then Filters\Stylize\Emboss. Angle: 90, Height: 1, Amount 150
Select the GREEN channel then Filters\Stylize\Emboss. Angle: 180, Height: 1, Amount 150
Select the RGB channel then Windows\layers
Next, Select the zoom tool and zoom out to about 5%. We'll use the perspective tool and will need lots of room.
Edit\Transform\Perspective.. Select one of the lower control handles and drag to about 1500 pixels. Press enter
{photo2.jpg}
Next zoom out and select Edit\Free Transform. Hold the shift key down and drag the top middle control handle to a little past midpoint.
Enter and save as "displacement map.psd"
{photo3.jpg}
Here's where the magic happens.
open your original file if it's not already open and select reflections
Select Filter\Distort\Displace.. Horizontal Scale: 30, Vertical Scale: 60, Stretch to fit, Repeat edge Pixels
Select OK. Choose the displacement map we just created.
One more thing to tidy up a bit.
Select the top layer and add a new layer. Layer\New\Layer..
Use the rectangular marquee tool and draw a square around the shore line.
{photo11.jpg}
Select Select\Modify\Feather. Feather Radius about 20
Press Alt + Delete. If the results are white then press Ctrl + Delete. The Band should be dark.
Next in the layers panel. Where is says Normal, change that to Soft Light
Well, That's it. A lot of the setting can be changed for different effects depending on the resolution and image. Try different setting for the displacement map, you have to make a new one and redo all the steps. It's worth the effort.
Happy New
Dec 30, 2018 02:26:17 #

Dec 30, 2018 02:33:49 #
RichardQ wrote:
Here's another of my 70-year-long trips down memory lane. This September, 1948(!) view of my honeymoon hotel was taken in Berchtesgaden, in the Bavarian Alps. The quaint but oddly fetching enthusiastic gardening approach probably would have been spectacular in color, but the medium-format color negative films of the time were horribly unreliable.
you were there man and totaled time
Bill
Dec 30, 2018 02:41:19 #
Steve DeMott
Loc: St. Louis, Missouri (Oakville area)
RichardQ wrote:
Here's another of my 70-year-long trips down memory lane. This September, 1948(!) view of my honeymoon hotel was taken in Berchtesgaden, in the Bavarian Alps. The quaint but oddly fetching enthusiastic gardening approach probably would have been spectacular in color, but the medium-format color negative films of the time were horribly unreliable.
Hope your feeling better and have a Happy New Year.
Magnificent Photo
 Have you ever gone back to see if it's still there? Knowing the Germans it probably better then before.
Dec 30, 2018 04:42:23 #

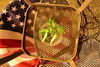
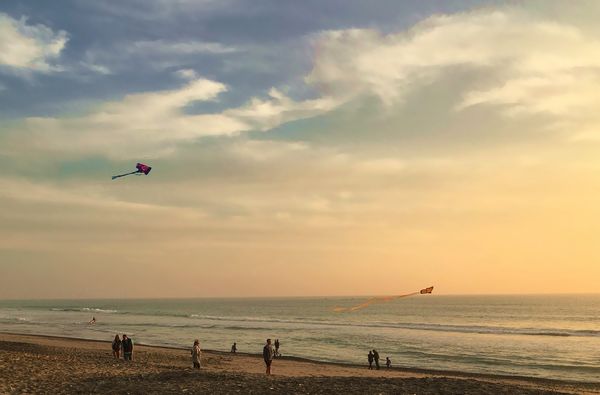
How Californians celebrate Christmas. (The day of Christmas Eve at San Clemente Beach in Southern California.) Captured on my iPhone SE.
Kites at the Beach
Dec 30, 2018 06:06:11 #
catchlight..
Loc: Wisconsin USA- Halden Norway
Added tip, try a motion filter adjustment horizontally after the gaussian, that can add a bit more realism and reduce the glass flatness affect unless that is the look you want ...
steve DeMott wrote:
The year is almost over. Sooo......I thought I wou... (show quote)
Dec 30, 2018 06:09:05 #
steve DeMott wrote:
She does look upset.
Yeah Buddy is an outside cat, 13 years old, note the battle worn ears...that was kind to grace us with his presence on Christmas Day for a short while. He has always been one of those cats that barely tolerates human interaction but is a great mouser for my daughter who lives out in the woods (when she recently moved out on her own about a mile from her father's house Buddy had no issue with the relocation...we were concerned he would try to travel back to Grandpa's but seems content staying around his new home area.) We all just wish (with his age) that on the colder nights he would come inside, but no, he insists on being out every night stalking the perimeter of the house...comes in during the day to watch the house when no one is home. One good side to that is he doesn't bird chase. Our "watch" cat!
Dec 30, 2018 06:15:42 #
Transbuff1985 wrote:
Nice RR like the clouds.
Thanks, Bob....The day belongs to those who rise early

Dec 30, 2018 06:18:30 #
steve DeMott wrote:
The year is almost over. Sooo......I thought I wou... (show quote)
This I will download and work on...thank you for posting it steve
Dec 30, 2018 06:19:43 #
MichaelEBM wrote:
How Californians celebrate Christmas. (The day of Christmas Eve at San Clemente Beach in Southern California.) Captured on my iPhone SE.
Very nice Michael, no kites flying around here this morning
Dec 30, 2018 06:20:33 #
steve DeMott wrote:
RR you have a knack of creating wonderful photos out of nothing. I like your style.
Thank you very much, steve
Dec 30, 2018 06:23:55 #
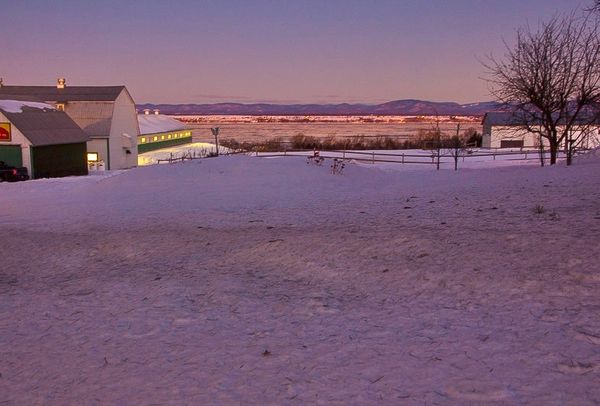
Again more in which includes the St. Lawrence River east of Québec City
Dec 30, 2018 06:39:41 #
MichaelEBM wrote:
How Californians celebrate Christmas. (The day of Christmas Eve at San Clemente Beach in Southern California.) Captured on my iPhone SE.
Can't wait for the return of kite flying season here in Pennsylvania (going to Mexico in February...may just have to pack one of my mini's to take with!)
If you want to reply, then register here. Registration is free and your account is created instantly, so you can post right away.