Blown out sky
Feb 20, 2018 10:59:45 #
krl48 wrote:
Did you really want to say "Focus for the sky..." or did you intend to say "Expose for the sky...", which, to me, would be the better approach?
Expose. Fast fingers slow mind! Thanks. :)
Feb 20, 2018 11:19:47 #
Feb 20, 2018 12:01:28 #
Get a graduated Neutral Density filter (get at least 3 stops of density). If you use it your skies will be beautiful.
Feb 20, 2018 12:49:13 #

That's why professionals go drink coffee or go into the woods between 10 and 4PM. A single shot (the sensor in the camera cannot handle the spead of light between bright light and black). Shoot only in the shadows and use a fill flash although I dislike shooting with a on camera flash.
Good shooting
Good shooting
Feb 20, 2018 12:53:48 #

Feb 20, 2018 13:44:11 #
amfoto1
Loc: San Jose, Calif. USA
The "old school/film" method of dealing with this was Graduated Neutral Density filters.... one, two and three stop strengths with soft, medium or hard transition serve to cover most situations. Rectangular filters in fitler holders allow you to position the transition area of the filter near the horizon in your images, so that the filter's primary effect is on the sky alone.
Problem is, most of the photos most of us take most of the time don't have a perfectly flat horizon line... so a physical filter (or even a digitally applied Grad ND) can effect other things you don't want darkened.

Today with digital you can do a much more precise job of it either by taking two photos or by double processing a single photo (best done with RAW files that have more latitude for adjustments).
Here's an extreme example where a filter would be utterly useless: Main subject indoors and shaded.... with the bright, sunlit background completely blown out. Also, moving subject makes taking multiple shots for HDR pretty much impossible. So instead I double processed the original image to make two different versions: One tweaked for exposure and color for the primary/indoor subject (left), the other adjusted to recover some of the outdoor/background detail by reducing exposure and setting a different white balance for full sunlight (center). I then used layers and masks in Photoshop to combine the "correct" portion from each into a single image, as shown on the right.

Try doing that with a filter! Even the graduated ND filters offered in some software wouldn't work.
Note: I actually ended up holding back the background a little (by increasing the transparency of the layer).... it was a bit too strong a "correction" for my tastes. And the finished example is deliberately slightly saturated or "punchy", because of the printing process that was going to be used for it.
The same technique can be done with most any single image.... It's even easier with simpler compositions. If possible to make two (or more) exposures at different settings and then combine those the result can be great. Using HDR techniques, a wider dynamic range can be "compressed" into a single, finished image and the process can be more automated in many image editing programs. To do it manually with complex compositions, such as the example above, requires a software that can work in layers & masks, such as Photoshop (but not Lightroom!)
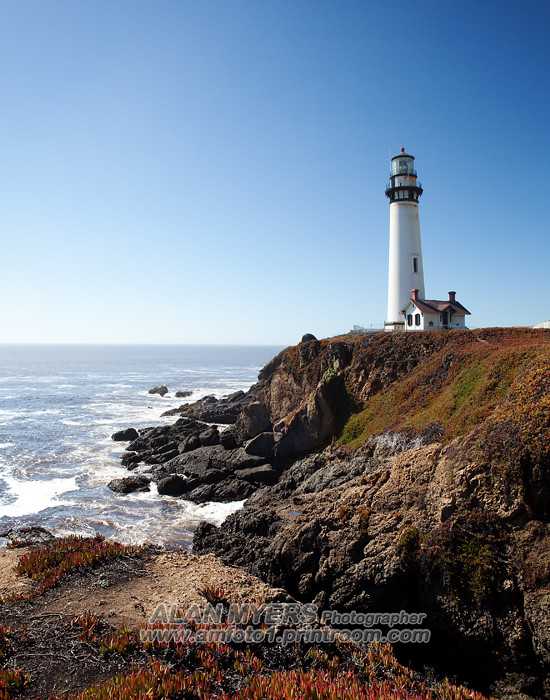
And, yes, for deeper blue skies (and better saturation of other colors, too), the simplest solution might be a Circular Polarizing filter...
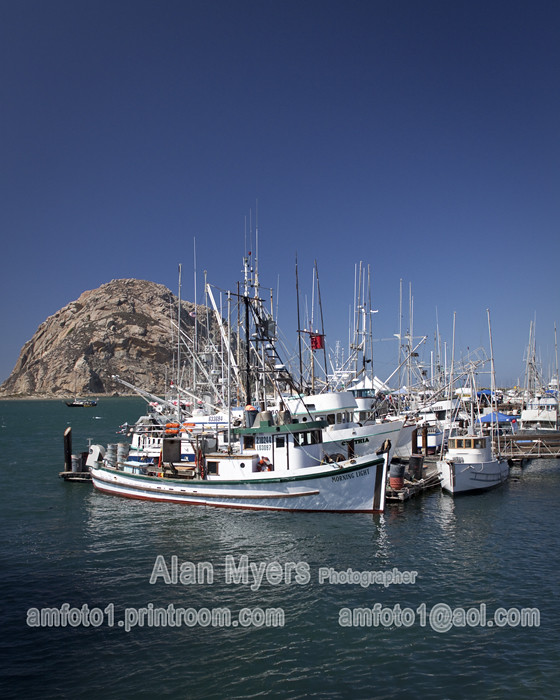
But when using wider lenses you do have to watch for uneven effects with a C-Pol. That's because it has strongest effect at 90 degrees from the light source (sun, in this case) and the filter's effect gradually tapers off at lesser or greater angle to the light source. This isn't necessarily a bad thing.... I used it deliberately for this image, to add some tonal variation to an otherwise boring, plain blue sky:
Problem is, most of the photos most of us take most of the time don't have a perfectly flat horizon line... so a physical filter (or even a digitally applied Grad ND) can effect other things you don't want darkened.
Today with digital you can do a much more precise job of it either by taking two photos or by double processing a single photo (best done with RAW files that have more latitude for adjustments).
Here's an extreme example where a filter would be utterly useless: Main subject indoors and shaded.... with the bright, sunlit background completely blown out. Also, moving subject makes taking multiple shots for HDR pretty much impossible. So instead I double processed the original image to make two different versions: One tweaked for exposure and color for the primary/indoor subject (left), the other adjusted to recover some of the outdoor/background detail by reducing exposure and setting a different white balance for full sunlight (center). I then used layers and masks in Photoshop to combine the "correct" portion from each into a single image, as shown on the right.
Try doing that with a filter! Even the graduated ND filters offered in some software wouldn't work.
Note: I actually ended up holding back the background a little (by increasing the transparency of the layer).... it was a bit too strong a "correction" for my tastes. And the finished example is deliberately slightly saturated or "punchy", because of the printing process that was going to be used for it.
The same technique can be done with most any single image.... It's even easier with simpler compositions. If possible to make two (or more) exposures at different settings and then combine those the result can be great. Using HDR techniques, a wider dynamic range can be "compressed" into a single, finished image and the process can be more automated in many image editing programs. To do it manually with complex compositions, such as the example above, requires a software that can work in layers & masks, such as Photoshop (but not Lightroom!)
And, yes, for deeper blue skies (and better saturation of other colors, too), the simplest solution might be a Circular Polarizing filter...
But when using wider lenses you do have to watch for uneven effects with a C-Pol. That's because it has strongest effect at 90 degrees from the light source (sun, in this case) and the filter's effect gradually tapers off at lesser or greater angle to the light source. This isn't necessarily a bad thing.... I used it deliberately for this image, to add some tonal variation to an otherwise boring, plain blue sky:
Feb 20, 2018 14:54:26 #

lianetdiaz wrote:
Hi to all, br br As you might already know South ... (show quote)
a lot of good ideas have been suggested here that should help. Here is an odd one. There is a little known adjustment in Photoshop called equalize, you can only find it in the top menu Image > adjustments > equalize. what it does is create a full range of tones from an area that is too light or too dark (thus focused on a narrow band of the histogram) and in many cases when used on a selective selection or an entire photo and then applied with a mask, it will bring detail in where non were obvious. It is best to use it on a duplicate layer or a selection on a new layer. then use masking to apply where you want it.. To avoid color and saturation changes set the layer to luminosity so only the brightness tones will be effected. Credit for this goes to Ben Wilmore from whom I learned the technique in his Masters academy..
Feb 20, 2018 15:02:06 #
Learn about the zone system and understand it. So much easier with digital. My Nikon --- set picture control---- lower the contrast. This contracts the scene brightness range to tolerable levels so sky and shadows can at least have some details to work with in PP.
Know how to expose for the scene you want and move (if possible) to use the sun to your advantage or wait for cloud cover. The auto exposure settings on your camera are only valuable if you know how to use it. I find I am always adding exposure (+.7 to +1.7) with snow, water, and sky to make sure the entire scene is exposed properly and I still get the tiny ripples in the snow and water visible because of lowering the contrast. The flat files I get are easily made beautiful in PP. If the sky or snow is blown out it's not so easy.
Know how to expose for the scene you want and move (if possible) to use the sun to your advantage or wait for cloud cover. The auto exposure settings on your camera are only valuable if you know how to use it. I find I am always adding exposure (+.7 to +1.7) with snow, water, and sky to make sure the entire scene is exposed properly and I still get the tiny ripples in the snow and water visible because of lowering the contrast. The flat files I get are easily made beautiful in PP. If the sky or snow is blown out it's not so easy.
Feb 20, 2018 15:08:19 #
amfoto1 wrote:
The "old school/film" method of dealing ... (show quote)
Thanks for the extremely informative post, Alan.
Mike
Feb 20, 2018 16:18:32 #

ricardo7 wrote:
If you don't want to go the bracketing and combining images route you are
pretty limited. Another option is a graduated neutral density filter to tone
down the bright sky. Combined with a slight under exposure might get you
better pictures.
pretty limited. Another option is a graduated neutral density filter to tone
down the bright sky. Combined with a slight under exposure might get you
better pictures.

Feb 20, 2018 22:38:18 #

lloydl2 wrote:
a lot of good ideas have been suggested here that ... (show quote)
Thank for posting this Loyd! I will definitely try it. Ben Willmore is a top-notch instructor - I first encountered him on CreativeLive.
Feb 20, 2018 23:24:13 #

GRADUATED NEUTRAL DENSITY FILTERS will cure most cases of white sky syndrome.
I have long used the rectangular Sing Ray filters (www.singh-ray.com/product-category/camera-filters/neutral-color-density-filters/), in an inexpensive, easy to adjust, Cokin mount. (www.cokin-filters.com)
I believe Sing Ray Filters are made not far from where you live (?)
I have long used the rectangular Sing Ray filters (www.singh-ray.com/product-category/camera-filters/neutral-color-density-filters/), in an inexpensive, easy to adjust, Cokin mount. (www.cokin-filters.com)
I believe Sing Ray Filters are made not far from where you live (?)
Feb 20, 2018 23:26:03 #

You live in a box—image media can handle a light dark ratio of about 3-1, get outside that and you have pure white highlights—or solid black shadows—all the above can stretch the box a bit—but probably best to learn to live with 3-1
Stan
Stan
Feb 21, 2018 01:26:31 #
Feb 21, 2018 06:44:48 #

If you want to reply, then register here. Registration is free and your account is created instantly, so you can post right away.