Cropping images to have printed
Jul 19, 2017 16:42:19 #
I was wanting to take advantage of the daily special on the 'Aluminize' website.
5, 5x7 prints.
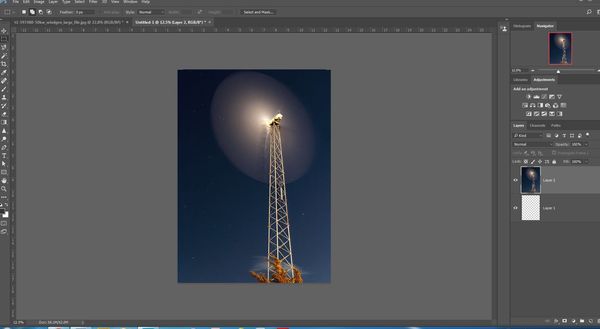
When I bring up the rulers on PS CS6 I get a height of about 13 inches (12.97)
The website will not let me print this image without cropping off the top, bottom, or both.
I'm confused as to why. If we cut the image in half (6.5 inches) then I should have a 1/4 inch left, top and bottom.
Customer support is at a lose as to why also..
Marion
5, 5x7 prints.
When I bring up the rulers on PS CS6 I get a height of about 13 inches (12.97)
The website will not let me print this image without cropping off the top, bottom, or both.
I'm confused as to why. If we cut the image in half (6.5 inches) then I should have a 1/4 inch left, top and bottom.
Customer support is at a lose as to why also..
Marion
50 KW Wind Gen.

Jul 19, 2017 16:47:11 #

The first thing to do is make sure that the proportions of the photo are correct for a 5 X 7 Photograph. That will translate into a photo that is 1500 X 2100 Pixels (assuming that you will be printing at 300 DPI). In photoshop crop to a ratio that is 5 X 7. Then resize the photo to be 5 X 7 at 300 dpi.
Jul 19, 2017 16:48:10 #

Marionsho wrote:
I was wanting to take advantage of the daily special on the 'Aluminize' website.
5, 5x7 prints.
When I bring up the rulers on PS CS6 I get a height of about 13 inches (12.97)
The website will not let me print this image without cropping off the top, bottom, or both.
I'm confused as to why. If we cut the image in half (6.5 inches) then I should have a 1/4 inch left, top and bottom.
Customer support is at a lose as to why also..
Marion
Perhaps others could help if you made the image downloadable.
Jul 19, 2017 17:09:24 #

Jul 19, 2017 17:09:44 #
Marionsho wrote:
I was wanting to take advantage of the daily special on the 'Aluminize' website.
5, 5x7 prints.
When I bring up the rulers on PS CS6 I get a height of about 13 inches (12.97)
The website will not let me print this image without cropping off the top, bottom, or both.
I'm confused as to why. If we cut the image in half (6.5 inches) then I should have a 1/4 inch left, top and bottom.
Customer support is at a lose as to why also..
Marion
5, 5x7 prints.
When I bring up the rulers on PS CS6 I get a height of about 13 inches (12.97)
The website will not let me print this image without cropping off the top, bottom, or both.
I'm confused as to why. If we cut the image in half (6.5 inches) then I should have a 1/4 inch left, top and bottom.
Customer support is at a lose as to why also..
Marion
Printing to standard sizes usually means cropping away part of your image. To be prepared for that, include more border when you compost the shot. Did you click on "fixed aspect ratio"?
http://www.digital-photo-secrets.com/tip/326/how-to-crop-your-digital-photo-for-printing/
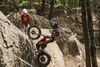
That looks like a super fast wind turbine.

Jul 19, 2017 17:15:35 #

Marionsho wrote:
I was wanting to take advantage of the daily special on the 'Aluminize' website.
5, 5x7 prints.
When I bring up the rulers on PS CS6 I get a height of about 13 inches (12.97)
The website will not let me print this image without cropping off the top, bottom, or both.
I'm confused as to why. If we cut the image in half (6.5 inches) then I should have a 1/4 inch left, top and bottom.
Customer support is at a lose as to why also..
Marion
5, 5x7 prints.
When I bring up the rulers on PS CS6 I get a height of about 13 inches (12.97)
The website will not let me print this image without cropping off the top, bottom, or both.
I'm confused as to why. If we cut the image in half (6.5 inches) then I should have a 1/4 inch left, top and bottom.
Customer support is at a lose as to why also..
Marion
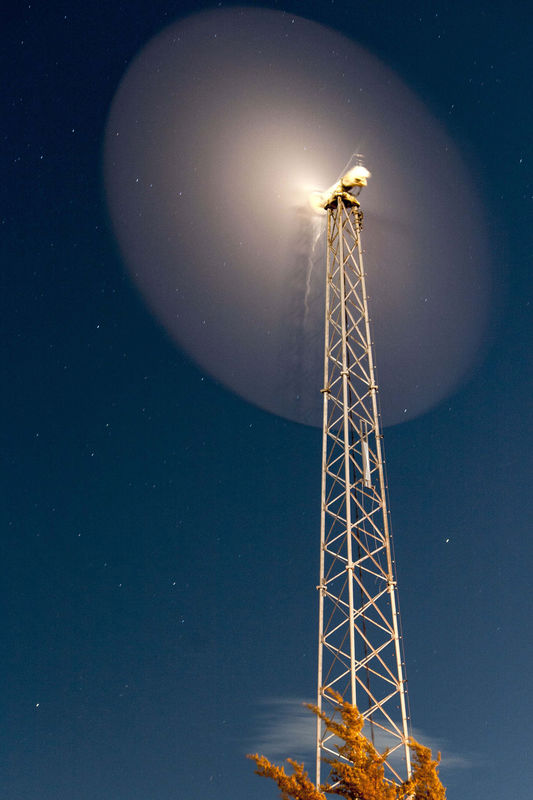
You have 2.5 choices - you can crop to a 5x7 aspect ratio, 12.97x9.26 or you can leave it as it is and be content with a full height image with a little space on the sides. They don't seem to offer any custom sizing to get you to exactly what you have. The half choice is to include a black (or other color) border so it can fill the sides of the 5x7 crop.
Jul 19, 2017 19:01:10 #
Linary
Loc: UK
Marionsho wrote:
I was wanting to take advantage of the daily special on the 'Aluminize' website.
5, 5x7 prints.
When I bring up the rulers on PS CS6 I get a height of about 13 inches (12.97)
The website will not let me print this image without cropping off the top, bottom, or both.
I'm confused as to why. If we cut the image in half (6.5 inches) then I should have a 1/4 inch left, top and bottom.
Customer support is at a lose as to why also..
Marion
5, 5x7 prints.
When I bring up the rulers on PS CS6 I get a height of about 13 inches (12.97)
The website will not let me print this image without cropping off the top, bottom, or both.
I'm confused as to why. If we cut the image in half (6.5 inches) then I should have a 1/4 inch left, top and bottom.
Customer support is at a lose as to why also..
Marion
Here is how I would do it:
Open the image in Photoshop
Create a NEW image in Photoshop 5" wide x 7" high, same bit depth and resolution as your photo
Place your photo onto the new canvas and (using the shift key to constrain proportions) drag the photo corners to the height of the transparent background.
Use the move tool to centre the image left and right onto the transparent background.
You will now have two thin borders running down the long edges.
Use the rectangular marquee tool to select these transparent edges ensuring the marching ants trespass a little into the blue sky.
Choose the Edit > Fill tool, turn off "preserve transparency" and select Content aware, choose OK.
The edges will fill with sky and the finished image will be 7"x 5" at 300 ppi with no borders.
Jul 19, 2017 19:58:45 #

Jul 19, 2017 20:10:56 #

Nothing against aluminyze (I've used them in the past with great success), but I suggest trying CGproprints.com. The quality is equally as good and I believe they are less expensive.
Jul 19, 2017 20:42:03 #
DWU2 wrote:
Perhaps others could help if you made the image downloadable.
I clicked on (store original) and it didn't make the trip. I'll try again.
Thanxs DWU2
Jul 19, 2017 20:52:17 #
Gene51 wrote:
You have 2.5 choices - you can crop to a 5x7 aspect ratio, 12.97x9.26 or you can leave it as it is and be content with a full height image with a little space on the sides. They don't seem to offer any custom sizing to get you to exactly what you have. The half choice is to include a black (or other color) border so it can fill the sides of the 5x7 crop.
Yes, they do offer custom sizing. I can have it printed exactly right with no cropping. I have never had any "metal" prints made and they are offering 5, 5x7 prints for what they say is a bargain. They offer a white back-round, a silver back-round and both glossy and matte finish. Mix or match.
I thought I would have one of each printed and another of, maybe the white back-round with a glossy finish.
I am not allowed the option of having the image printed full height. It has to be cut down, top or bottom, or both. Customer service can't answer my questions to why. I'm perplexed.
Thanks Gene.
Jul 19, 2017 20:55:53 #
jerryc41 wrote:
Printing to standard sizes usually means cropping away part of your image. To be prepared for that, include more border when you compost the shot. Did you click on "fixed aspect ratio"?
http://www.digital-photo-secrets.com/tip/326/how-to-crop-your-digital-photo-for-printing/
That looks like a super fast wind turbine.
http://www.digital-photo-secrets.com/tip/326/how-to-crop-your-digital-photo-for-printing/
That looks like a super fast wind turbine.
Thanks Jerry, I'll check out your link.
That's a 20 second exposure so it would look fast in a one MPH wind. LOL
I think the wind was maybe 30MPH that night.
Jul 19, 2017 20:57:08 #
Linary wrote:
Here is how I would do it: br br Open the image i... (show quote)
Thanks for all that info.
I'll get on this....soon.

Marion
Jul 19, 2017 20:59:39 #
Cdouthitt wrote:
Nothing against aluminyze (I've used them in the past with great success), but I suggest trying CGproprints.com. The quality is equally as good and I believe they are less expensive.
Thanks. I was just trying to take advantage of the daily sale they have going on, right now. I haven't shopped around.
Appreciate the info. I'll look up, CGproprints.com's site.
Marion
Jul 19, 2017 21:57:05 #
DWU2 wrote:
Perhaps others could help if you made the image downloadable.
It made the trip this time.

If you want to reply, then register here. Registration is free and your account is created instantly, so you can post right away.