Another Fall
Jul 12, 2017 11:15:49 #

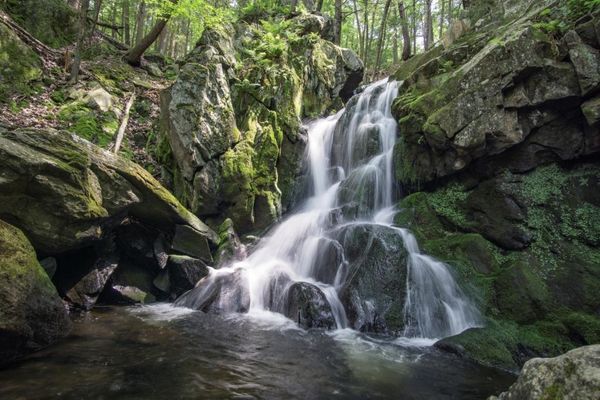
At the risk of pushing my proverbial luck with you generous folks, i'm posting yet another waterfall shot here from my recent trip. In this one, i used LR to adjust all the basic parameters, and then tried the NIK Color efex filters suggested by Fstop12 in my last post. I've attached a link to a smaller TIF version in case you want to give it a try with your workflow. I'm now going to try another go using Jim-Pops' method. Thanks again for everyone's help on this project.
Marylea
TIF link:
https://drive.google.com/file/d/0B6h7eCVDIw9YZkE5MjNiTFRiS3M/view?usp=sharing
Marylea
TIF link:
https://drive.google.com/file/d/0B6h7eCVDIw9YZkE5MjNiTFRiS3M/view?usp=sharing
Jul 12, 2017 11:44:42 #
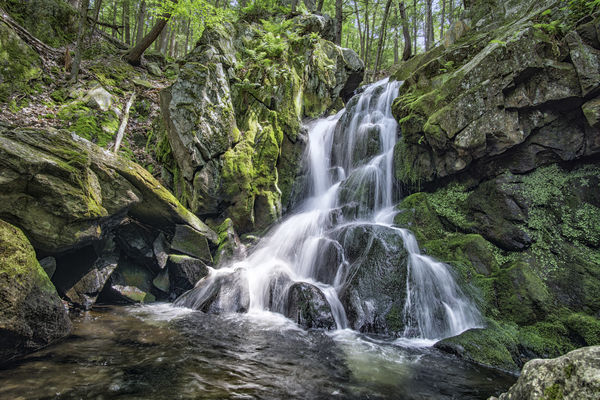
This picture is much better than your last. Great color and composition. Looks so much better without trees.
I am not sure what is happening with your edit. From what you said you did and what I see I don't know why you are loosing all the sharp focus. This happened in your last post also. I have made my edits and will wait for your version using what I mentioned before but I will show you I mine. I used your tiff file and it is great to work with and supper sharp.
Jim
Jul 12, 2017 19:18:45 #
Jim-Pops wrote:
This picture is much better than your last. Great color and composition. Looks so much better without trees.
I am not sure what is happening with your edit. From what you said you did and what I see I don't know why you are loosing all the sharp focus. This happened in your last post also. I have made my edits and will wait for your version using what I mentioned before but I will show you I mine. I used your tiff file and it is great to work with and supper sharp.
Jim
I am not sure what is happening with your edit. From what you said you did and what I see I don't know why you are loosing all the sharp focus. This happened in your last post also. I have made my edits and will wait for your version using what I mentioned before but I will show you I mine. I used your tiff file and it is great to work with and supper sharp.
Jim
I think i know what happened to the sharpness of each . . . i used Windows Picture Manager to compress these jpegs before posting them. This one was rendered straight out of PS, using the following steps from your last post to me:
- Made Duplicate layer, command J. Opened Camera Raw Filter under filters. I lowered highlight a small amount, opened shadows all the way, moved white slider to the right while holding alt/option key until a bit more whites started showing. I
increased blacks a small amount, added clarity a small amount. Moved on to sharpness and increased sharpness to 80 and used the Mask slider while holding alt/option key and watched the edges and made sure only the edges were strong.
Moved Luminance to 20. Took one last look and upped my exposure a very small amount.
I don't really understand the mask for strong edges. I love the method of holding the alt key with the slider to get the inverse effect, so i saw the image in black and white relief. The more i slid the bar, the more of the entire image would fill in, so i only used a little of this effect, thinking those were the edges only . . . ??
I really appreciate the time you're giving me on this. I loved this waterfall too. I had a tripod with me that day, whereas i didn't in the previous shot i posted. That's some of the difference in clarity as well i'm sure.
ML

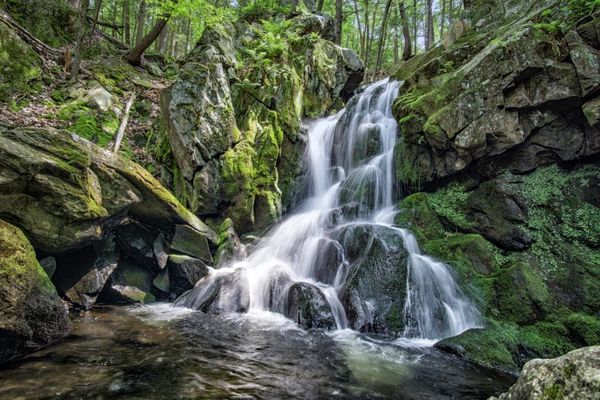
Jul 12, 2017 19:35:40 #
This is the NIK filters one again, using only Lightroom to compress the file for upload. I think it may be a better rendition because of that.
ML
ML
Jul 12, 2017 19:59:01 #
melueth wrote:
This is the NIK filters one again, using only Lightroom to compress the file for upload. I think it may be a better rendition because of that.
ML
ML
This one looks great!.. The water opens up and you can see the rocks below the surface. Yours is better than what I got out of it using my method.
Get rid of Windows Picture Manager, it is not your friend.
Jul 13, 2017 07:35:07 #
Jim-Pops wrote:
This one looks great!.. The water opens up and you can see the rocks below the surface. Yours is better than what I got out of it using my method.
Get rid of Windows Picture Manager, it is not your friend.
Get rid of Windows Picture Manager, it is not your friend.
Thanks, Jim. I really liked this one too, but have learned so much tinkering with both methods. WPM is gone!!
ML
Jul 13, 2017 08:35:40 #

melueth wrote:
At the risk of pushing my proverbial luck with you... (show quote)
# 2 for me. Well done.
Jul 14, 2017 02:55:32 #
melueth wrote:
I think i know what happened to the sharpness of e... (show quote)
Regarding the sharpening mask in Lr, I think you'll find that black areas are not affected and degrees of are gradual, until white is the sharpest.
Jul 14, 2017 07:02:23 #
magnetoman wrote:
Regarding the sharpening mask in Lr, I think you'll find that black areas are not affected and degrees of are gradual, until white is the sharpest.
Hmm . . . i'll have to tinker with this to really see the differences. I didn't get much effect working for me when i tried it on this one. Thanks for the explanation though.
ML
If you want to reply, then register here. Registration is free and your account is created instantly, so you can post right away.