Need some help please
May 1, 2017 03:10:54 #
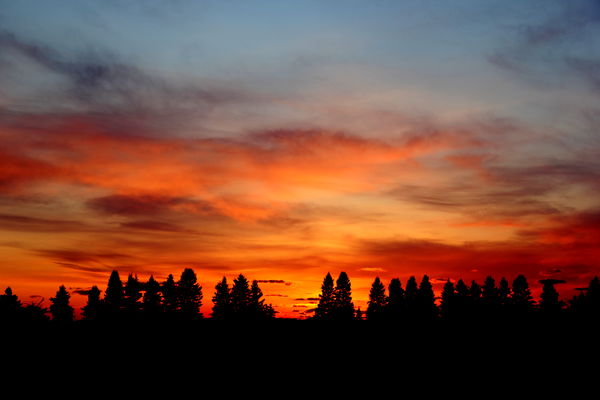
Need some help with my sunset pics, I get good sky, but non-existent foreground, how can I get the foreground to show up better with nice detail. Feel free to download and play with these, all I ask is that you re-post and explain how you did what you did, so we all can learn, and do better. Thanks in advance to all that comment, your help is greatly appreciated.


May 1, 2017 03:51:34 #
amfoto1
Loc: San Jose, Calif. USA
The scene you are shooting is too extreme for your camera. The dynamic range is too great.
There are several possible ways to deal with it.
One way is to take two photos... one exposed for the sky, the other exposed for the foreground. Later you can combine the "correct" portions from each in post-processing software (such as Elements or similar).
Another way is to use a Graduated Neutral Density filter... which is half gray, half clear. ND Grad filters come in various strengths... you probably need at least two stops, maybe three. The best type are rectangular and slide into a filter holder that screws onto the front of your lens (Cokin makes a fairly inexpensive set, adapters and filter holders... there are more expensive from Lee, Singh-Ray and others). With this type filter you cover the brighter sky with the gray area of the filter to "hold back" some of its brightness and let the foreground show through the clear portion of the filter. This method isn't as precise as the above, two-shot method, but could work pretty well with your examples.
A third method is to use a flash or several flashes to illuminate portions of the foreground, but that wouldn't work very well in your examples. It works best when there's some foreground objects fairly close.
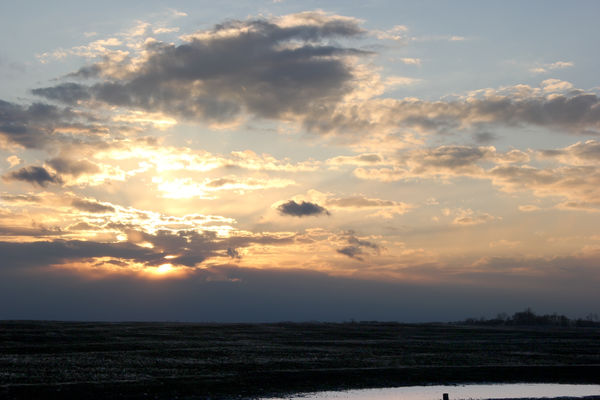
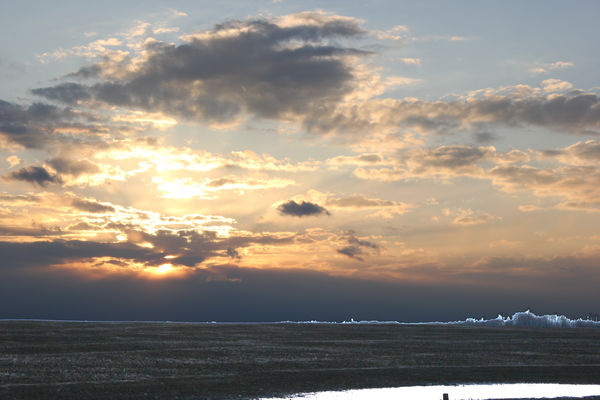
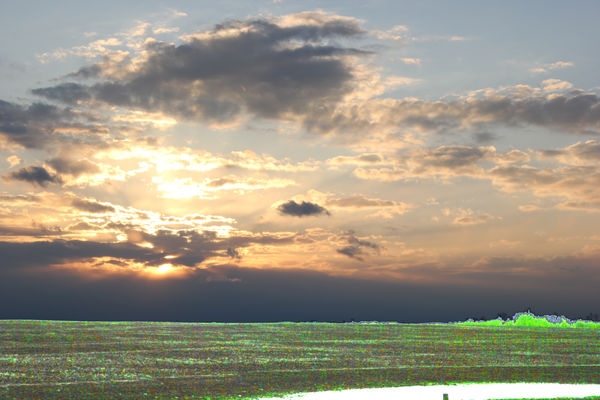
There really isn't much foreground in your first example image, and the silhouette of the trees in the second one actually look pretty good (plus would be relatively hard to correct now... or using the filter mehod mentioned above). So I did some adjustments to the foreground in your third shot, using Photoshop. First I created a layer and adjusted the brightness of the foreground strongly, but that caused the sky to be "blown out"... So I used a mask and removed just the sky portion, allowing the background sky to show (unadjusted) through. It's similar to the method of taking two shots, but there's a limit to how much can be done trying to do it all this way with post-processing adjustments. It's also limiting working with JPEGs such as these. RAW files have more latitude for adjustment. Image noise and artifacts increased a lot, so I had to apply some noise reduction. I also had to do some hand blending right at the horizon line, then flatten the two layers into a single image. It's pretty subtle, still... but there's a bit more detail in the foreground now, especially when you view the full size image.
There are several possible ways to deal with it.
One way is to take two photos... one exposed for the sky, the other exposed for the foreground. Later you can combine the "correct" portions from each in post-processing software (such as Elements or similar).
Another way is to use a Graduated Neutral Density filter... which is half gray, half clear. ND Grad filters come in various strengths... you probably need at least two stops, maybe three. The best type are rectangular and slide into a filter holder that screws onto the front of your lens (Cokin makes a fairly inexpensive set, adapters and filter holders... there are more expensive from Lee, Singh-Ray and others). With this type filter you cover the brighter sky with the gray area of the filter to "hold back" some of its brightness and let the foreground show through the clear portion of the filter. This method isn't as precise as the above, two-shot method, but could work pretty well with your examples.
A third method is to use a flash or several flashes to illuminate portions of the foreground, but that wouldn't work very well in your examples. It works best when there's some foreground objects fairly close.
There really isn't much foreground in your first example image, and the silhouette of the trees in the second one actually look pretty good (plus would be relatively hard to correct now... or using the filter mehod mentioned above). So I did some adjustments to the foreground in your third shot, using Photoshop. First I created a layer and adjusted the brightness of the foreground strongly, but that caused the sky to be "blown out"... So I used a mask and removed just the sky portion, allowing the background sky to show (unadjusted) through. It's similar to the method of taking two shots, but there's a limit to how much can be done trying to do it all this way with post-processing adjustments. It's also limiting working with JPEGs such as these. RAW files have more latitude for adjustment. Image noise and artifacts increased a lot, so I had to apply some noise reduction. I also had to do some hand blending right at the horizon line, then flatten the two layers into a single image. It's pretty subtle, still... but there's a bit more detail in the foreground now, especially when you view the full size image.
May 1, 2017 09:52:51 #
amfoto1 wrote:
The scene you are shooting is too extreme for your... (show quote)
That did make a difference, thank-you. I assume this can be done in Gimp the same way ???
May 1, 2017 14:54:51 #

PhotoNoob wrote:
"I agree the best way is to take 2 Images one for the sky the other exposed for the fore ground . you need a tripod to pull this off ! Both pictures have tobe of the same Image. Need some help with my sunset pics, I get good sky, but non-existent foreground, how can I get the foreground to show up better with nice detail. Feel free to download and play with these, all I ask is that you re-post and explain how you did what you did, so we all can learn, and do better. Thanks in advance to all that comment, your help is greatly appreciated.
. . . some more thoughts . . . duplicate layer . on this new layer uses levels to expose for the forground only ( Should be way to the left ) press o.k. , touch the white with magic wand , edit > cut . should look like this - still alittle clean-up needed . . . Now you can go or use Hues/Saturation , as you move saturation to the right you will get color , use Hues to correct the color of choice . . . probably went to far , but i wanted you to see . . . hope some of this helps . . . feather
May 1, 2017 15:04:59 #
I tried on Image #2 there is no detail in the Black at all . . . feather
May 1, 2017 15:11:13 #
amfoto1 wrote:
The scene you are shooting is too extreme for your... (show quote)
. . . Great Job ! amfoto1 . I enjoyed your comments and thoughts , i learned a lot ! Thankyou for sharing . . . feather
May 2, 2017 08:58:16 #
romanticf16
Loc: Commerce Twp, MI
If your camera is tripod mounted , Spray a 10x12 sheet of smooth, rigid mountboard with flat black paint. Test your timed exposure for the "top of scene"; then for "bottom of scene". Once you know the ratio- you'll know how long to block the top while doing a timed exposure before removing the card. (the difference may be in minutes).
May 3, 2017 11:11:00 #
romanticf16 wrote:
Love this thankyou for sharing . . . featherIf your camera is tripod mounted , Spray a 10x12 sheet of smooth, rigid mountboard with flat black paint. Test your timed exposure for the "top of scene"; then for "bottom of scene". Once you know the ratio- you'll know how long to block the top while doing a timed exposure before removing the card. (the difference may be in minutes).
If you want to reply, then register here. Registration is free and your account is created instantly, so you can post right away.