Help on Pileated Woodpecker
Mar 10, 2016 09:38:58 #
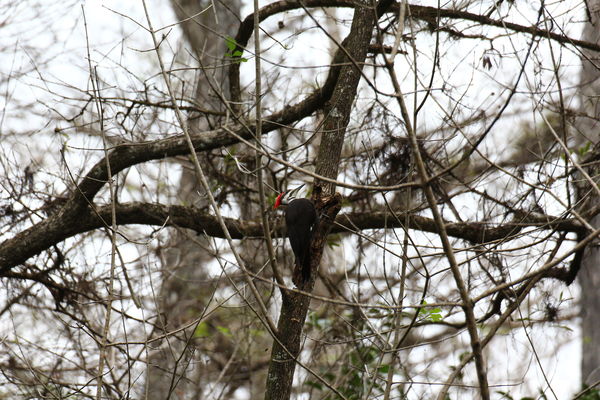
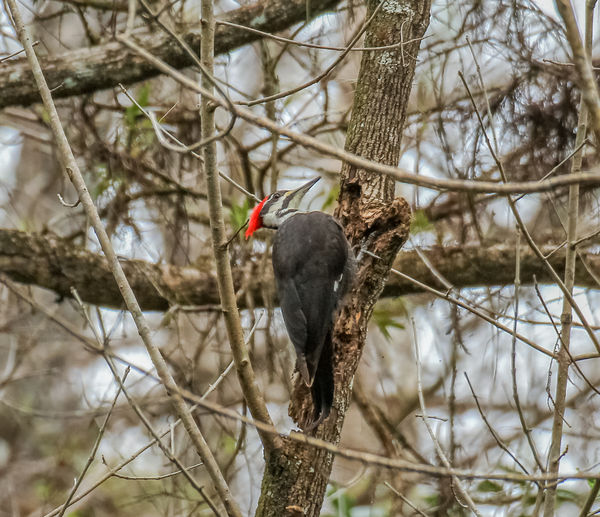
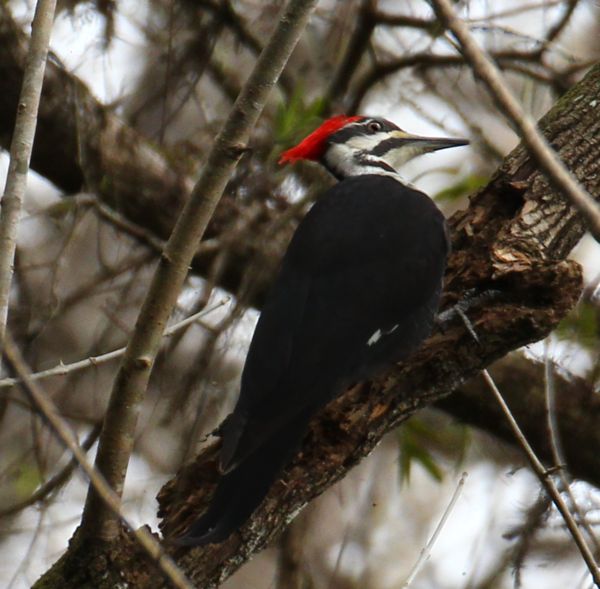
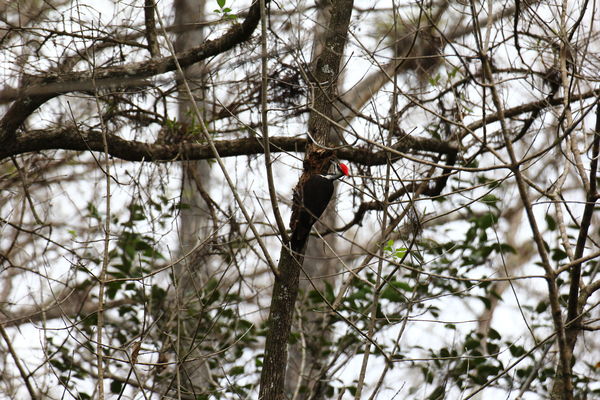
I have attached two pictures of a Pileated Woodpecker, original and a PP copy, using PSE14. On the PP photo, I can't seem to get rid of the brownish-purple tint on the breast and the upper portion of the wing. On other shots of this same bird (all taken within a minute or so) with the bird on the other side of the tree, the discoloration does not seem to appear, but they do on other shots like this one. Unfortunately, this is the best shot of the bird; I have Cloned out or used the Healing brushes to remove some branches, but nothing has been done over this portion of the bird. I suspect the problem may be that the lighting angles or shadows were different on the two sides of the tree, bur have no clue how to attack that problem.
C & C will be gratefully accepted; I'm no PP expert and have tried every trick I know including painting over the area, but that looked too fake; all the feather detail was lost.
Feel free to try your hand on this, and thank you for any help and suggestions.
C & C will be gratefully accepted; I'm no PP expert and have tried every trick I know including painting over the area, but that looked too fake; all the feather detail was lost.
Feel free to try your hand on this, and thank you for any help and suggestions.
Mar 10, 2016 14:48:51 #

I think you're right about the different light angle. I think it's iridescence similar to what you see on pigeons and others.
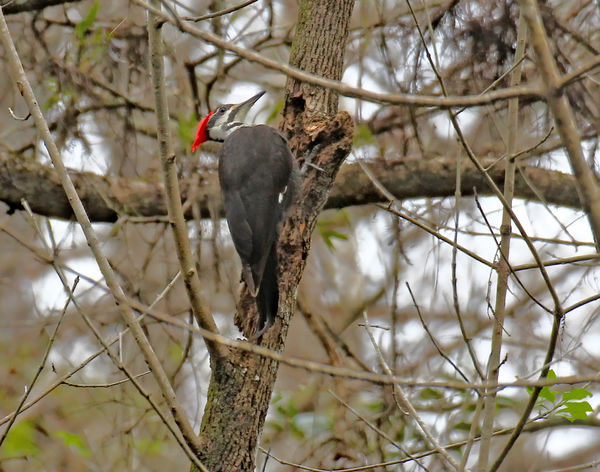
One of the most effective single adjustments that you can give it is a large helping of colour de-noise. It doesn't get rid of the magenta tint completely (see #1), but I suspect that the tint isn't entirely inappropriate.
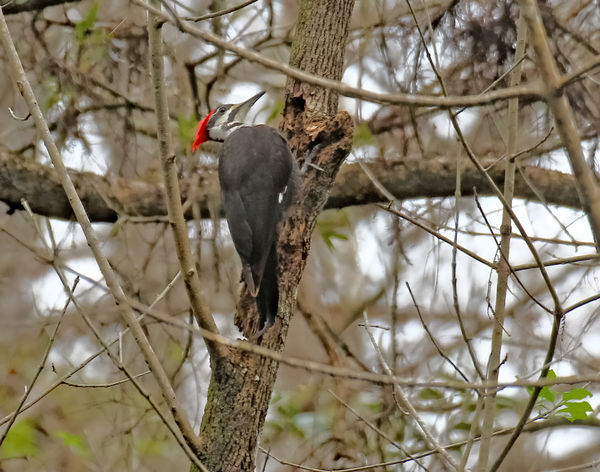
On the other hand, if you were determined to see the magenta gone, you could select the offending area and just give it a large dose of desaturation (see #2). The feathers are basically grey and that's unaffected by the desaturation. You may find you want to leave a suggestion of that colouring because it's part of the real-life colouring.
PS - I tried using the HSL tool but it wasn't doing anything significant to that area.
-
One of the most effective single adjustments that you can give it is a large helping of colour de-noise. It doesn't get rid of the magenta tint completely (see #1), but I suspect that the tint isn't entirely inappropriate.
On the other hand, if you were determined to see the magenta gone, you could select the offending area and just give it a large dose of desaturation (see #2). The feathers are basically grey and that's unaffected by the desaturation. You may find you want to leave a suggestion of that colouring because it's part of the real-life colouring.
PS - I tried using the HSL tool but it wasn't doing anything significant to that area.
-
#1 - Your edit with colour de-noise.
(Download)
#2 - My edit with de-noise and desaturation.
(Download)
Mar 10, 2016 15:33:46 #
Thanks, R.G.. Your edits definitely make a difference. I'll make a couple more copies and try again with the de-noise and saturation. I had tried the PSE 14 de-noise tool as well as the Topaz Adjust plug-in, but not the saturation.
When I tried printing the Post Processed copy I attached, the offending color really jumped out much more than it shows up on my 28" monitor.
Thanks again for the help.
When I tried printing the Post Processed copy I attached, the offending color really jumped out much more than it shows up on my 28" monitor.
Thanks again for the help.
Mar 10, 2016 19:20:42 #
JCam wrote:
I have attached two pictures of a Pileated Woodpecker, original and a PP copy, using PSE14.
C & C will be gratefully accepted; I'm no PP expert and have tried every trick I know including painting over the area, but that looked too fake; all the feather detail was lost.
Feel free to try your hand on this, and thank you for any help and suggestions.
C & C will be gratefully accepted; I'm no PP expert and have tried every trick I know including painting over the area, but that looked too fake; all the feather detail was lost.
Feel free to try your hand on this, and thank you for any help and suggestions.
At the risk of losing feather detail, Cam, I tried to inject a little impact by cropping, rotating, removing a few branches (growing out of its head) and playing with the brightness of the eye. Now it needs to be enlarged.
Well, it was fun anyway.
:roll:
Mar 10, 2016 23:27:16 #
JCam wrote:
I have attached two pictures of a Pileated Woodpec... (show quote)
How do you know the dark feathers aren't supposed to have a little purple iridescence? Many dark colored birds do - from Blackbirds to Frigate birds.
Mar 11, 2016 01:33:46 #
JCam wrote:
......I'll make a couple more copies and try again with the de-noise and saturation......
Just remember that with colour de-noise you can use generous amounts and it will have only a slight effect on overall softness. The luminosity de-noise is a different story, but you should only have to use very little - if any.
Mar 11, 2016 08:37:59 #
rborud
Loc: Minnesota
JCam wrote:
I have attached two pictures of a Pileated Woodpec... (show quote)
Cam
Here is a try in PSP and a couple other programs. Neat bird!!
RBorud

Mar 11, 2016 09:21:29 #
Shakey wrote:
At the risk of losing feather detail, Cam, I tried to inject a little impact by cropping, rotating, removing a few branches (growing out of its head) and playing with the brightness of the eye. Now it needs to be enlarged.
Well, it was fun anyway.
:roll:
Well, it was fun anyway.
:roll:
Shakey, Great job of PP! How did you mask the "brownish colors? The loss of detail is minor and doesn't seem to effect the photo at all! Your results duplicate what I was trying to do but couldn't accomplish. Thank you!
When I tried cropping that close it made the objectionable brownish discoloration even more prominent :( .
Mar 11, 2016 10:19:21 #
GregWCIL wrote:
How do you know the dark feathers aren't supposed to have a little purple iridescence? Many dark colored birds do - from Blackbirds to Frigate birds.
Greg, to be honest, I don't know, but none of the "bird books" I've checked show the brownish "discoloration", and other pictures of this same bird (one attached) with a different light angle show it either. In my opinion it detracts from the picture so I wanted to get rid of it.
Mar 11, 2016 13:32:38 #
JCam wrote:
Shakey, Great job of PP! How did you mask the "brownish colors? The loss of detail is minor and doesn't seem to effect the photo at all! Your results duplicate what I was trying to do but couldn't accomplish. Thank you!
When I tried cropping that close it made the objectionable brownish discoloration even more prominent :( .
When I tried cropping that close it made the objectionable brownish discoloration even more prominent :( .
I just used the Levels tool and the Curves tool. With the Levels tool move the sliders at each end of the histogram inwards until you get close to the effect you want. Use the center slider for final adjustments. You'll soon get the hang of that. With the Curves tool use the red, green, and blue channels to adjust the colors. If in doubt see this tutorial:
http://www.uglyhedgehog.com/tpr?p=1276786&t=69708
I hope this helps :D
If you want to reply, then register here. Registration is free and your account is created instantly, so you can post right away.