F-stop, shutter speed, etc.
Aug 21, 2011 11:06:29 #
Hi,
Can you please tell me a easy way to learn how to use the f-stop system and the shutter speeds?
Help
Thanks. Wiliam.
Can you please tell me a easy way to learn how to use the f-stop system and the shutter speeds?
Help
Thanks. Wiliam.
Aug 21, 2011 12:16:38 #

Hi,
The easiest way to learn to use a camera is simply to take pictures and review the results you get at different settings. Correct me if I'm wrong, but I think you are looking to gain a better understanding of how f-stops, shutter speeds, etc. can affect a picture when you shoot it. I highly recommend some reading that will really help you gain insight into the how, when, and why of using different camera settings. There is a great 3 volume set by Scott Kelby titled "The Digital Photography Books Boxed Set" that is a wonderful and entertaining way to learn about digital photography. Browse your local bookstore and flip thru some of the pages - I think you'll find his way of writing very easy to understand and immensely helpful.
The easiest way to learn to use a camera is simply to take pictures and review the results you get at different settings. Correct me if I'm wrong, but I think you are looking to gain a better understanding of how f-stops, shutter speeds, etc. can affect a picture when you shoot it. I highly recommend some reading that will really help you gain insight into the how, when, and why of using different camera settings. There is a great 3 volume set by Scott Kelby titled "The Digital Photography Books Boxed Set" that is a wonderful and entertaining way to learn about digital photography. Browse your local bookstore and flip thru some of the pages - I think you'll find his way of writing very easy to understand and immensely helpful.
Aug 21, 2011 17:13:33 #

A Quick Guide to Shutter Speeds, F-Stops and Film Speed
(they are all related)
In terms of exposure, shutter speeds and f-stops are the same. Each full f-stop and each full shutter speed (not the in-between stuff you see in Program mode) is ONE F-STOP apart.
The exposure system is logarithmic:
f/2.8 is twice as bright as f/4 which is twice as bright as f/5.6, and the reverse, in terms of being BRIGHTER as you go up the scale, is also true.
The same is true for shutter speeds:
1/125 is twice as bright as 1/250 which is twice as bright as 1/500 and so forth.
In short, things get brighter or darker based upon which way you are turning the f/stop ring or shutter speed dial (in Manual mode.)
Why?
Shutter speeds are all about stopping action, or not. The necessary shutter speed to stop action varies with the angle of view and type of action involved.
F-stops are all about depth of field, from what distance to what further distance are things in focus? The higher the f-stop, the more depth will be in focus. In the old days, lenses were actually marked with the depth of field for each f-stop. Why this was good: you could manually set the focus to control the focus of the shot, and KNOW what would be in focus, and what was blur, without needing instant review, which did not exist (except with view cameras, but that's another lesson) In the movies, we used to use a book of look-up tables for depth of field, but now it's all on a smart phone app.
Film Speed (ISO) is all about allowing you to place the shutter speeds and f-stops where you need them for the given shot. A day at the beach is very different from shooting a stage play in a theater.
Creative Example... what about NOT stopping the action? Had you a tripod, your camera, and a waterfall before you, while you could easily freeze the water as it falls, putting the camera on the tripod, select a looooong exposure time, then adjust the f/stop for proper exposure. Longer exposure times require higher f-stops. Consider the following two IDENTICAL exposures:
1/125 second at f/2 is the same exposure as 1 second at f/22
But which exposure will tend to turn falling water into something magical? The latter. Loooong exposures can be good. And not just for waterfalls. It also works with traffic and even certain city crowd-scapes. (Lots of other things too.)
Now, when considering the creative use of exposure, which is the exposure dance between f/stops, shutter speeds, and ISO "film" speed, you must consider the environment and its shooting conditions.
If you came upon that waterfall on a windy day, and all the trees in your frame were swaying with the leaves fluttering, the magical looooong exposure is going to turn ALL that movement to a blur. Not good. Better to just freeze it all with a faster shutter speed and wider aperture in that condition. You can raise the film speed setting on the camera if necessary to keep enough f-stop for your depth of field.
It's all about SENSITIVITY and QUALITY TRADE-OFFS. In the old days, we bought different films for different purposes, and these films were also categorized by their FILM SPEED. This has translated into digital to keep things sane.
Generally, in film OR digital, as ISO "film" speed settings go UP, grain (on film) and noise (in digital) goes UP, too, eventually either really interesting or unusable. Digital SLRs HAVE tipped the equation with each new iteration of CMOS/CCD chip design, which makes high ISO shooting a smoother thing, but it conjures memories of shooting TMAX 3200 film exposed at 6400, then processing it in my lab, and discovering a very special film grain look, something only digital manipulation can sort of achieve in digital. But it's not the same.
Well, that's it for a bit of a primer.
Richard Brown
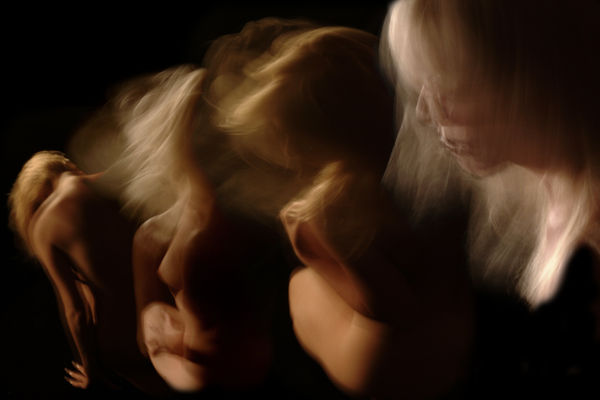
Long Exposures, A Digital Camera, and Photoshop by Richard Brown
Aug 21, 2011 17:17:52 #
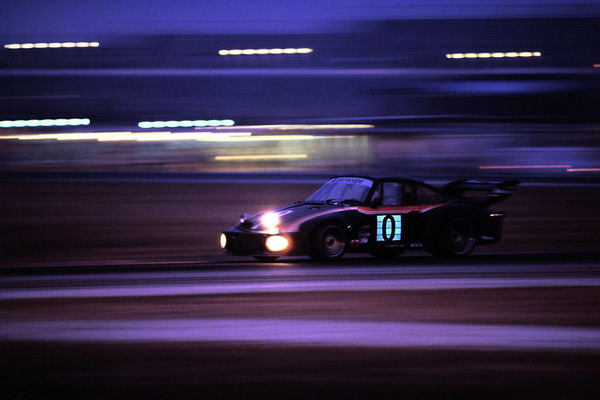
Oh, another note...
The shot below is an example of creative use of shutter speed and f-stop. Uniquely, the photo has all the information necessary to determine the shutter speed used.
Can you guess it?
The shot below is an example of creative use of shutter speed and f-stop. Uniquely, the photo has all the information necessary to determine the shutter speed used.
Can you guess it?
The 24 Hours at Daytona by Richard Brown
Aug 21, 2011 21:36:54 #
Aug 22, 2011 09:58:39 #
I am so used to using auto exposure I would like to know how to stop using auto and is it better to bracket photos using manual ? any sugestions will be apreciated
Aug 22, 2011 11:30:00 #
To wean yourself off of Program Mode and begin to enjoy the greater freedom and creativity photography provides, the cheapest thing, in MANUAL MODE, is to labor to obtain an 18% Grey Card. Filling your frame with that grey makes your camera into an INCIDENT meter. Incident meters measure the light FALLING UPON your subject. It is the most common meter seen on movie sets, though a 1 degree spot meter, and color meter, often show up as well.
Other tricks:
Use the GRASS. Often, the grass will make an okay incident reading when in manual mode.
Use the back of your hand. Sometimes, it's just like grass, but you can vary the quality of the way the sun is falling by moving your hand to better match, say, a distant subject you are shooting.
You could, for example, choose your hand as your "grey card," and then find the right ISO which brings all your meter readings into perfect exposures. This is a variant of a thing we used to do in film when determining the system speed for film shooting.
If you have the capital, invest in a handheld exposure meter. Minolta, Sekonic, and Gossen all make a variety of models. Remember that, when using an incident meter (this is the kind you want to buy) they usually have removable or slide out of the way white domes over their sensors. When you remove that dome, and point the sensor toward your shot, you get the REFLECTIVE reading, the light reflected from your subject.
Also, with, say, the Minolta meter, the hemispheric white dome for incident readings can be replaced with a flat one. Flat incident readings allow precise readings of the light falling on a subject from different angles. It is the best way to determine what each light in a studio setup is doing. When you learn this type of metering, you can know, before you pick up a camera, exactly how the shot will look.
Some meters, like the Spectra Cine meter, offers a combination exposure, balanced between incident and reflected readings, and offers readings at 24 fps. Nice for people with Nikons or Canons which shoot video.
Learning the difference between incident and reflected readings, how each quality of light effects your image, and also learning on which way to sway your exposure (the two readings are almost always different,) is delightfully easy with digital cameras, as it costs NOTHING to learn. Those of use who started in film paid a heavy price to perfect the craft.
On a movie set, there is no excuse for bad exposure, which sometimes is the fault of the lab. One lab might develop too thin (underexposed possibly due to inadequate replenishing) and another lab, with spot-on chemistry, gets it right. Digital has changed this equation.
All these images metered with a flat disc on an incident meter.
Aug 23, 2011 21:23:34 #
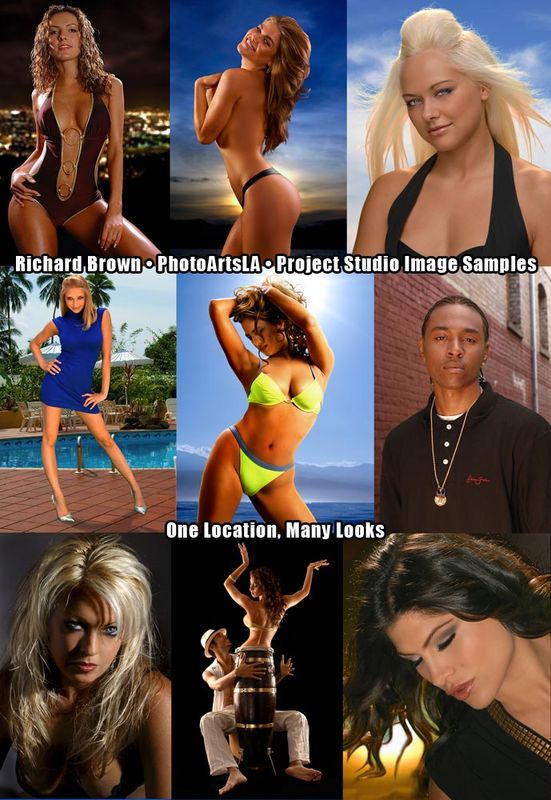
Man you should write a book. That was the best and most succient explanation of exposure I have come across. I have been asked by my shrink to lead a therapy group I have entitled photographic expression therapy. The idea is to use photography to express the emotions of what the student is feeling. This is for clients of the doc who have difficulty expressing themselves in individual or group therapy. Kinda like art therapy. I will touch on the basics but it really isnt a photography class per se the subject matter and what client feels is more important then say whether or not it violates the rule of thirds. Any way what i would like to do is print out your post and explanation of exposure and use it as a handout. The photos will be used in therapy by the doc. When enough of a body of work has been generated we want to display and put up for sale the good ones to rasie funds for our mental health rec center. Any suggestions and tips would be greately apreciated and let me know if I can print out your post. Also I really could use any of those models in your color shot for my own therapy :P any chance you can send me one? (just not the guy)
If you want to reply, then register here. Registration is free and your account is created instantly, so you can post right away.