Tutorial - Add a simple frame to your image
Jan 24, 2016 07:43:30 #

How to add a simple but effective looking mat or frame to an image.
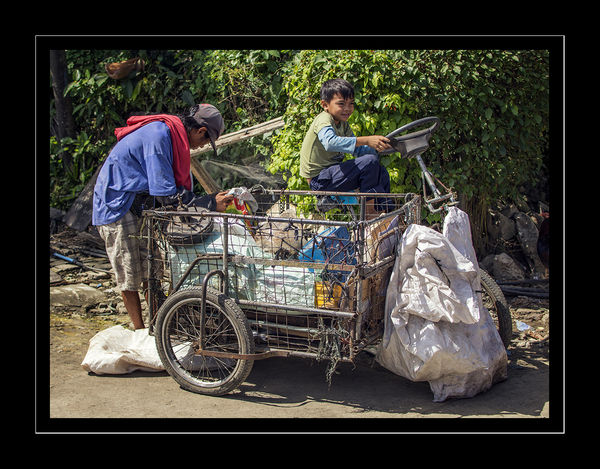
The first thing to do if needed is change the size and resolution of your finished picture. I always change to 72 dpi and around 1000 pixels on the longest side using Image>Image size in Photoshop This shows up perfectly on the net and deters theft as the image lacks both size and resolution for printing purposes..
I am using Photoshop but I'm pretty sure this will work with Elements Paint Shop Pro and Gimp.
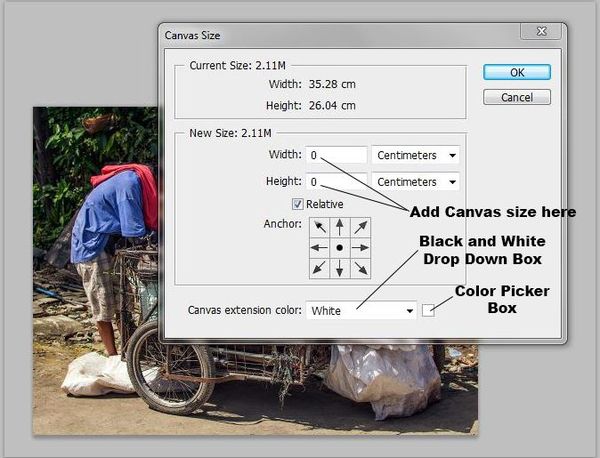
With your re-sized image open on the screen go Image>Canvas Size and a box will open as per the illustration. At this stage I always work in Centimeters and suggest whilst following this tutorial you do as well
1) Make sure there is a tick in the box marked Relative.
2) Using the drop down box set the canvas extension color to black.
3) Change size in Width and Height boxes to 2 Cms
4) Click OK and you will have a black box around your picture
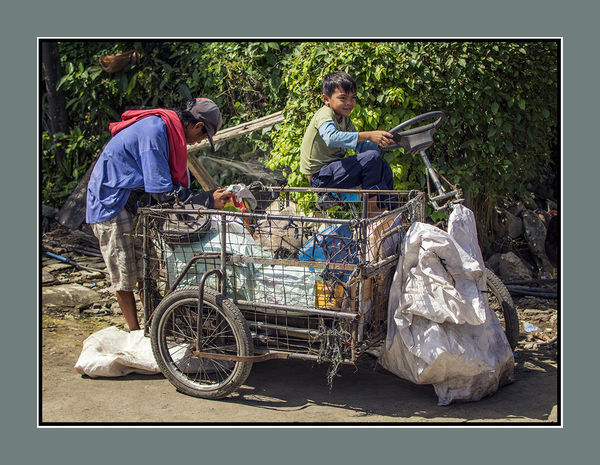
Now we are going to add a very thin white line to the outside of our frame.
1) Go Image>Canvas Size and change drop down box to white for canvas extension color.
2) Change Width and Height to 0.1 and click OK to get the thin white line we need.
To finish the frame
1) Go Image>Canvas Size change drop down box to Black and Height and Width to 5 Cms to end up with our finished result.
I have made a simple black and white frame making use of the drop down box. The Color Picker box allows you to be as adventurous as wish with your frames. Just remember it is to enhance your Photograph and its better to be conservative when choosing colors generally.
If you use the Color Picker the color you choose becomes your foreground color so choose that in the drop down box,
An excellent post and link to an informative article which goes into matting in some depth can be found here
http://www.uglyhedgehog.com/t-355222-1.html
The correct frame in the correct color or even color combination can greatly increase the appeal of your work. In a future article we will cover adding textures to frames.
Hope the tutorial was helpful and if you wish to show your results her you are welcome to post.
The first thing to do if needed is change the size and resolution of your finished picture. I always change to 72 dpi and around 1000 pixels on the longest side using Image>Image size in Photoshop This shows up perfectly on the net and deters theft as the image lacks both size and resolution for printing purposes..
I am using Photoshop but I'm pretty sure this will work with Elements Paint Shop Pro and Gimp.
With your re-sized image open on the screen go Image>Canvas Size and a box will open as per the illustration. At this stage I always work in Centimeters and suggest whilst following this tutorial you do as well
1) Make sure there is a tick in the box marked Relative.
2) Using the drop down box set the canvas extension color to black.
3) Change size in Width and Height boxes to 2 Cms
4) Click OK and you will have a black box around your picture
Now we are going to add a very thin white line to the outside of our frame.
1) Go Image>Canvas Size and change drop down box to white for canvas extension color.
2) Change Width and Height to 0.1 and click OK to get the thin white line we need.
To finish the frame
1) Go Image>Canvas Size change drop down box to Black and Height and Width to 5 Cms to end up with our finished result.
I have made a simple black and white frame making use of the drop down box. The Color Picker box allows you to be as adventurous as wish with your frames. Just remember it is to enhance your Photograph and its better to be conservative when choosing colors generally.
If you use the Color Picker the color you choose becomes your foreground color so choose that in the drop down box,
An excellent post and link to an informative article which goes into matting in some depth can be found here
http://www.uglyhedgehog.com/t-355222-1.html
The correct frame in the correct color or even color combination can greatly increase the appeal of your work. In a future article we will cover adding textures to frames.
Hope the tutorial was helpful and if you wish to show your results her you are welcome to post.

Jan 24, 2016 08:45:46 #
Frank2013
Loc: San Antonio, TX. & Milwaukee, WI.
Very helpful and easy to understand tutorial Mr. Spad
Jan 24, 2016 09:44:59 #

Nice work, Billy. Another way to make a basic frame for those who don't have Photoshop is to go to Picasa 3 and use both the regular and salon framing tools. They both offer a variety of colors and widths.
Jan 24, 2016 09:51:48 #
jaymatt wrote:
Nice work, Billy. Another way to make a basic frame for those who don't have Photoshop is to go to Picasa 3 and use both the regular and salon framing tools. They both offer a variety of colors and widths.
Nice to see you here John. I have no knowledge at all of Picaso but if you wish to outline how its done and add it here it would be more than welcome. Only if you have time my friend. Its not a pressure thing at all.
Jan 24, 2016 10:51:29 #

Good job on the tutorial. I have mixed feelings about framing the images we post. Some I do, some I don't. With some photos, the frames enhance the shot, but in many cases, the frames pull attention away from the image. It does give a nice 'finished' look to an image, but it's also often mentioned that the image should stand on its own merits.
Thoughts?
Thoughts?
Jan 24, 2016 11:02:59 #
Frank2013
Loc: San Antonio, TX. & Milwaukee, WI.
Treepusher wrote:
I'm in your boat. After some thought.....depends on the image and frame I guess.Thoughts?
Jan 24, 2016 11:38:55 #

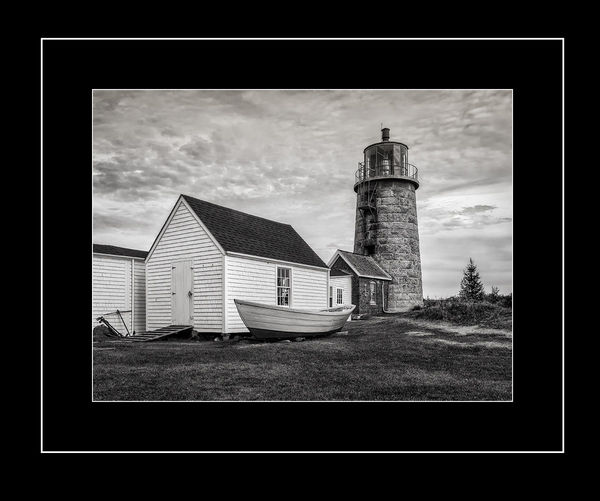
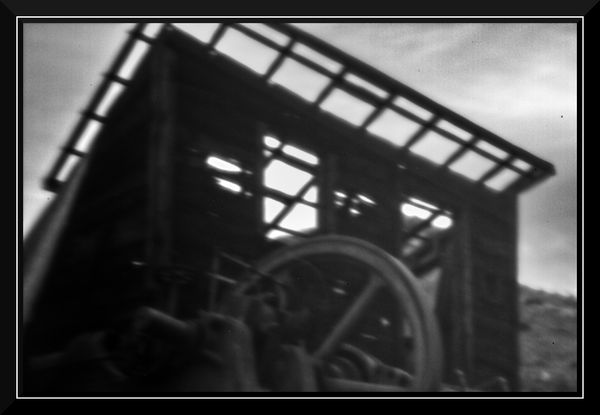
Of course I had to tinker so mine didn't come out exactly like the tutorial. I did do a version that followed it to the letter, but always have to play...
Thanks, and I look forward to learning how to add textures too.
Thanks, and I look forward to learning how to add textures too.
Jan 24, 2016 12:00:45 #

Billyspad wrote:
How to add a simple but effective looking mat or frame to an image.
...
...
Another wonderful tutorial, and easy to follow to. Thank you for this gift to the section! S-
Jan 24, 2016 12:46:14 #
There may be a better way, but I added this frame in GIMP -
Open GIMP
File > Open your image
Filters > Decor > Add border...
- Border X sixe = 12
- Border Y size = 12
- Border color = Black (click to change)
Filters > Decor > Add border...
- Border X sixe = 3
- Border Y size = 3
- Border color = White (click to change)
Filters > Decor > Add border...
- Border X sixe = 36
- Border Y size = 36
- Border color = Black (click to change)
File > Export As...
Jan 24, 2016 12:47:52 #
Nice tutorial. You mentioned PSP. It has a simple "Add Border" function that accomplishes the same effect in a single step.
Jan 24, 2016 13:04:05 #
mallen1330 wrote:
Nice tutorial. You mentioned PSP. It has a simple "Add Border" function that accomplishes the same effect in a single step.
The real value in Billy's tutorial is not this particular outcome but the variations you can create using these steps and more. I use a couple of programs that add frames and mattes, but I am eager to get to later steps where we can customize these things as much as we'd want.
Software makes a lot of things easy for us, but the biggest challenge for me is harnessing it to make it do what I want instead of having me select pre-customized options.
Jan 24, 2016 13:22:11 #
minniev wrote:
The real value in Billy's tutorial is not this particular outcome but the variations you can create using these steps and more. I use a couple of programs that add frames and mattes, but I am eager to get to later steps where we can customize these things as much as we'd want.
Software makes a lot of things easy for us, but the biggest challenge for me is harnessing it to make it do what I want instead of having me select pre-customized options.
Software makes a lot of things easy for us, but the biggest challenge for me is harnessing it to make it do what I want instead of having me select pre-customized options.
My mention of PSP 's border function is not referring to their "Frame" mattes. The "Add Border" dialog simply adds a border - you set the width, color, and whether it's symmetric.
Jan 24, 2016 13:29:55 #
mallen1330 wrote:
My mention of PSP 's border function is not referring to their "Frame" mattes. The "Add Border" dialog simply adds a border - you set the width, color, and whether it's symmetric.

Jan 24, 2016 18:36:59 #
St3v3M wrote:
There may be a better way, but I added this frame in GIMP -
For a man Im dragging to the PP table kicking and screaming you have turned out a cool frame and the steps you outlined will Im sure help others.
Nicel one St3v3
Jan 24, 2016 18:39:54 #
mallen1330 wrote:
Nice tutorial. You mentioned PSP. It has a simple "Add Border" function that accomplishes the same effect in a single step.
Glad you enjoyed the tutorial and I have to admit my knowledge of PSP is scant so thank you for taking the time to point out the steps needed to make a frame. I appreciate it very much.
If you want to reply, then register here. Registration is free and your account is created instantly, so you can post right away.