Light Tent DIY
Jan 5, 2016 11:07:45 #

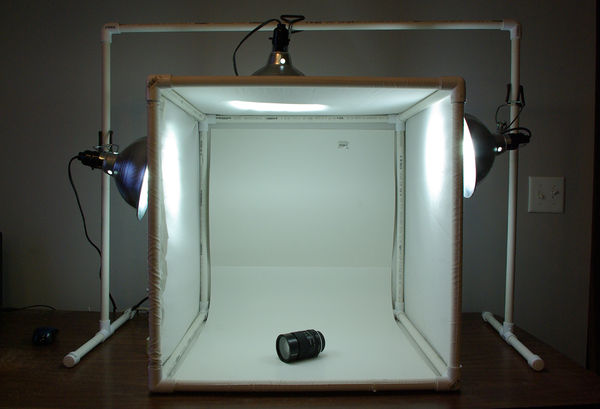
I wanted a light tent and being a DIY'er I decided to build one.
I received a couple requests from my post "My Equipment" asking me to show how I built this tent.
Material List:
1-Bed Sheet (I think I used a Full Size, Queen or King will work also, non-fitted see cut diagram)
4-8' 1/2" PVC Pipe
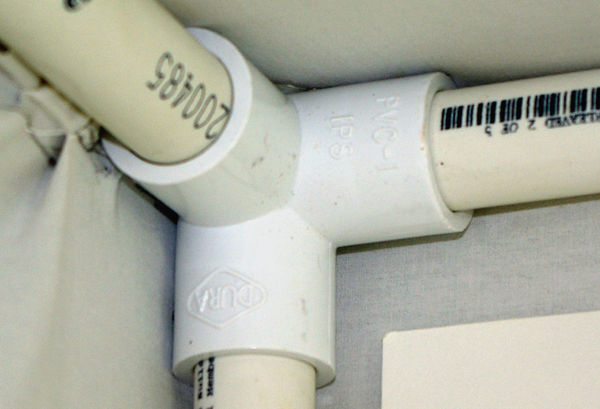
8-1/2 x 1/2 x 1/2 PVC Side Outlet
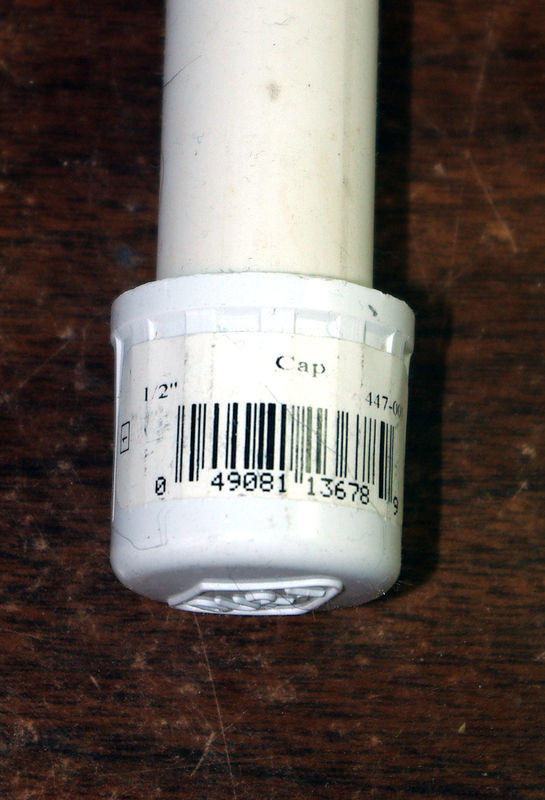
4-1/2 Caps
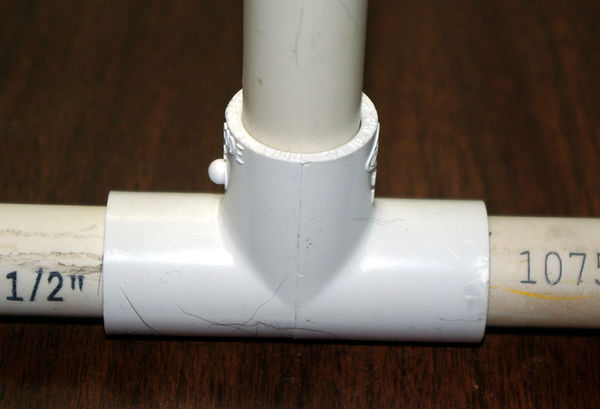
2-1/2 x 1/2 x1/2 PVC T-fittings
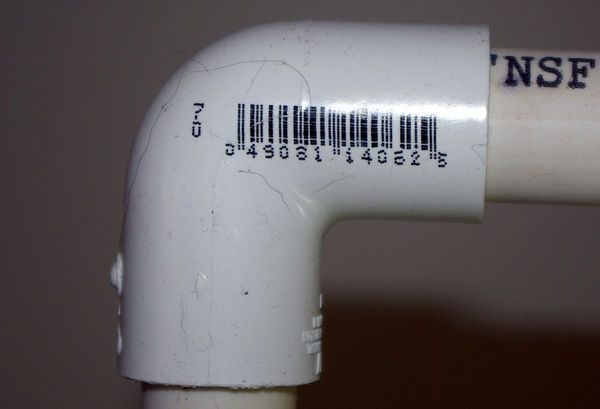
2-1/2 x 1/2 PVC 90 degree Elbow
CUT INSTRUCTIONS:
CUBE
Cut 12 pieces of 1/2" PVC pipe @ 22"
Light Standard
Cut 1 piece of 1/2" PVC pipe @ 40" (Top Piece)
Cut 2 piece of 1/2" PVC pipe @ 31" (Uprights)
Cut 4 piece of 1/2" PVC pipe @ 8" (Legs)
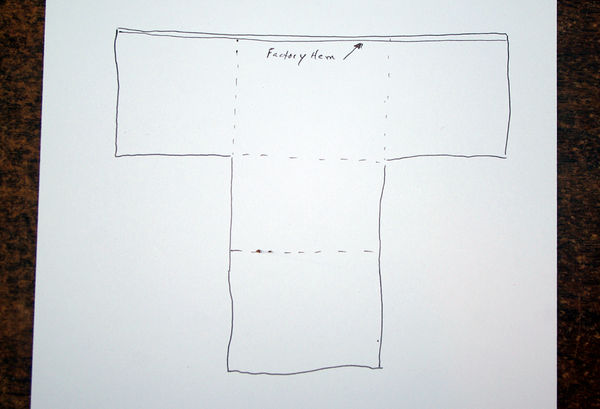
If you cut sheet correctly you should be able to insert pipe through the hemmed area. You will have to cut (notch) at each corner to allow for PVC fittings. You will have to sew or use witchery stichery and iron to finish the hem and 2 seams.
I am using compact fluorescent "Daylight" bulbs.
Hope you all have fun using your new light tent.
I received a couple requests from my post "My Equipment" asking me to show how I built this tent.
Material List:
1-Bed Sheet (I think I used a Full Size, Queen or King will work also, non-fitted see cut diagram)
4-8' 1/2" PVC Pipe
8-1/2 x 1/2 x 1/2 PVC Side Outlet
4-1/2 Caps
2-1/2 x 1/2 x1/2 PVC T-fittings
2-1/2 x 1/2 PVC 90 degree Elbow
CUT INSTRUCTIONS:
CUBE
Cut 12 pieces of 1/2" PVC pipe @ 22"
Light Standard
Cut 1 piece of 1/2" PVC pipe @ 40" (Top Piece)
Cut 2 piece of 1/2" PVC pipe @ 31" (Uprights)
Cut 4 piece of 1/2" PVC pipe @ 8" (Legs)
If you cut sheet correctly you should be able to insert pipe through the hemmed area. You will have to cut (notch) at each corner to allow for PVC fittings. You will have to sew or use witchery stichery and iron to finish the hem and 2 seams.
I am using compact fluorescent "Daylight" bulbs.
Hope you all have fun using your new light tent.
Lite Tent
Side Outlet Fitting
90 Degree
T-Fitting
Cap
Layout for Sheet
Jan 5, 2016 11:29:17 #
Jan 5, 2016 12:40:19 #

Jan 5, 2016 13:25:14 #

Thank you, Coyote, for the plains for the "DIY-Light Box".
It looks good, simple, affordable, and works well. (I hope that people would NOT glue the parts together???)
To secure the cloth with Velcro Straps sewn to the edges. OR -- After making and fitting it over the frame, one could stitch the whole thing together.
It looks good, simple, affordable, and works well. (I hope that people would NOT glue the parts together???)
To secure the cloth with Velcro Straps sewn to the edges. OR -- After making and fitting it over the frame, one could stitch the whole thing together.
Jan 5, 2016 13:58:01 #
James R wrote:
Thank you, Coyote, for the plains for the "DIY-Light Box".
It looks good, simple, affordable, and works well. (I hope that people would NOT glue the parts together???)
To secure the cloth with Velcro Straps sewn to the edges. OR -- After making and fitting it over the frame, one could stitch the whole thing together.
It looks good, simple, affordable, and works well. (I hope that people would NOT glue the parts together???)
To secure the cloth with Velcro Straps sewn to the edges. OR -- After making and fitting it over the frame, one could stitch the whole thing together.
Yes, I should have added that I DID NOT glue the parts together.
This will allow easy take down for storage or transport.
Great idea to use velcro, James
Jan 5, 2016 14:03:46 #
St3v3M wrote:
Thank you for sharing! S-
St3v3M, thank you for posting that link. I will start reading thru the info posted there. I need all the help I can get.
Jan 5, 2016 14:07:33 #
Highplains Coyote wrote:
St3v3M, thank you for posting that link. I will start reading thru the info posted there. I need all the help I can get.
Always! S-
Jan 5, 2016 15:09:06 #

Jan 5, 2016 18:14:14 #

Great job. Thanks for sharing.
Highplains Coyote wrote:
I wanted a light tent and being a DIY'er I decided... (show quote)
Jan 6, 2016 06:03:43 #

Kudos, Highplains Coyote, in fact, Kudos to any one who does DIY. With DIY you use your brain and you have control over the situation. I shout the praises of DIY people "Cause I are bee one"
Jan 6, 2016 08:29:32 #
Thank you, dpullum
dpullum wrote:
Kudos, Highplains Coyote, in fact, Kudos to any one who does DIY. With DIY you use your brain and you have control over the situation. I shout the praises of DIY people "Cause I are bee one"
Jan 6, 2016 09:04:42 #
Jan 6, 2016 09:25:36 #

Looks like a great light tent Coyote, thank you for sharing the plans and material list. I was just thinking of getting one off of the net. I may try this instead. What was the final cost including the lights and stand -- if you don't mind?
Jan 6, 2016 09:32:41 #
Jan 6, 2016 11:21:13 #
hswader
Loc: Bedford, PA
I think I'd like to make a copy of your light tent, but could you supply the measurements for cutting the sheet? Or do I go with the sizes of the pvc pipe you gave?
I could go by that, but it may be easier to some if they were mentioned.
Thank you for providing the info on the tent.
Yours, Hswader
I could go by that, but it may be easier to some if they were mentioned.
Thank you for providing the info on the tent.
Yours, Hswader
If you want to reply, then register here. Registration is free and your account is created instantly, so you can post right away.