Increasing clarity in PSE 13
Nov 11, 2015 10:46:12 #
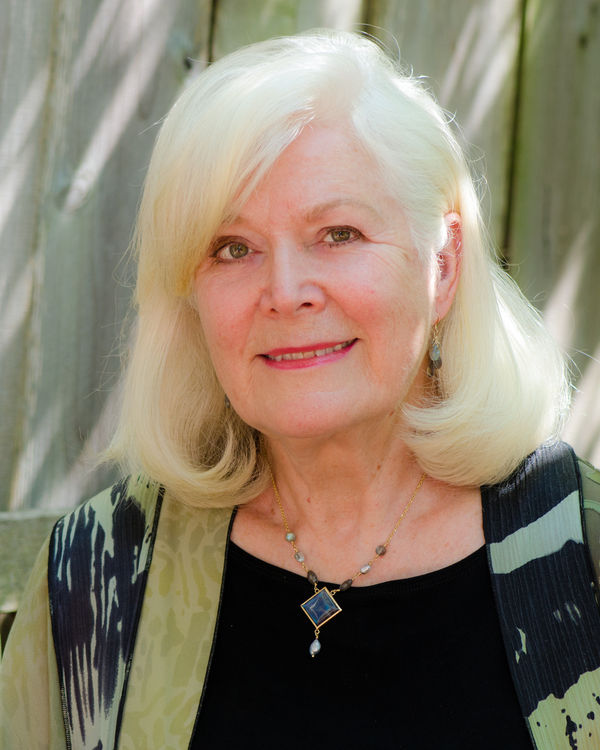
In trying to improve my pp skills, I submitted this shot to my photoclub. It was suggested that I use the clarity control in Lightroom just on the eyes. Well, I don't have Lightroom. I use PSE 13. The clarity control in works on the RAW file only, and then on the entire image. Increasing the clarity in the Raw file does bad things to the subject's skin. Is there a workaround after selecting the eyes. Please, no suggestions to get Lightroom.
Nov 11, 2015 12:28:10 #

GAAAHHHHH! You're not going to like it, but it CAN be done. Save a copy or your Photo. For simplicity sake, let's say the first image is titled "PrettyLady". Do a File>Save As>PrettyLady_1 and click OK. While the PrettyLady photo is still open, do a File>Open in Camera Raw>PrettyLady_1. When this happens, the file will open in a menu that has the Clarity slider at the bottom. Looking only at the lady's eyes, adjust the clarity until you've got it where you want it. I realize this is a Global Change that will do horrible things to the skin, but we'll deal with that next. When your through with your corrections, click Open Image. Do a Ctrl-A to "Select All", then Edit>Copy. At this point you have saved a copy of PrettyLady_1 with the clarity enhancements to the clipboard. You can now close PrettyLady_1.
Navigate back to your orginal photo, PrettyLady. Do an Edit>Paste. This will paste the copy from the clipboard to a new layer on your photo. If you haven't already done so, click on Windows>Layers so you can see the layers panel on the right side of the screen. You should have two layers, probably named Background and Background Copy 1. Click on the thumbnail in the layers panel called Background Copy 1, then click on the icon that looks like a dark rectangle with a circle in the middle (at the top of the Layers Panel). If you mouse over this icon it should read "Add a mask". This will create a white masking box to the right of Background Copy 1. Click in the white box. Hit Ctrl-I to invert this mask. The box will change to black. This indicates that your original photo, Pretty Lady is now being presented on your monitor, in the large editing window.
Now we want to selectively replace just the eyes with the clarity-enhanced layer. To do this look in the COLOR box which usually has a white and a black box, overlapping each other. You want white to be on top, so click the two-headed toggle switch until white is on top. Then go up to the DRAW section and select the Brush Tool. In the options for brush tool, resize the brush until it is small enough to fit inside the lady's eyes without overlapping, and set the opacity to something like 90%. You may have zoom in on the image pretty far so you just get her eyes. Now, with the paint brush tool, paint over the ladies eyes. What this will do is to allow the high clarity image from the upper copy to replace the pixels in the eyes. Once you've gotten them to where you like them, click on Layer>Flatten Image, and Save your file.
If anyone knows a simpler way to do this PSE 13 alone, please share it with us.
Nov 11, 2015 13:24:04 #
Bob Yankle wrote:
GAAAHHHHH! You're not going to like it, but it CA... (show quote)
Wow! Thanks for the detailed instructions, Bob. It is a lot of work though
Nov 11, 2015 13:28:02 #
photog11 wrote:
Which is why some folks might recommend Lightroom or PS CC 2015. For instance, PS CC 2015 has the Camera Raw Filter included in the Filters menu. In that instance, all you would have to do is select the eyes and apply the filter without going through the whole rigamarole of creating a separate image to do the same thing.Wow! Thanks for the detailed instructions, Bob. It is a lot of work though
Nov 12, 2015 10:55:00 #
Bob Yankle wrote:
Which is why some folks might recommend Lightroom or PS CC 2015. For instance, PS CC 2015 has the Camera Raw Filter included in the Filters menu. In that instance, all you would have to do is select the eyes and apply the filter without going through the whole rigamarole of creating a separate image to do the same thing.
I use the radial filter in Lightroom for this. You can also easily feather it.
You could also use the brush.
But the OP didn't want that so your approach works and your explanation is excellent.
Another way might be to select the eye and sharpen and brighten each.
Frankly the eyes look great to me in this original, though. While a good general suggestion I don't see it as necessary here.
If you want to reply, then register here. Registration is free and your account is created instantly, so you can post right away.