Macro Equipment Set-Ups
Oct 13, 2012 11:46:50 #
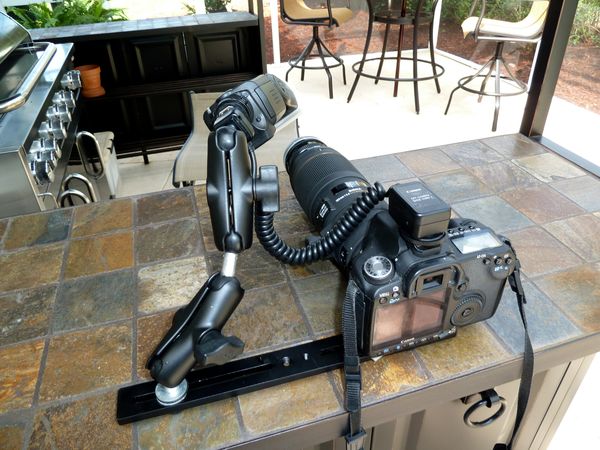
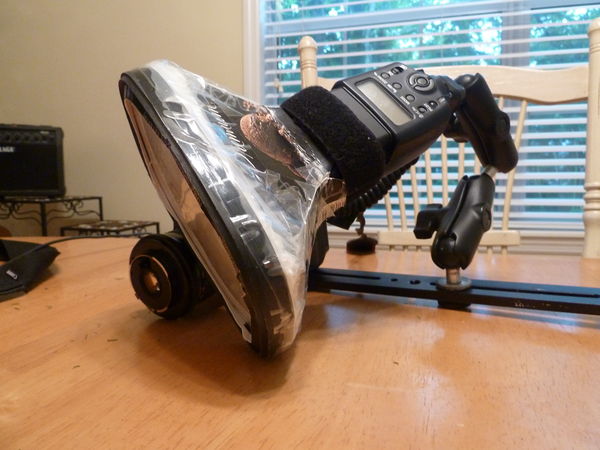
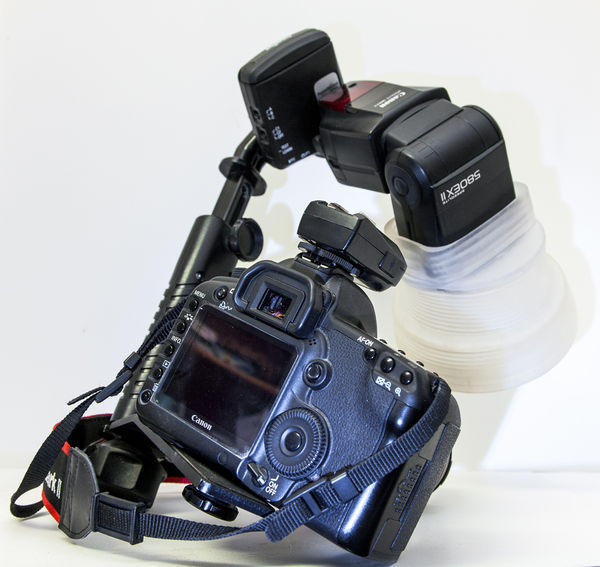
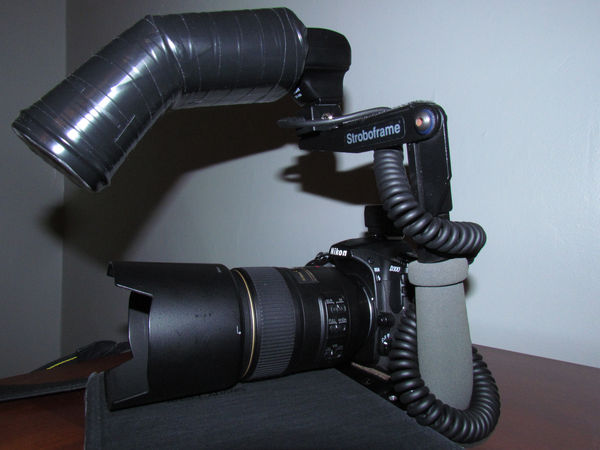
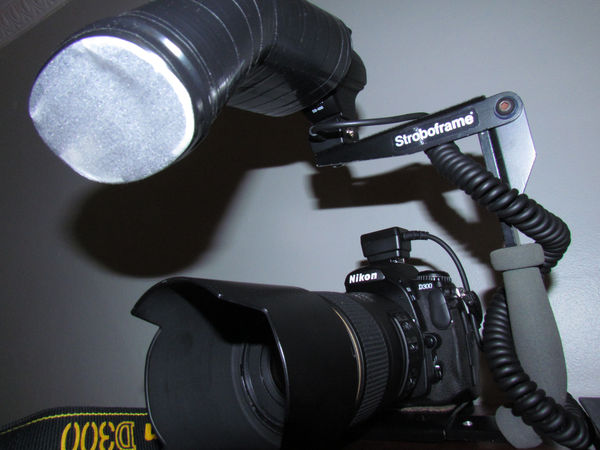
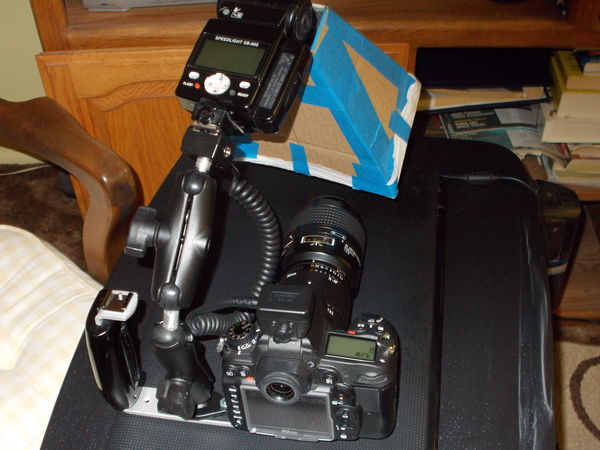
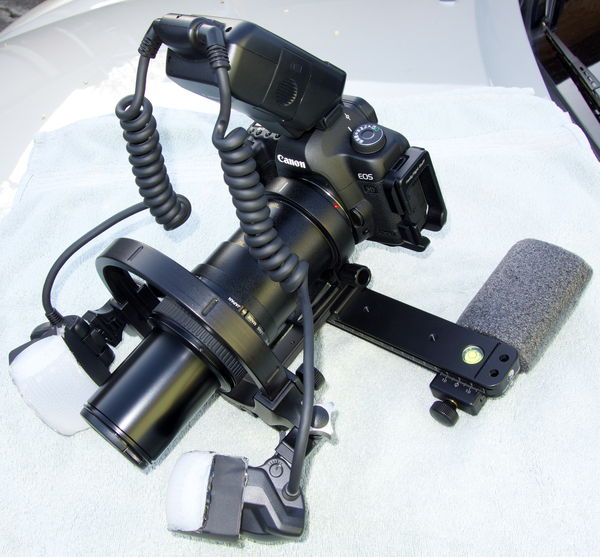
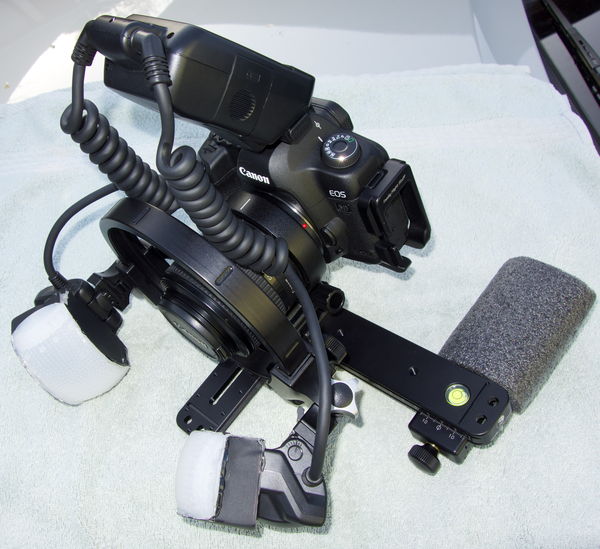
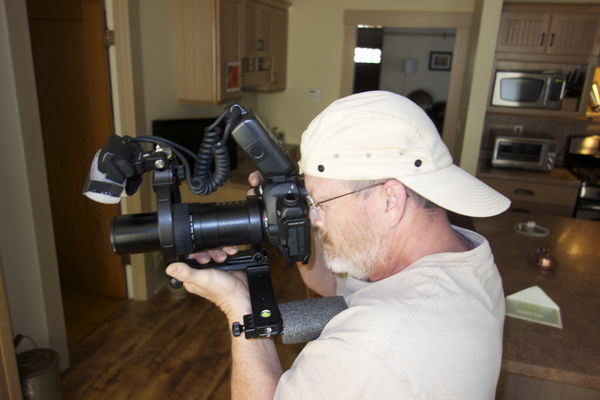
My reverse lens setup and Homemade Wimberley Bracket.
As far as lens mounting you just need to purchase from ebay or other sources either a reversed lens mounting ring or a reverse lens coupling ring for lens stacking, they are very inexpensive and allow you to reverse a lens onto your camera body or onto the front of another lens.
Here is my setup, I shoot both reverse lens and stacked lenses so the length of the lenses that I use varies depending on which setup that I am shooting with. The flash bracket that I use is very versatile in its ability to extend the flash head to the end of the lens allowing me to use low powered manual flash settings. This is important, many people are surprised that I can get clear shots handheld at high magnifications, I really believe that this is more a function of the flash than it is my ability to hold the camera still. I believe that it was in Lord V's blog which is linked at the beginning of this forum that I read that the intensity of the flash is not a function of the intensity of the bulb during the firing of the flash, but it is a function of the duration of the flash, so the lower the flash setting the less time your subject will be illuminated enabling you to better freeze motion. Getting the head of your flash unit out to the end of a reverse set up means that it is only a few inches away from your subject allowing for very low power settings. For that reason and the instantaneous recycling of low powered flash settings I find that the bracket is very important to a good equipment setup. There are other commercially available brackets that will serve the same purpose, the Manfroto 330B will support two flash heads, is very adjustable and can be purchased for about the same price that I paid to construct my bracket.
My bracket is a homemade knock off of the Wimberley F-2 Macro Bracket that can be purchased for about $170.00 at either Adorama or B&H. If money is not an object for you the easiest route is to purchase the manufactured bracket. I chose however to build my own and priced out component parts this morning and it came to about $62 not including any shipping costs... some vendors offer free shipping and other's do not. Below I have listed the component parts that were I making this bracket a second time I would purchase, the only difference that I would make is the ball and plate that mounts to the straight flash bracket as I would use a diamond plate with two screws to secure it, I used a threaded stud that mounted directly to the mounting screw that came on the bracket, but it was very difficult to tighten enough to stop movement caused by the weight of the flash extended on the bracket's adjustable arm. All these components are made of Aluminium and are very strong, you can purchase some of these components made from plastic and save a little bit of money, but I like the idea of a strong arm holding my much more expensive flash head.
I am very new myself to reverse lens photography, but I will share with you some of the issues that I am still trying to overcome, the biggest challenge that you face will be positioning the flash head correctly so that you best balance the light as it is directional and it will be imbalanced, I try to position the diffuser so that I get a fair amount of light going both down and out away from the camera to try and balance as best as I can... The second thing that you will fight especially with just straight reversed lens more so than when lens stacking is flare, I try to keep the flash head behind the lens as best as possible, and have learned that if the flash is bouncing off a light colored shinny leaf, that I will have a problem with flare more so than if there is no reflection of the light, ie a bug on a stem where the light does not reflect.
From the Mount Depot http://www.themountdepot.com/category_s/545.htm
2ea Ram B-201U Double Socket Standard Sized Length Arm for 1 Inch Ball
1ea Ram B-230U Double Ball Connector with Two 1 Inch Balls
1ea Ram B-237U 1/4"-20 Male Aluminum Camera Stud with 1 Inch Rubber Ball
1ea Ram B-238U Universal Aluminum Diamond Plate with 1 Inch Ball Dia. Rubber Ball
From Amazon... Straight flash bracket.
http://www.amazon.com/dp/B007ETWWCO/ref=asc_df_B007ETWWCO2222448?smid=A33F2GQRYJ4V7X&tag=dealtmp655980-20&linkCode=asn&creative=395105&creativeASIN=B007ETWWCO
This is not the same straight bracket I purchased but honestly I do not see any difference, mine is 1/4" thick which I think is important, it is much heavier than many other straight brackets on the market which I think is important as I think that a thin bracket will probably flex due to the pressure that a flash mounted to what amounts to a torque arm will place on it. I ordered mine directly from China and had to wait weeks for delivery, this like I said looks to be the same bracket available on Amazon.
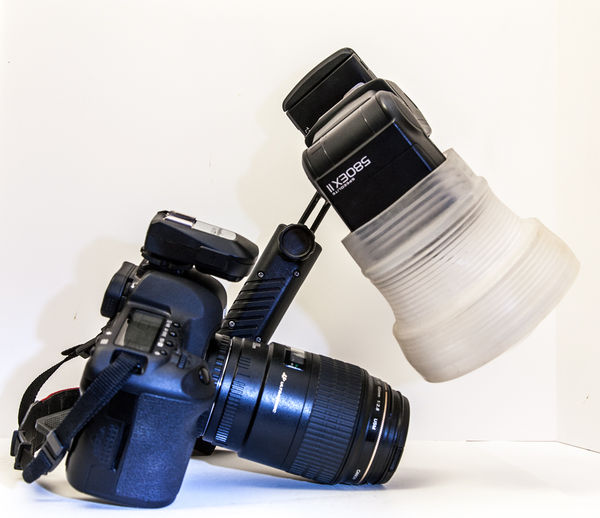
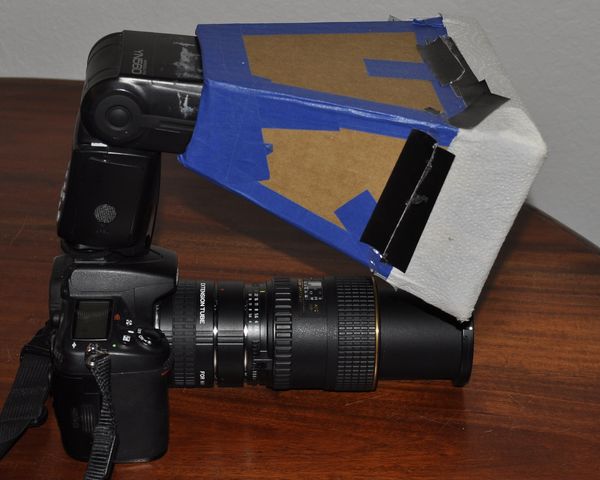
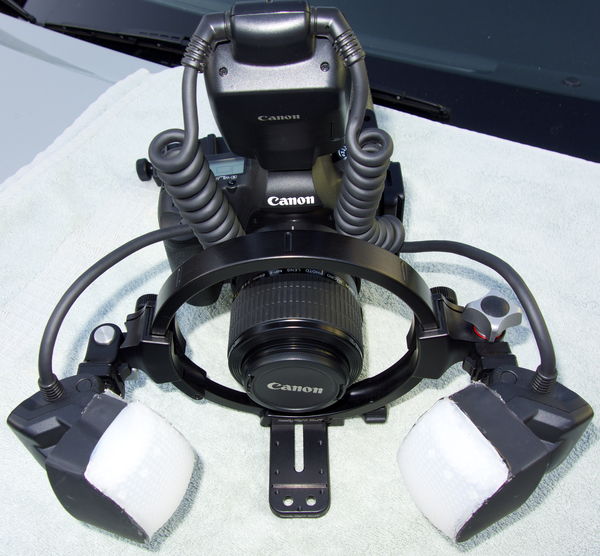
50mm reversed onto a 180mm lens, upto 4.6X magnification
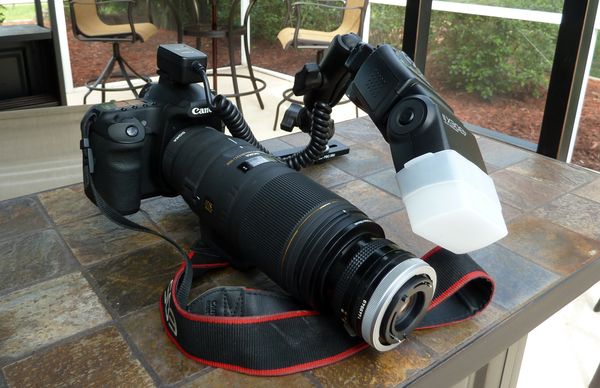
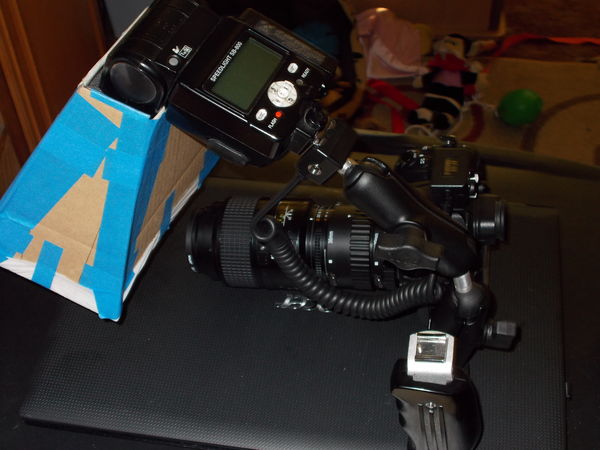
Bracket easily extends out to front of this very long lens.
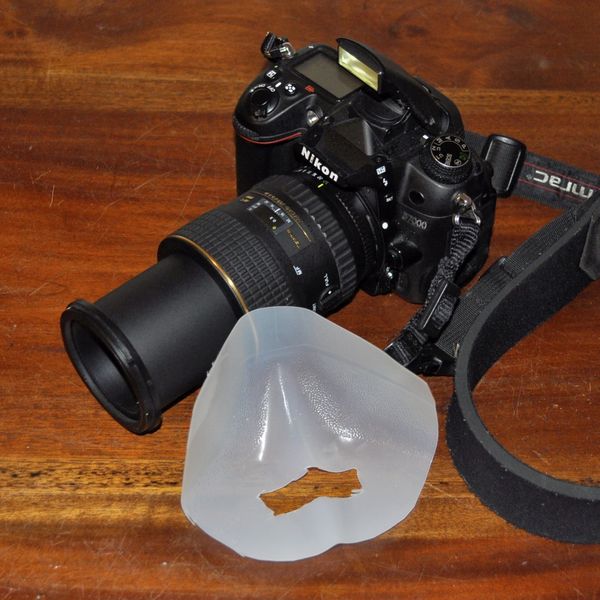
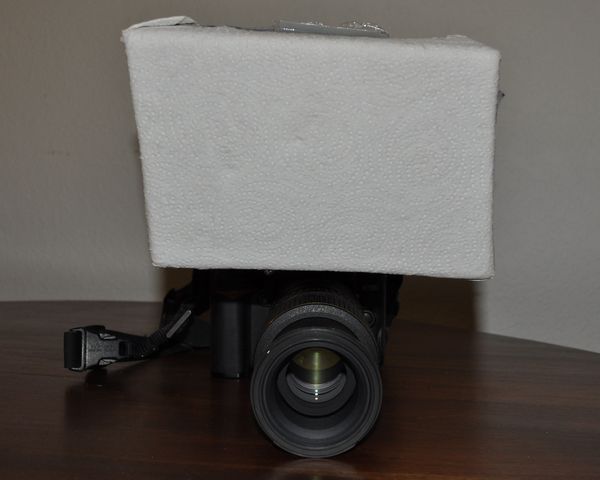
Ice Cream Box/Paper Towel DIY Diffuser front view
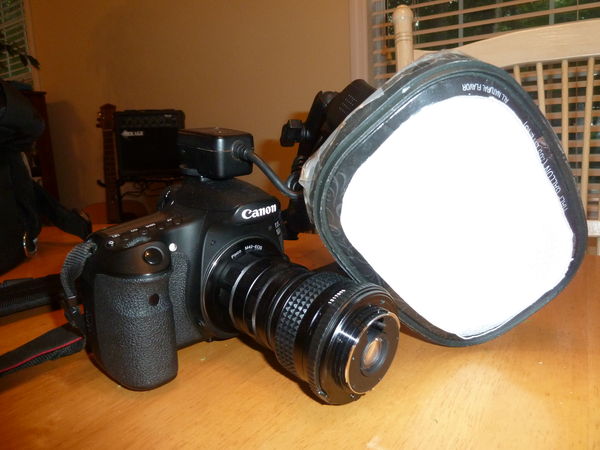
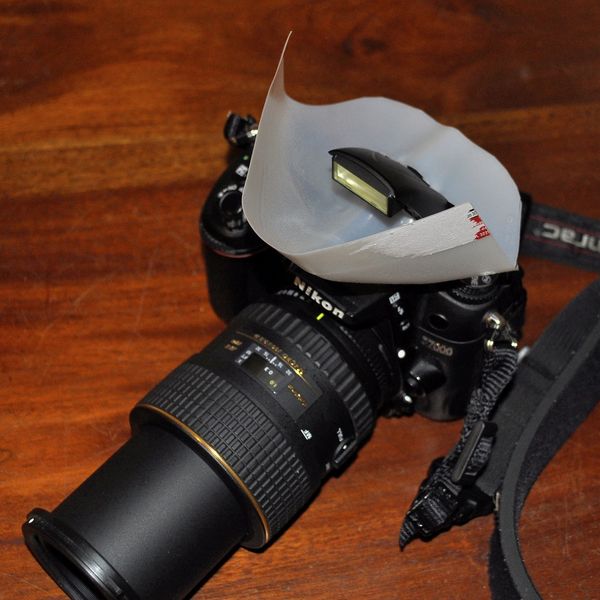
Ice Cream Box/Paper Towel DIY Diffuser side view
Oct 14, 2012 14:59:02 #
Here's my set-up: Nikon D7000 with Tokina 100mm Macro Lens, Pop-up Flash with Home made diffuser (gallon milk jug).
Nov 8, 2012 12:49:44 #

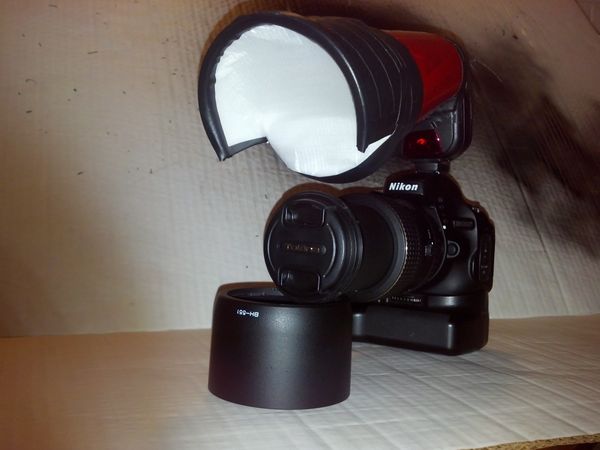
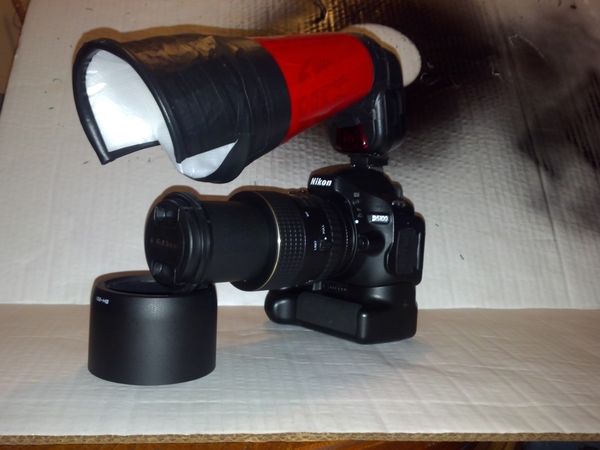
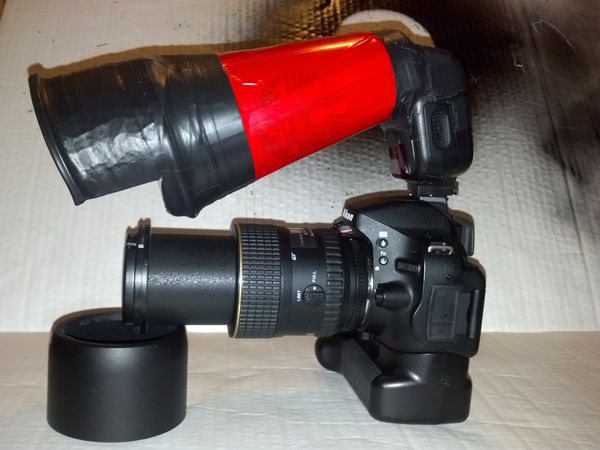
My rig: Nikon 5100 camera with Tokina 100-mm macro lens, and DIY snoot diffuser made from Starbucks paper and plastic coffee cups. Material on diffuser front from TV screen protector. Black electrical tape and red plastic tape cover diffuser body.
Nov 10, 2012 14:24:30 #
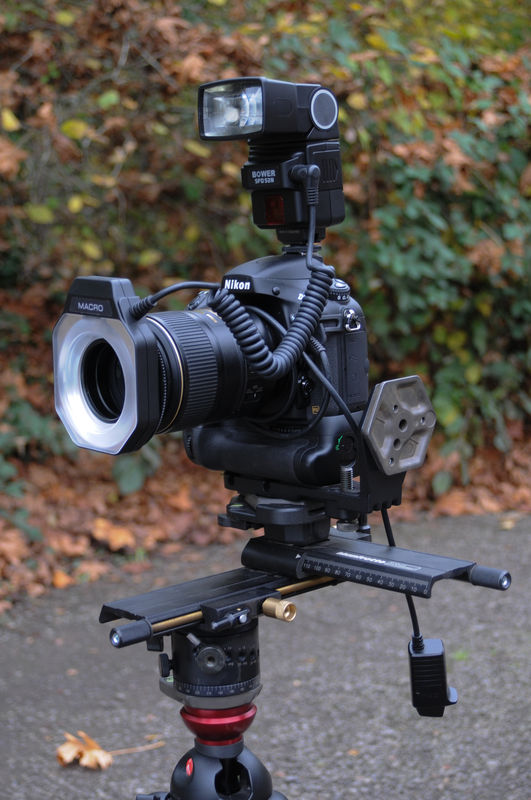
I use a Nikon D800e with a Nikkor 105G macro lens, and a Bower speedlight with ring light.
Manfrotto panoramic head for a focus rail. Shutter release cable.
2 pairs of eyeglasses.I have a nip every now and then to help with my eyesight.
Manfrotto panoramic head for a focus rail. Shutter release cable.
2 pairs of eyeglasses.I have a nip every now and then to help with my eyesight.
Nov 19, 2012 21:00:51 #
eframgoldberg
Loc: South Florida
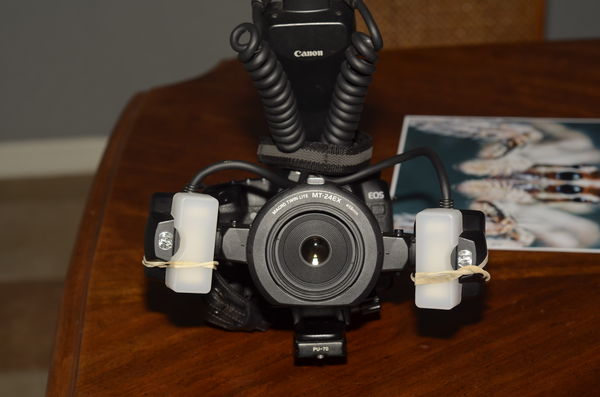
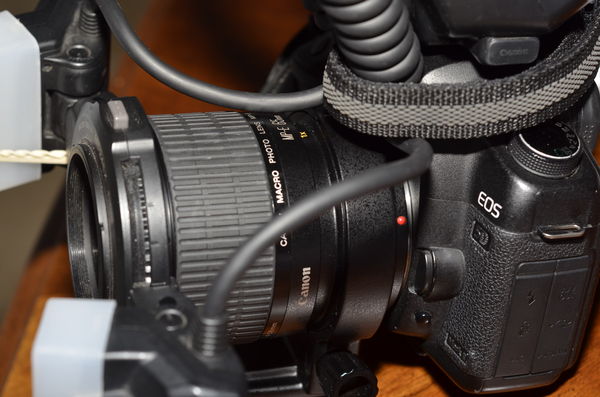
My new set-up: Canon 5D Mk II camera, with Canon MPE 65-mm macro lens, and Canon MT-24EX Macro Twin Lite Flash with diffusers.
Dec 12, 2012 16:53:44 #
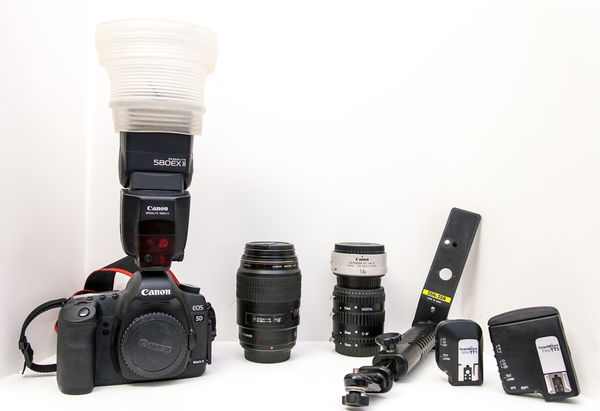
Canon 5D and Canon 5D Mk II
Canon 100mm f/2.8 macro lens
Cheap extension tubes 13mm, 21mm, 31mm
Canon 580 EX2 flash
Canon 1.4-II extender
Gary Fong flash defuser dome
PocketWizard Mini TT1 and Flex TT5
Sea and Sea flash bracket from under water camera
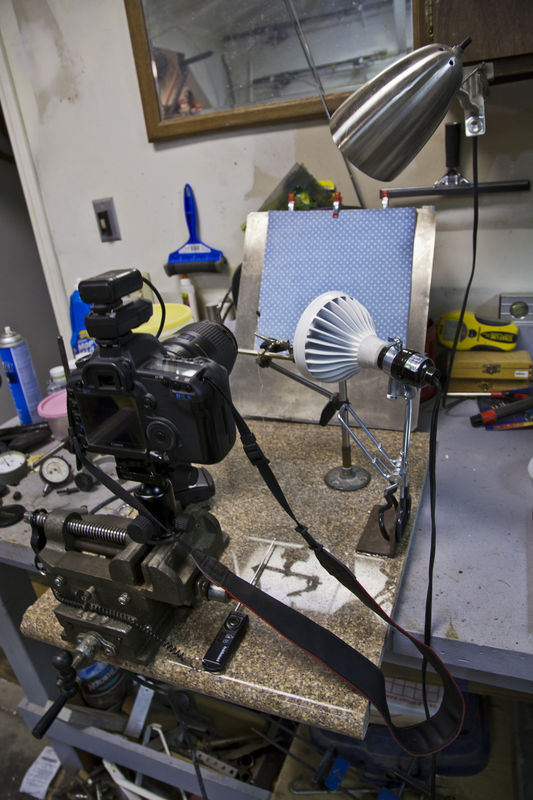
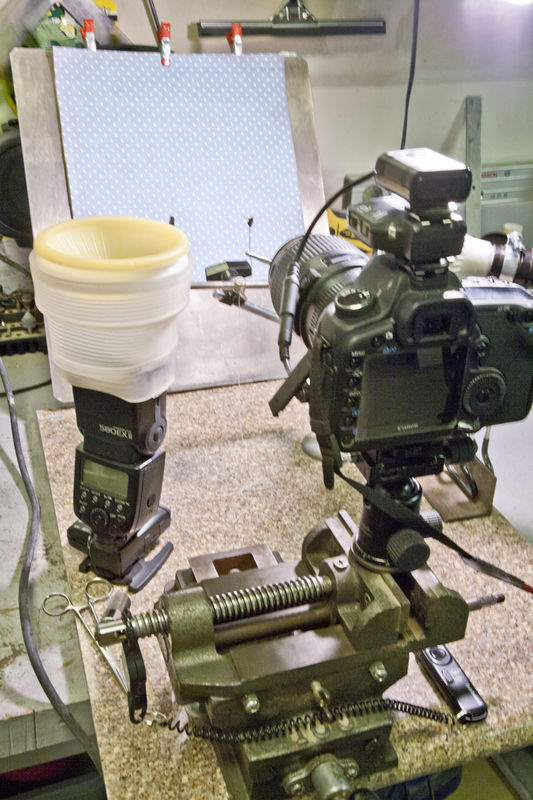
Studio setup is a machinist 2 way adjustable vice
Granite counter top with brackets glued in place
Back drop stand
Alligator clip stand for holding subject
Ball head mount for camera mount
Wireless remote trigger release
1300 Lumens LED light for focus
Canon 100mm f/2.8 macro lens
Cheap extension tubes 13mm, 21mm, 31mm
Canon 580 EX2 flash
Canon 1.4-II extender
Gary Fong flash defuser dome
PocketWizard Mini TT1 and Flex TT5
Sea and Sea flash bracket from under water camera
Studio setup is a machinist 2 way adjustable vice
Granite counter top with brackets glued in place
Back drop stand
Alligator clip stand for holding subject
Ball head mount for camera mount
Wireless remote trigger release
1300 Lumens LED light for focus
Dec 16, 2012 18:49:29 #
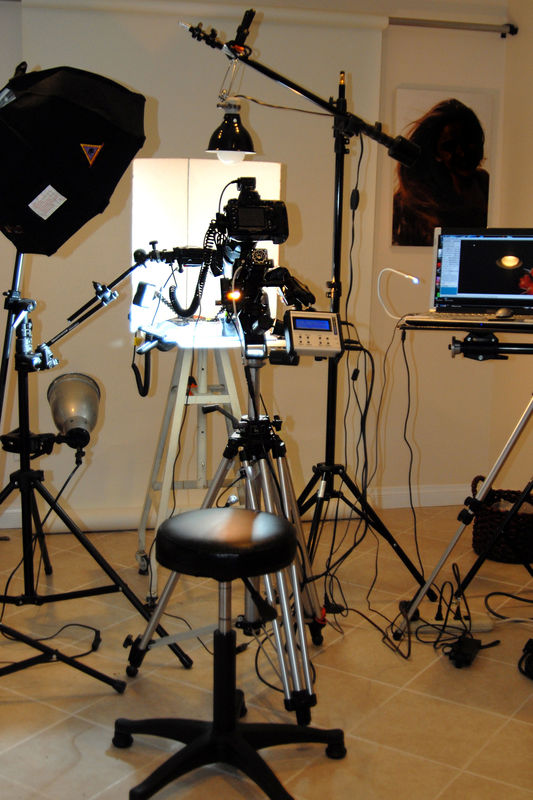
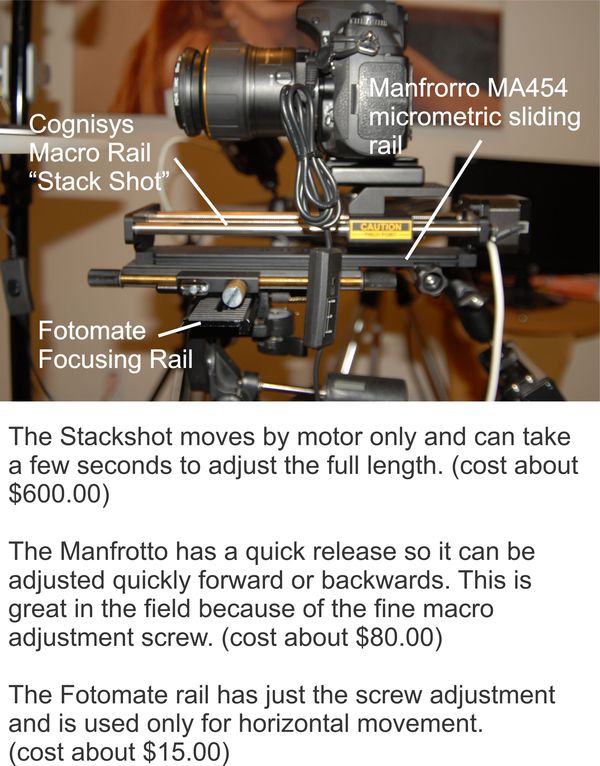
Now if I can just take a good photo. This is my recent Cognisys Inc. StackShot system. Still reading the Owner's Manual.
Nikon D700 camera with Tamron 180-mm SP macro lens on a Bogen 3046 tripod (40 years old & strong as new) with a Calumet CK7061 three-way head. SP SPBL32 boom stand, Nikon D80DX speedlight, Nikon SB800AF speedlight, RPS RS3115 hotlight w/ boom, Manfrotto 3001N tripod, Manfrotto 175F-1 spring clamp w/ flash shoe, Manfrotto MA454 sliding camera plate (under StackShot macro rails), Manfrotto 196A articulated arm with flash attachment, Cognisys macro rail controller, and assorted little stuff to hold it all together.
Nikon D700 camera with Tamron 180-mm SP macro lens on a Bogen 3046 tripod (40 years old & strong as new) with a Calumet CK7061 three-way head. SP SPBL32 boom stand, Nikon D80DX speedlight, Nikon SB800AF speedlight, RPS RS3115 hotlight w/ boom, Manfrotto 3001N tripod, Manfrotto 175F-1 spring clamp w/ flash shoe, Manfrotto MA454 sliding camera plate (under StackShot macro rails), Manfrotto 196A articulated arm with flash attachment, Cognisys macro rail controller, and assorted little stuff to hold it all together.
Focus Stacking set-up
Dec 23, 2012 17:13:32 #
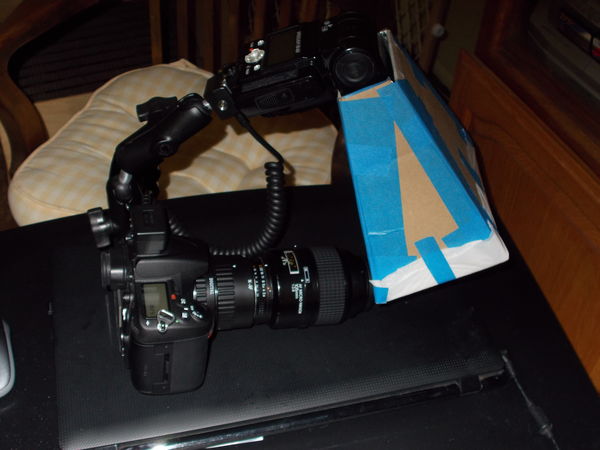
This is my 3rd Macro lighting set-up-- and likely not the last
I call it the "Ghetto Blaster" because Nikonian72 referred to using electrical tape as "ghetto".
Materials for DIY diffuser: a plastic container which held those moist towelettes, cut to bend for reflecting the light down. Aluminum foil for lining the inside. Diffusion is packing material. And several feet of "ghetto tape".
I used an old Stroboframe flash bracket, my SB400, an SC-17 sync cord. Nikon D300 and Nikkor 105G macro lens.
Usual settings: ISO 400-500, f/22. & 1/60 sec. Obviously, this is not a powerful flash unit-- ergo the higher ISO.
Jan 19, 2013 19:14:17 #
Jan 26, 2013 17:57:21 #
This is another setup it's for a homemade Softbox the bracket for the flash is the parts that Blurryeyed has listed with his Equipment, this right now is a Nikon D7000 & Nikkor 105D macro lens w/ two auto tubes a 36mm & a 20mm/ w a Nikon SB-800 Speedlight
Feb 4, 2013 16:26:08 #
My New set up with Nikon D7000 with Tokina 100mm Macro Lens and Yongnuo YN-560 speedlight with DIY diffuser, lined with aluminum foil and a quality paper towel over the end, as seen. One paper towel thick.
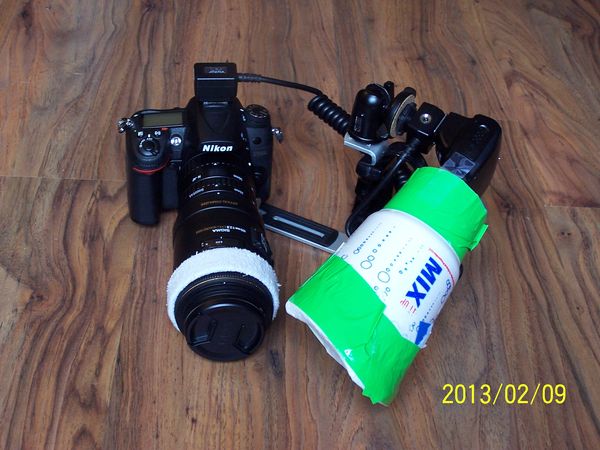
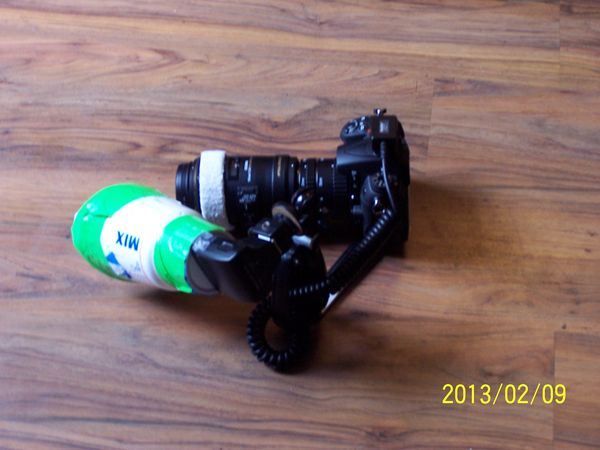
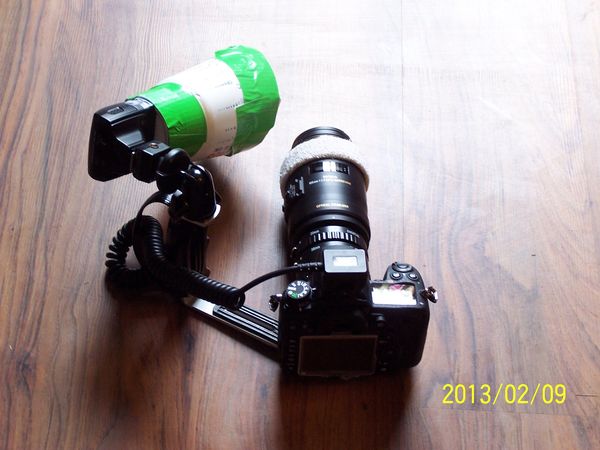
Feb 9, 2013 15:58:57 #
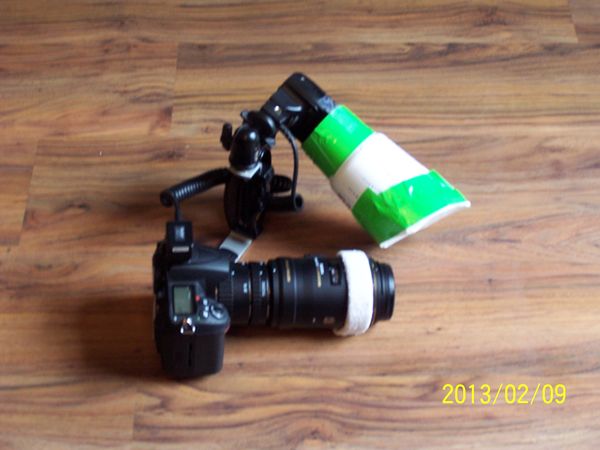
Nikon D7000 with extension tubes (either 56-mm or 68-mm) & Sigma 105-mm macro lens (or Sigma 150-mm macro lens), on Kalt L-grip bracket with small tripod head, SB-400 speedlight with DIY Sonic cup diffuser.
Feb 24, 2013 16:35:55 #
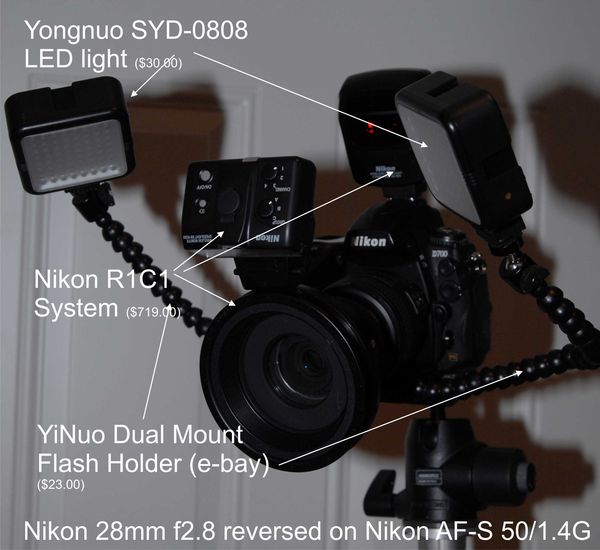
In order to see what I am photographing with this reverse lens setup, I use the constant LED lights to help.
Mar 8, 2013 19:32:27 #

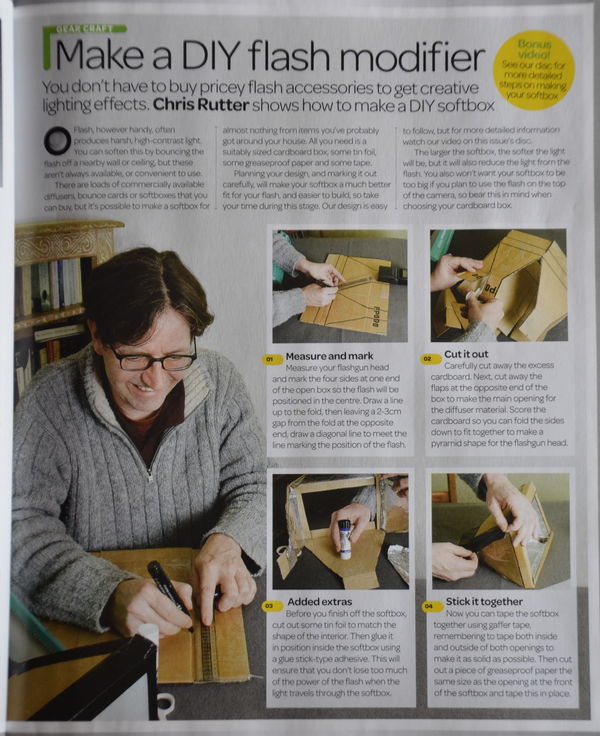
I thought this "How To" article might be of interest. It is quite similar to other DIY diffusers previously made by fellow Macro-Hoggers.
Mar 22, 2013 22:39:27 #
My recent macro set-up: Canon 5D Mk ll, Canon MP-E 65mm lens (1x-5x), Canon MT-24 twin flash, with copied Franken diffusers, RRS rig with additional add-ons by me, (shoulder/wrist brace) what you don't see is my rechargeable battery holder for the flash for extended shooting, depends on how I'm shooting on where I mount it (rig or pocket/belt): http://www.flickr.com/photos/nikonian72/
http://www.bhphotovideo.com/c/product/765906-REG/Bolt_CBP_C1_Compact_Battery_Pack_for.html
http://www.bhphotovideo.com/c/product/765906-REG/Bolt_CBP_C1_Compact_Battery_Pack_for.html
MPE-65 extended to 5x
MPE-65 at 1x or 1:1
view of add ons (RRS)

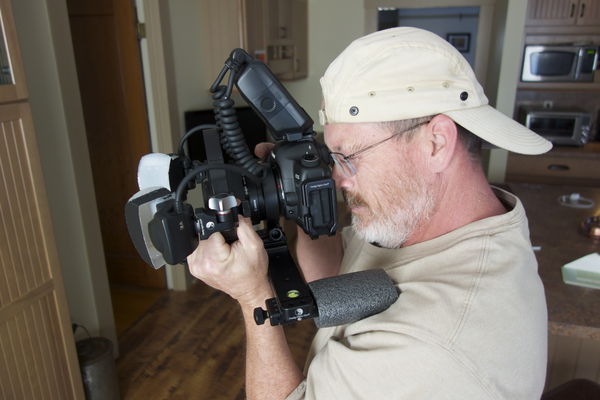
showing use of shoulder/wrist brace
different grip at 5X
If you want to reply, then register here. Registration is free and your account is created instantly, so you can post right away.