The Lorax
Jun 7, 2015 00:20:07 #
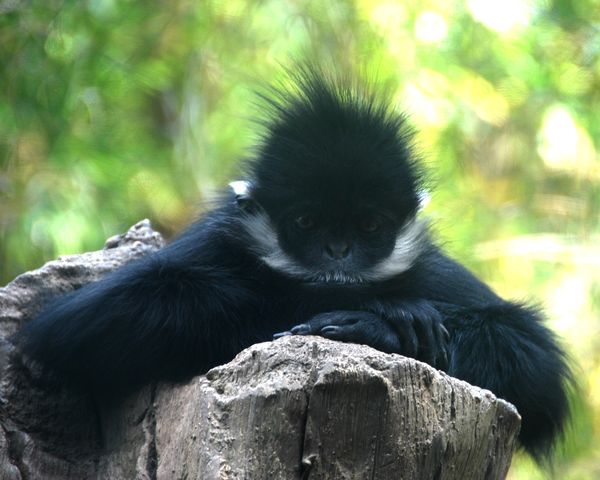
I know that is a weird title, but this little Francois Langur reminded me of The Lorax from Dr. Seuss. I can really only attribute it to the distinct little white "mustache" and spiky fur!
Any way I am wondering how I could have made his eyes stand out a bit more.
When I edited it I didn't do too much.
I am very new to editing and still use a website to do it since the others are very daunting.
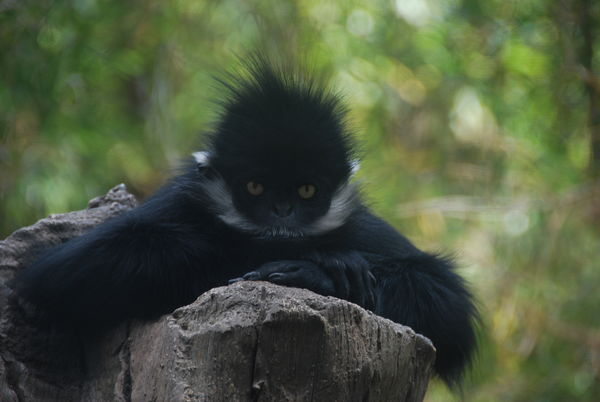
The edited one was cropped to make it more square and more centered. I lightened it up a little too. There isn't a huge difference between the SOOC and the edited version.
These were my settings:
Nikon d40X ISO 200 200mm 0EV (I'm not sure what this value is) f/5.6 1/80 AWB
Any way I am wondering how I could have made his eyes stand out a bit more.
When I edited it I didn't do too much.
I am very new to editing and still use a website to do it since the others are very daunting.
The edited one was cropped to make it more square and more centered. I lightened it up a little too. There isn't a huge difference between the SOOC and the edited version.
These were my settings:
Nikon d40X ISO 200 200mm 0EV (I'm not sure what this value is) f/5.6 1/80 AWB
SOOC

Edited
Jun 7, 2015 08:40:17 #

You didn't check the (store original) box, so we can't get too good a look at it, and any posted edits of the thumbnail images will be of limited value. It's hard to tell how much it has in the way of details that can be brought out. You also don't mention which software you're familiar with already (that helps when it comes to giving targeted advice).
Since you don't want your background getting too bright and eye-catching, you can't just increase the brightness for the whole shot, so you'll need to make a selection of the bits that you want brightened. My approach would be to use a well-feathered brush to select the whole face. A little bit of overshoot with the feathered part of the brush would be OK, but you wouldn't want to overdo it - likewise if your selection stopped just short of the edge of the face. A well-feathered brush gives you a bit of leeway where selections are concerned, but I'd recommend carefully taking the edge of the feathering as close to the edge of the face as possible, adjusting the size of the brush accordingly.
Depending on how much feathering your software allows, you might want to select the area around and including the eyes with a slightly feathered brush, just to make sure that the eyes are going to get 100% of the adjusting that you'll be applying.
Alternatively, instead of feathering, your selection tool might have some edge-detecting capability. The disadvantage of that is that the transition from selected to non-selected isn't smooth because it's stepped.
Once you're happy with your selection you can start applying adjustments. When there's an area that needs brightening but it's not devoid of bright bits to begin with, my approach is to move the Highlights slider to the left (usually fully), then apply brightening. With the highlights subdued it gives you a clearer idea as to how much brightening you can get away with. (When you seek to darken an area that already has dark bits, first shift the Shadows slider fully right before darkening - for similar reasons).
When you find the limit to how much brightening it can take, back off slightly then apply Contrast and Clarity, and possibly a bit of extra Sharpen. You'll probably find that something in the region of 30-50% for Contrast and 20-40% for Clarity will work. Experiment by nudging both of them up or down together as you think fit. If you add sharpening, you'll have to take care not to introduce sharpening artefacts.
After you've made these adjustments you could go back to the main edit and see if you can get away with lowering the Blacks (if you have that option somewhere - it may be in a Curves tool or some such). Hopefully that would give a bit more contrast to the face. You should be able to select an option that shows up saturated (i.e. totally black) areas (either in the picture itself or possibly in a histogram). You lose details when an area goes totally black (or white). With black, a little bit is usually what you want, not huge swathes of the shot.
If you are happy to have other people edit your shot, you can re-post the image, checking the (store original) box.
Jun 7, 2015 08:41:46 #
Jun 7, 2015 11:04:48 #
Jun 8, 2015 07:54:33 #
No they're not - she doesn't have the software or know-how to swap out eyes. If she did, she could have done the brightening suggested in the first reply.
If you want to reply, then register here. Registration is free and your account is created instantly, so you can post right away.