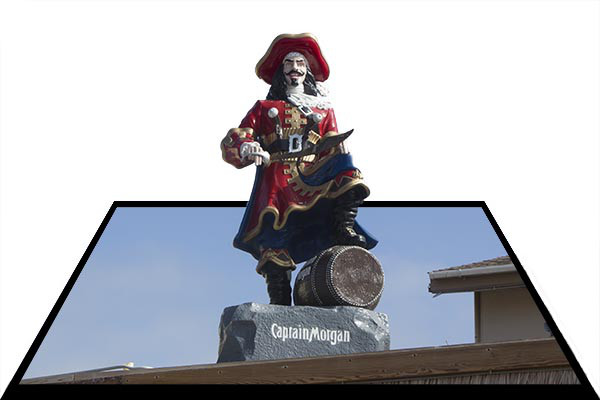
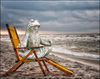
Using Photoshop to create out of bounds effects
Oct 22, 2013 20:46:02 #
I have been looking for a good tutorial for a long time to create the out of bounds effects. I never found one, even though I have been through 47 tutorials, both static and video. They all seem to leave out something critical, or they take you through 10 steps to accomplish one thing.
Thus, I created my own tutorial for my blog followers. UHH members are welcome to make use of it as well.
It's at http://russelrayphotos2.com/2013/10/22/how-to-create-the-out-of-bounds-effect-in-photoshop/
Thus, I created my own tutorial for my blog followers. UHH members are welcome to make use of it as well.
It's at http://russelrayphotos2.com/2013/10/22/how-to-create-the-out-of-bounds-effect-in-photoshop/
Oct 23, 2013 06:06:12 #
russelray wrote:
I have been looking for a good tutorial for a long... (show quote)
Thanks for sharing this. My only suggestion would be "Not" to use the eraser tool to get rid of part of your frame. If you simply add a " Layer mask" on the layer with the frame you can use your brush tool and foreground color of black to "Paint" out the frame without destroying any pixels. If you make a mistake you just change your foreground color to "white" and brush back in. This technique is a very useful way of doing "Non-destructive" edits.
Oct 23, 2013 10:03:57 #
Thank you for this. I have seen a few of these and wondered how to do it. I really don't have time to dig into it right now, but I saved a link to your page and will hit it when I get a chance.
It looks like you are using a new version of PS than I have (CS2), so I am hoping that everything is there, although maybe not in the same place. I have come across a couple of things lately which CS2 doesn't have... :-(
It looks like you are using a new version of PS than I have (CS2), so I am hoping that everything is there, although maybe not in the same place. I have come across a couple of things lately which CS2 doesn't have... :-(
Oct 23, 2013 11:01:19 #
Fstop12 wrote:
Thanks for sharing this. My only suggestion would ... (show quote)
Good point. Thanks!
I am a big fan of the History panel, too, which allows one to step backwards to redo, undo, outdo something. Maybe I'll do a tutorial on just how powerful the History panel is because I have never seen a tutorial on that topic.
Oct 23, 2013 13:47:52 #

Thank you for sharing the results of your long quest :thumbup:
Oct 23, 2013 14:27:35 #

Dec 15, 2013 01:58:33 #
http://tv.adobe.com/watch/learn-photoshop-elements-11/adding-an-out-of-bounds-effect/
video tuturial for pse 11 users
video tuturial for pse 11 users
Dec 15, 2013 10:28:06 #
Thanks for this concise and easy to follow tutorial. I am a new Paint Shop Pro user and have been looking for an easy OOB tutorial. I will try to adapt this to PSP.
If you want to reply, then register here. Registration is free and your account is created instantly, so you can post right away.