004 Indexed
This topic is locked to prevent further replies.
Oct 15, 2013 10:18:39 #

Most often in my photos, I'll have a group-photo and one or two of the people in it, just look better in another photo, but there the other people don't look as nice, so I'll want to try and fix that.
If you are taking group-photos, you can anticipate this will happen, therefore tell your group: Don't move till I tell you you may!, then take 3 or 4 photos.
Please, keep in mind that this is the way I do it, and that there probably are as many methods as there are PSE users out there.
Open the photo you want to "fix" - try and find a "replacement" at approximately the same resolution. Also, if needed, adjust the colour, brightness, saturation, etc., to have both photos as similar to each other as possible. The two pictures I am using here as samples, are cropped out of larger photos, and actually intended for the trash-bin, but they serve my purpose here.
Make a duplicate layer of the photo that needs fixing - never work on the original, once it is altered, it is altered forever.
Open a new layer above this picture (in the layer bin, click on the icon that looks like paper with the corner folded. (Photo 1 and Photo 2).
Now go to photo 2 and with the lasso tool, draw a line around the head. No need to carefully follow the outline of the head, that will come later.
Copy the outlined head to the other photo (Ctrl+C photo 2, Ctrl+V on photo 1)
In photo 3 you can see how "rough" I cut out the head, then copied it onto its own layer.
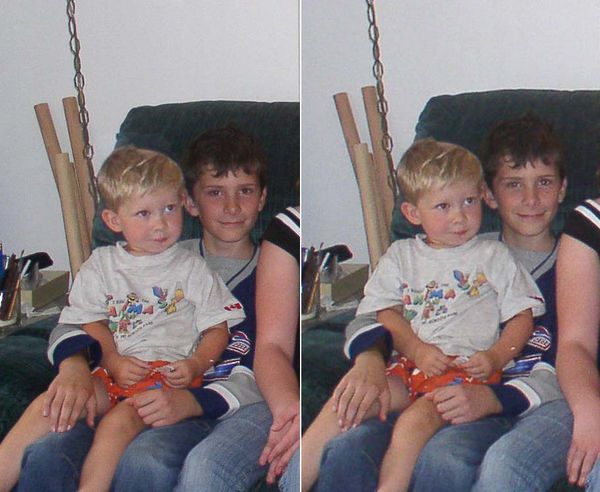
Using the Move tool, bring this head into place.
As it happens, on this photo, I would be finished.
If it doesn't quite fit, because the resolution is just a bit off, or because the person has moved his/her shoulder, you can adjust the size by grabbing one of the corner handles (with the new layer selected) and make it just a bit larger or smaller. Be careful not to drag out the sides, top or bottom, you'll distort the image instead of making it larger or smaller.
You may have to erase at least some of the area around the head. Not too much, because then the head on the layer below my become visible outside the new head.
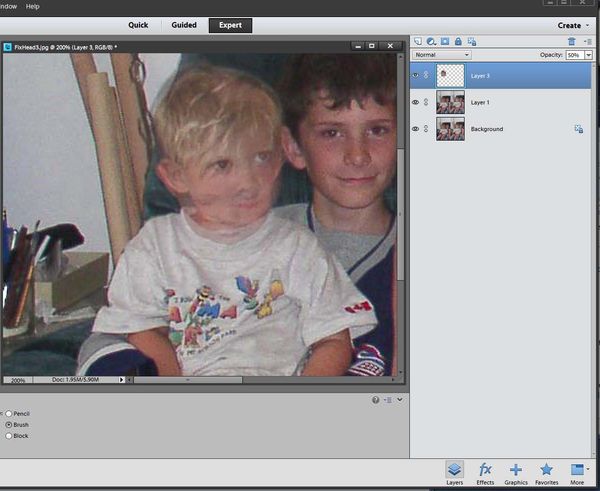
At the top of the layers bin, set the Opacity to 50% and you can see both heads. If you need to blend the new head or background to the old one, or erase the background area around the new head, make sure you don't go inside the outline shown.
For blending in the new head, I know that some of you wil use layer masks.
Unfortunately, layer masks are still largely a mystery to me, so if any one of you wants to jump in and post an explanation of how to use layer masks, please do so.
PS: When "cutting out" the new part, it can be helpful in blending in afterwards, to set the feathering of the lasso tool to something like 5 - 10 pixels, you need to try it out for your photo.
If you are taking group-photos, you can anticipate this will happen, therefore tell your group: Don't move till I tell you you may!, then take 3 or 4 photos.
Please, keep in mind that this is the way I do it, and that there probably are as many methods as there are PSE users out there.
Open the photo you want to "fix" - try and find a "replacement" at approximately the same resolution. Also, if needed, adjust the colour, brightness, saturation, etc., to have both photos as similar to each other as possible. The two pictures I am using here as samples, are cropped out of larger photos, and actually intended for the trash-bin, but they serve my purpose here.
Make a duplicate layer of the photo that needs fixing - never work on the original, once it is altered, it is altered forever.
Open a new layer above this picture (in the layer bin, click on the icon that looks like paper with the corner folded. (Photo 1 and Photo 2).
Now go to photo 2 and with the lasso tool, draw a line around the head. No need to carefully follow the outline of the head, that will come later.
Copy the outlined head to the other photo (Ctrl+C photo 2, Ctrl+V on photo 1)
In photo 3 you can see how "rough" I cut out the head, then copied it onto its own layer.
Using the Move tool, bring this head into place.
As it happens, on this photo, I would be finished.
If it doesn't quite fit, because the resolution is just a bit off, or because the person has moved his/her shoulder, you can adjust the size by grabbing one of the corner handles (with the new layer selected) and make it just a bit larger or smaller. Be careful not to drag out the sides, top or bottom, you'll distort the image instead of making it larger or smaller.
You may have to erase at least some of the area around the head. Not too much, because then the head on the layer below my become visible outside the new head.
At the top of the layers bin, set the Opacity to 50% and you can see both heads. If you need to blend the new head or background to the old one, or erase the background area around the new head, make sure you don't go inside the outline shown.
For blending in the new head, I know that some of you wil use layer masks.
Unfortunately, layer masks are still largely a mystery to me, so if any one of you wants to jump in and post an explanation of how to use layer masks, please do so.
PS: When "cutting out" the new part, it can be helpful in blending in afterwards, to set the feathering of the lasso tool to something like 5 - 10 pixels, you need to try it out for your photo.
Photo 1 & Photo 2
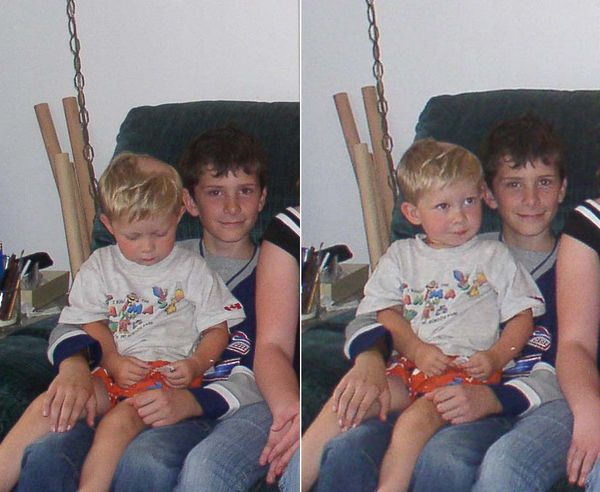
Photo 3 & Photo 2
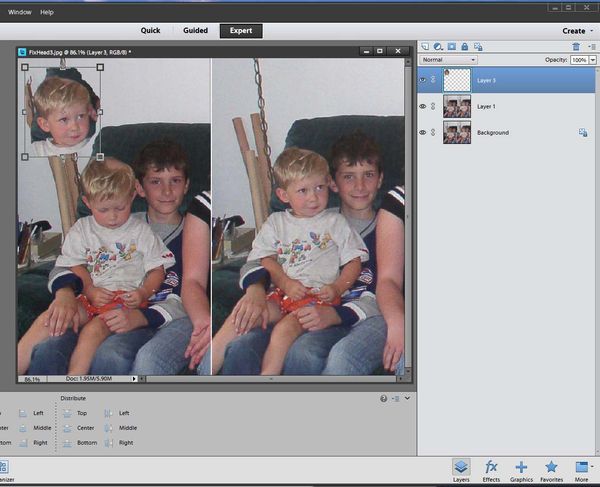
Photo 4
Finished
If you want to reply, then register here. Registration is free and your account is created instantly, so you can post right away.