Posts for: Weddingguy
Mar 28, 2019 12:16:34 #
Guyserman wrote:
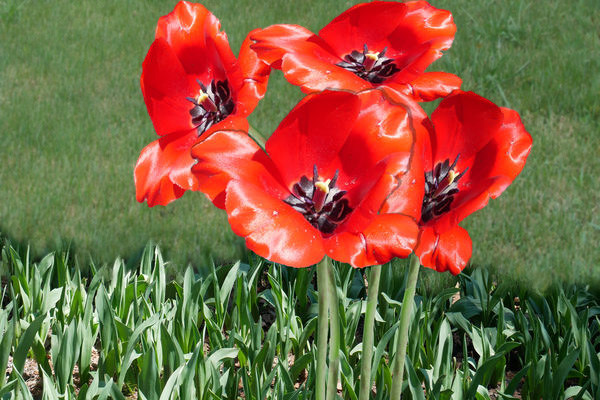
Make a bouquet out of a single flower image.
The flower in the center was duplicated three times and various transforms were performed along with the shear filter to make them look different from the original. I had to put a small shadow behind the center flower to visually separate it from the others. Maybe with a little practice I can make bouquets that will rival Snap Shot's (No way, lol.)
If you don't know who Snap Shot is, visit the gallery.
Two suggestions that I personally feel would improve your effort, both on this image, and one that you posted previously are . . .
1) Your background seems too sharp and as a result draws attention away from your "bouquet".
2) The edges of some of the cut-out are not smooth and unnatural looking. Two things you might try to correct this would be to use the "blur" tool on the edge, or select the cut-out then "modify/feather" . . . trying different amounts of feathering (1, 2, 3, 4, etc pixels)
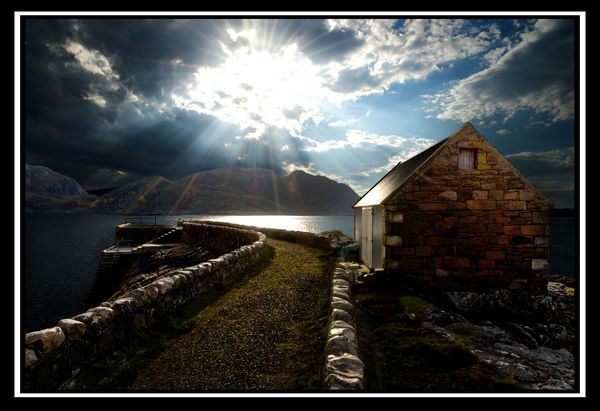
Here are two examples of that which I am suggesting. Both have the background blurred with Gaussian blur at .7 %
First I cut out the flowers. On the first I selected the edge of the flowers and then went to (in PS) "Select" then "Modify" then "Feather" and set it at 4 pixels.
On the second I simply went around the edges of the flower with a very small brush using the Blur Tool.
They would be better if starting with the original, but thought I would show you my suggestions for your consideration. Jut keep playing with it, starting from scratch with each effort until you get what you really love.

Blur Tool

Feather tool
Mar 25, 2019 13:37:09 #
whlsdn wrote:
Very logical comments, Weddingguy. A cheap lens c... (show quote)
I understand your reasoning . . BUT . . . I have found that the "weak links" that have to replaced later have been my most expensive experiences.
Mar 25, 2019 11:46:24 #
Your camera/lens/filter combination is like a chain . . . only as good as it's weakest link!
I don't understand the up-grade to a FF for better quality, only to down-grade the quality of your "chain" by adding garbage links. To get the most from your 5D Mk III, you should really consider an "L" series lens. The 70-200 F/4 L non IS is a superb lens that will do your "chain" more than justice.
These are real great value used !
Mar 23, 2019 17:06:07 #
" I get what I think is the right exposure, get home put pics. on the computer and some are over exposed by half a stop or more. But look right in the viewfinder. "
I am quite surprised that no one has yet to give you a straight answer to your question above.
The reason the images look differently on the camera screen from the computer screen, is because both have brightness adjustments, and one is not matched to the other.
Typically the LCD on the camera is set to make it easy to view in out door light . . . much brighter than being able to give you an accurate idea of the exposure of the image.
Think about this . . . if you underexposed an image by, say, 1 full stop . . . would increasing the LCD brightness on the camera correct the under exposure? Of course not. The LCD is for viewing the subject and composition, not for judging exposure. Not even sharpness or color balance can be accurately judged on the LCD
Several members gave good advice in that the only accurate way of judging exposure of an image on the camera is by learning to read the histogram. Google it for "simple to follow" instructions.
Hope that helps.
Mar 17, 2019 16:37:46 #
neilds37 wrote:
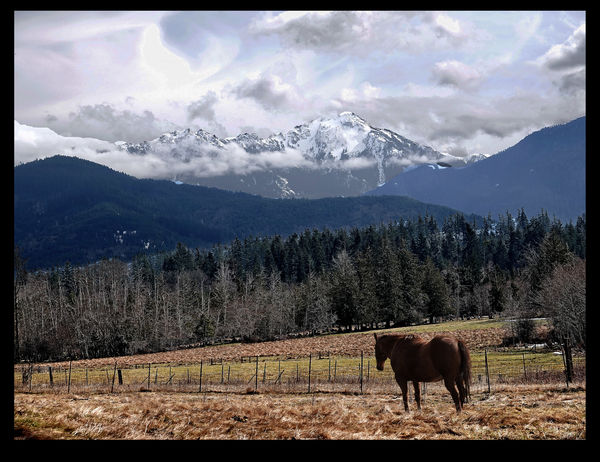
Taken from 10 miles northwesterly from the summit. It would have been nice if the horse was turned around, or on the right side, but can't have everything all the time.
FYC
Looks like there is a minor halo on right and left foothills to be taken care of.
FYC
Looks like there is a minor halo on right and left foothills to be taken care of.
Sorry . . . called the horse several times, but just couldn't get him to turn around!

Mar 15, 2019 15:23:00 #
#2 does it for me . . . well done!
Mar 3, 2019 12:10:32 #
rborud wrote:
Curmudgeon you bird is indeed worth working with. Here is an alternative that I came up with, I do hope you find it useful. RBorud
I prefer the original . . . think this is a bit overdone.
Mar 1, 2019 14:52:02 #
Feb 28, 2019 16:18:57 #
NJFrank wrote:
Aint it grand to get one of them. Your a big boy now, no more mom giving you the haircut 
Feb 28, 2019 12:04:52 #
NJFrank wrote:
Throwback to an earlier time. These clippers are at least a hundred years old. Well used. FYC
Oh . . . I remember these well! I think I was about 10 when I got my first "store bought" hair cut!
Feb 28, 2019 11:46:16 #
Curmudgeon wrote:
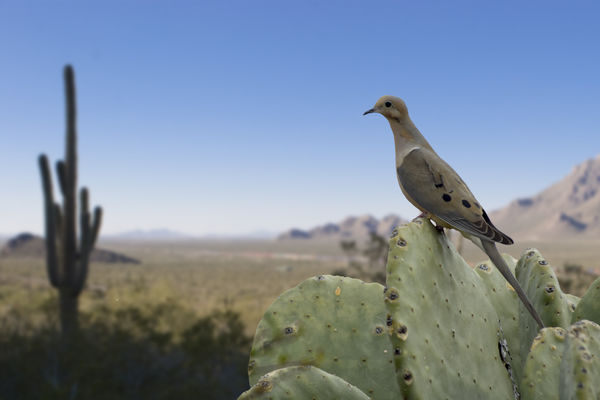
Initial photo was this Mourning Dove silhouetted against a uniform gray sky. Used Camera Raw filter in PS to adjust image, upsized image in PS, replaced the sky with Landscape Pro. I got a nice bird and cactus against an obviously replaced sky.
What can I do to blend these together. As usual, feel free to fold, spindle or mutilate. Just tell me what you did.
What can I do to blend these together. As usual, feel free to fold, spindle or mutilate. Just tell me what you did.
Here's a try that you might like. Cut out the dove and cactus with Remask . . . then added and blurred a desert scene including a nicer sky.
I find the best way to blend the two and get rid of the "halo" is with an eraser brush feathered even though there is an "edge refinement" setting in Photoshop.
Hope you like it.
Feb 21, 2019 12:00:40 #
Feb 16, 2019 09:50:06 #
Feb 15, 2019 16:51:37 #
ken_stern wrote:
You did good -- real good -- Pretty sure I can preform that process with PhotoLab -- Just need to figure out just how -- Knowing it can be done is a great help
Thanks for your help!!!
Thanks for your help!!!
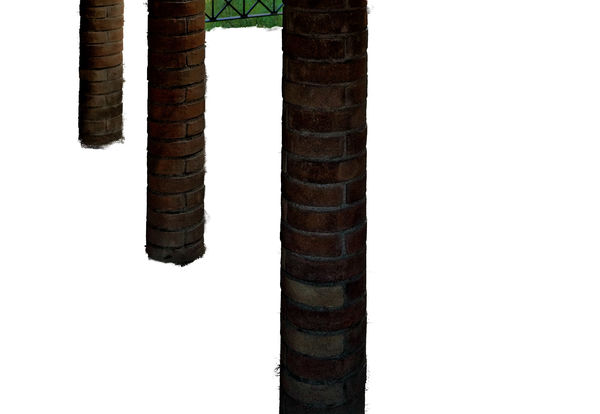
No problem. Here is a shot of the foreground and background separated on two different layers.. I then used the clone tool to move the darker part of the image along the length of the columns over top of the "halo" part on the background layer as you can see . . . then put the other layer, the cutout columns, back over the background.

Feb 15, 2019 16:06:22 #
ken_stern wrote:
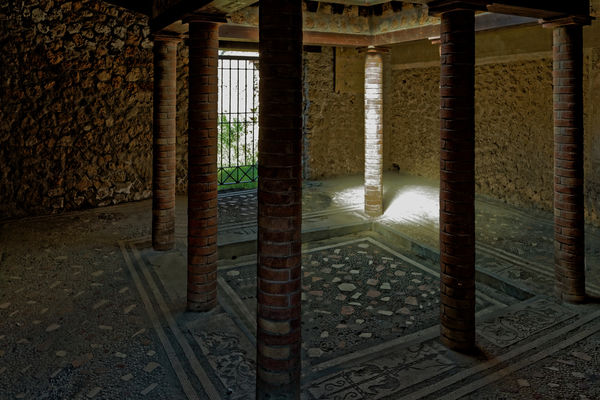
Could use some HOG expert advice -- revisiting & re-post-processing via DxO PhotoLab some photos taken while in Pompeii a few yrs back
Have posted two photos -- 1) RAW & 2) the best so far as I can do with the image
Question: I'll call them Halos showing up around the columns ---- Any thoughts on how I can reduce if not totally eliminate them???
Any thoughts/advice will be greatly appreciated !!!
THANKS
Have posted two photos -- 1) RAW & 2) the best so far as I can do with the image
Question: I'll call them Halos showing up around the columns ---- Any thoughts on how I can reduce if not totally eliminate them???
Any thoughts/advice will be greatly appreciated !!!
THANKS
Would be much easier if starting with the original RAW file, but basically what I did was separate the columns from the background to adjust the background separately . . . then add back the columns.
Hope that gives you the idea.