Check out Photo Critique Section section of our forum.
Posts for: grassroots
Feb 29, 2012 20:00:53 #
I played with these just a bit. did you have something like this in mind?


Feb 29, 2012 16:38:20 #
You have a beautiful granddaughter and it shows it in the shots. I also like the candid shots over stiff posed. To go along with the advice about bokeh I agree. Remmeber also that you can add it to the shots you have already taken if you want to. Keep shooting
Feb 28, 2012 22:05:49 #
so the blonde decided to take up skydiving. the instructor told everyone he wanted them to pull the ripcord at 300 ft. How we will know when we are at 300 the blonde asked. He replied that is a very good question. You will know your are 300 ft when you are able to recognize faces of the people on the ground. " What happens if I don't see anyone I recognize?"
Check out Photo Critique Section section of our forum.
Feb 28, 2012 21:40:57 #
hi,
here is my take on your bridge; i hope you don't mind.
here is my take on your bridge; i hope you don't mind.

Feb 28, 2012 21:32:51 #
Feb 28, 2012 19:29:31 #
I just saw this and wanted to add my adjustment.
orginal

edit

Feb 28, 2012 18:22:18 #
Check out Video for DSLR and Point and Shoot Cameras section of our forum.
Feb 28, 2012 17:03:27 #
Feb 28, 2012 16:04:53 #
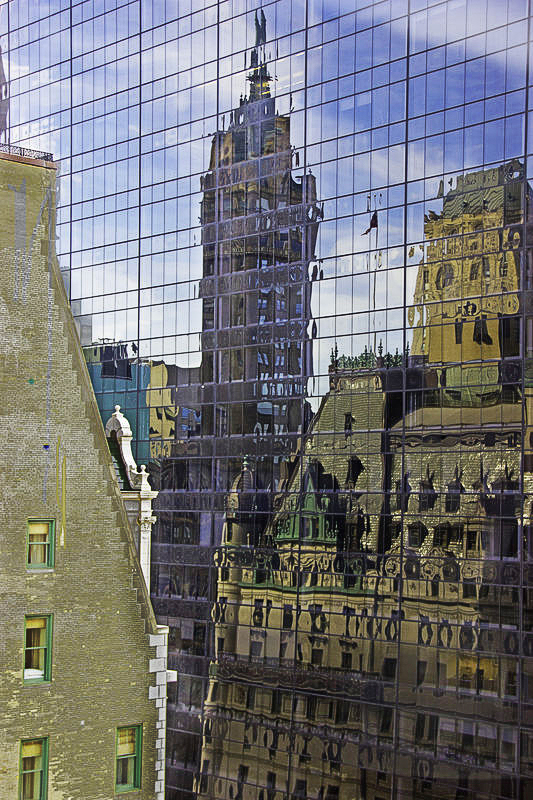
this is orginal along with 2 edits using the same method with just a little more adjustment. First as English
Wolf has said: open levels adjustment layer and use the sliders to adjust for the creme colored bld on the left, darken it to bring some detail back. don't worry about how dark the right side of the picture gets. click ok. there is now a white box on that layer in the adjustment panel; using control i, turn it black and hit d for default and b for brush paint over just the wall of the building not the windows. if it looks too dark to you use the opacity in the adj panel to lighten just a bit. now you can flatten layer or use levels again to do the other side of the pic to get a little more detail on that side, again don't worry about brightness for now. adjust opacity again if you prefer. now use a contrast layer and pick medium from the flyout and adjust opacity to suit taste. now for just a bit of color use hue/sat and adjust to + 12 or suit taste.remember that you want to be subtle.Flatten layers. At this point it looks a little dark in some areas especially on the right side of the pic. Now we use a non-destructive dodge and burn. or you could call it exposure adj if you wanted to. Hold down alt and click create new adj layer on the right bttm of the panel, this will bring up a box. Select overlay from mode. check the box for 50% gray. click ok. hit d for default and b for brush. black is for darken and white lighten. adjust the opacity level for the brush and then paint over the areas that are dark especially on the right hand building. I used about 20% opacity for the green window frames and also the blue sky. As you paint hold the mouse button down. when you let up on the mouse it gives you more effect. Lighten and darken to taste. flatten layer. now create a duplicate copy by control j. select the top which is the copy and uncheck the box, select the other layer and then go to filter>highpass> adjust to 1.4 and hit ok. go back to the copy layer and check the box and then select overlay from the menu at top of panel watch image this will bring back a little more detail if you don't like the result from that you can delete that layer and readjust.
Hope I didn't lose anyone
!st edit

Orginal

Second edit

Feb 26, 2012 13:23:10 #
Feb 21, 2012 12:33:29 #
I happen to know of a case where a pro was beaten on the bid for a wedding by a 100$. Later he happened to have the opportunity to speak with the person who got the bid. He was curious as to the lighting suitation; so he asked what f-stops would she be using at the location,she replied:"what's an f=stop?" goes right along with you get what you pay for.
Check out Close Up Photography section of our forum.
Feb 9, 2012 12:13:46 #
Lensrentals.com is the way to go, excellent service, great variety of lenses,; good advice when asked and good prices both nikon and canon or others. ships on time and they handle everything very quickly
Feb 5, 2012 00:00:25 #

Jan 27, 2012 22:32:12 #
Jan 25, 2012 15:28:19 #
Here is one more; have a few more if interested
Mt. Saint Helens
