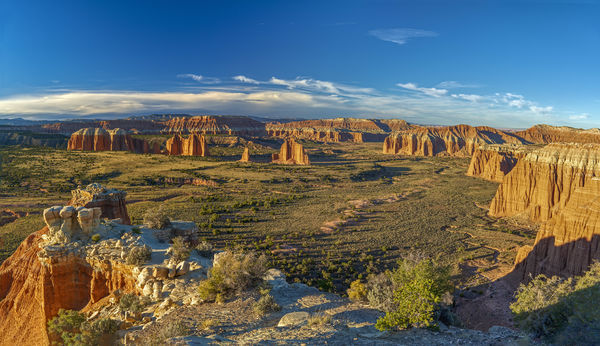
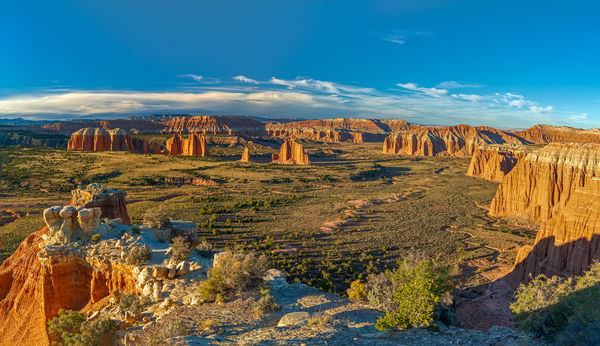
Two shot wide angle of Cathedral Valley-Need help
Jan 25, 2019 18:19:43 #
Have you tried using the paint brush in RAW? Select the paintbrush at the top of the AC RAW on the opening page. Then select the color you would like and paint over what you don't like. I think you might achieve the same result using the dodge tool, but it would take some time to get the exact color you would like.
Jan 25, 2019 18:37:20 #
E Mang wrote:
Have you tried using the paint brush in RAW? Select the paintbrush at the top of the AC RAW on the opening page. Then select the color you would like and paint over what you don't like. I think you might achieve the same result using the dodge tool, but it would take some time to get the exact color you would like.
Another excellent idea of which I hadn't thought. I'll give it try tonight after dinner.
Thanks for the tip.
Jan 25, 2019 22:07:12 #
greymule wrote:
I know I said I was going to stop posting, so bear... (show quote)

Hi greymule,
I've made this mistake many times. This old dog still has trouble learning new tricks. But once the mistake is made, all is not lost.
Is this an example of what you're looking for?
This was a quick edit using LR. It could be further refined, but I'll leave that to the photog. Here's what I did:
1) Created a mask to cover the sky using the gradient filter.
2) In the Range Mask panel, I created a luminosity mask selected for the darker part of the sky. I set the softness to about 50 so that the mask would blend seamlessly into the lighter part of the sky.
3) Once I was satisfied with the mask, I turned the 'show mask' off and then turned 'dehaze' down.
That's it.
I could have used luminosity masks in PS, but for this case LR was much easier.
Hope this helps
Mike

Jan 25, 2019 22:59:39 #
greymule wrote:
Thank you ID guy. I will give both a try if the first one doesn't correct it.
However, may I trouble you a bit more- How does one synchronize? I did the merge using PS-CC 2019 and clicked all three options available.
When I developed these together in PS-CC 2019 in camera raw, I used correct lens profile for both as well as the same adjustments for each. Is that synchronizing? If so, I'll try adjusting the luminosity.Had never thought of that.
I find that I get the best results when I do the minimum processing in Camera Raw in Bridge. Mostly just lens profile. Then I combine and finish processing in Ps. Camera raw is available in the filter section.
Jan 26, 2019 11:07:52 #
cboysen
Loc: Homewood, IL
Great photo! I was wondering what lens you used: a 10 mm? an 8 mm fisheye?
If you want to reply, then register here. Registration is free and your account is created instantly, so you can post right away.