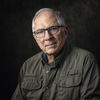
Can anyone help me figure out how this skin was retouched?
May 27, 2014 11:57:51 #
aisajib wrote:
Don't know why the attachment became that small. Here's a link: https://dl.dropboxusercontent.com/u/21065046/live/trial.png
It is still pretty small to see really well, but it looks OK. I do think eyes should be retouched manually, but if one does not know how or have the time, this can work. The main thing is to not make the whites too white and to not lighten the whole eye to the same shade.
May 27, 2014 12:01:50 #
CaptainC wrote:
It is still pretty small to see really well, but it looks OK. I do think eyes should be retouched manually, but if one does not know how or have the time, this can work. The main thing is to not make the whites too white and to not lighten the whole eye to the same shade.
Thanks for your comments. There is a lot to learn from this new software, but from first impression I think it does the eye enhancement pretty good. The controls are fine. But I'm still struggling to get the perfect skin tone. :( I'd choose to stick with Photoshop or Lightroom (despite the dilemma of what to use), and luckily this is available as a Photoshop plugin for additional cost.
I'm gonna check out this other tool Topaz Clean.
May 27, 2014 12:21:38 #

Kingmapix wrote:
One look at this photo tells the viewer that it was over-manipulated.
Not necessarily...in some genre's (fashion, glamour) this sort of "plastic skin" look is exactly what is called for. It's anything but realistic but it's the norm.
May 27, 2014 12:22:14 #
Another recommendation for Portrait pro. You can dial in however much or little massaging of the skin you want.
May 27, 2014 12:45:41 #
rpavich wrote:
Not necessarily...in some genre's (fashion, glamour) this sort of "plastic skin" look is exactly what is called for. It's anything but realistic but it's the norm.
Exactly. It does require skill to get it right, but knowing how it's done (the process) is somewhat important. I wish not everyone would protect their workflow like trade secrets. :(
May 27, 2014 13:20:34 #
aisajib wrote:
Exactly. I wish not everyone would protect their workflow like trade secrets. :(
I think most people here do share generously. Although I have to admit if I could come up with a look that REALLY separated me from everyone else, I would never share it. That is highly unlikely.
May 27, 2014 13:25:01 #
First off I doubt to many on here are protecting there work flow. Perhaps you should learn how to do it just photo shop.
1. select you brush -
2. Set to opacity level 17% percent or there about.
3. Set the brush to soft, the fuzzy looking brush.
4. Set the size to match the area you working in.
5. Keep on finger on the Alt Key. (select the eye Dropper)
6. Select the color you wish to use. Paint in the area.
7. You may have to spray four or five times to see the result.
Enjoy.
May 27, 2014 13:25:36 #
CaptainC wrote:
I think most people here do share generously. Although I have to admit if I could come up with a look that REALLY separated me from everyone else, I would never share it. That is highly unlikely.
Yeah, that makes sense. That is why I shared the images in the first place hoping someone would figure out/know how to achieve this look.
May 27, 2014 13:31:09 #
Note: Remember to sample often, since skin tones are not like a wall, they tend to change often and can be very complex.
When going around areas you wish not to disturb, select that area then just reverse you selection if your worried about effecting it. Such as eye, lips, nostrils.
When going around areas you wish not to disturb, select that area then just reverse you selection if your worried about effecting it. Such as eye, lips, nostrils.
May 27, 2014 13:59:37 #
Bill Houghton wrote:
Note: Remember to sample often, since skin tones are not like a wall, they tend to change often and can be very complex.
When going around areas you wish not to disturb, select that area then just reverse you selection if your worried about effecting it. Such as eye, lips, nostrils.
When going around areas you wish not to disturb, select that area then just reverse you selection if your worried about effecting it. Such as eye, lips, nostrils.
Thanks. I'll practice and follow your advice.
May 27, 2014 14:15:56 #
I have sent you to photo's, one before and one after. Done only with the air brush.
I didn't post them here, I think the Captain would not approve. LOL...
I didn't post them here, I think the Captain would not approve. LOL...
May 27, 2014 15:02:43 #

I'm not sure but it looks like they lowered the clarity of the photo just a bit. It does wonders! Especially with ageing women!
May 27, 2014 15:07:19 #
MDoner wrote:
I'm not sure but it looks like they lowered the clarity of the photo just a bit. It does wonders! Especially with ageing women!
And how can I do that on Photoshop?
I know this can be done on Lightroom easily, but I'm not liking the two-step process of Lr+Ps. I'm not a professional, so the entire time-saving advantage of using Lightroom doesn't really apply to me. I've just found that the Hue/Saturation adjustment layer on Photoshop has a drop-down menu to select colors, which does identical job like the HSL sliders on Lightroom. Now where can I find clarity?
May 27, 2014 15:12:04 #
In photo shop
Make a layer using Control J.
Select filters and the top.
Move mouse down to Blur.
Select Gaussian Blur
You will be able to select how much blur you want.
Once it is applied, you can use your eraser tool to remove it where you don't want it. Like on that picture I sent you. Your can remove it from her hair, eyes ect.
May 27, 2014 15:15:11 #
Bill Houghton wrote:
In photo shop
Make a layer using Control J.
Select filters and the top.
Move mouse down to Blur.
Select Gaussian Blur
You will be able to select how much blur you want.
Once it is applied, you can use your eraser tool to remove it where you don't want it. Like on that picture I sent you. Your can remove it from her hair, eyes ect.
Make a layer using Control J.
Select filters and the top.
Move mouse down to Blur.
Select Gaussian Blur
You will be able to select how much blur you want.
Once it is applied, you can use your eraser tool to remove it where you don't want it. Like on that picture I sent you. Your can remove it from her hair, eyes ect.
I believe that does not do the reduced clarity job as neatly as the Ligthroom's clarity slider does. Perhaps that feature is only available in Lightroom?
If you want to reply, then register here. Registration is free and your account is created instantly, so you can post right away.