Macro Equipment Set-Ups
Oct 5, 2013 13:17:01 #
Here are a few typical 'companion components' to make macro-photography a bit more manageable.
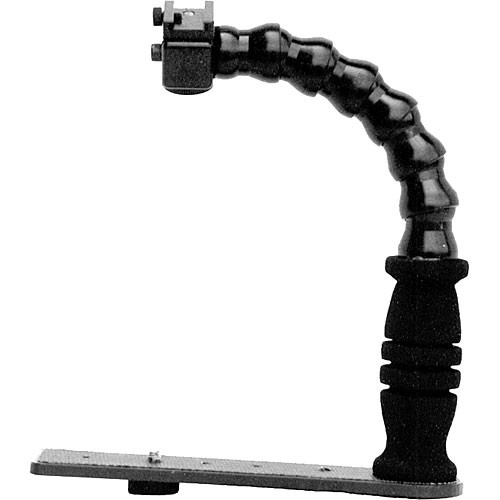
Delta 1 Flip Flash I Bracket - 7-in Flash Arm
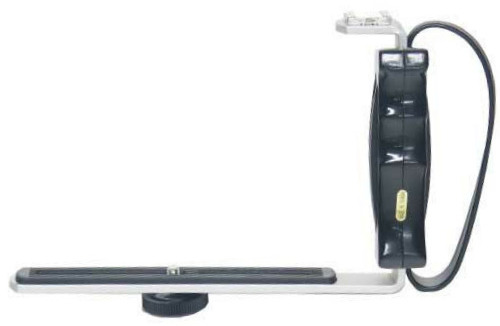
Kalt L-Grip Flash Bracket ($25)
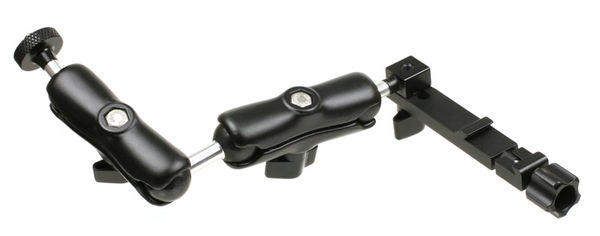
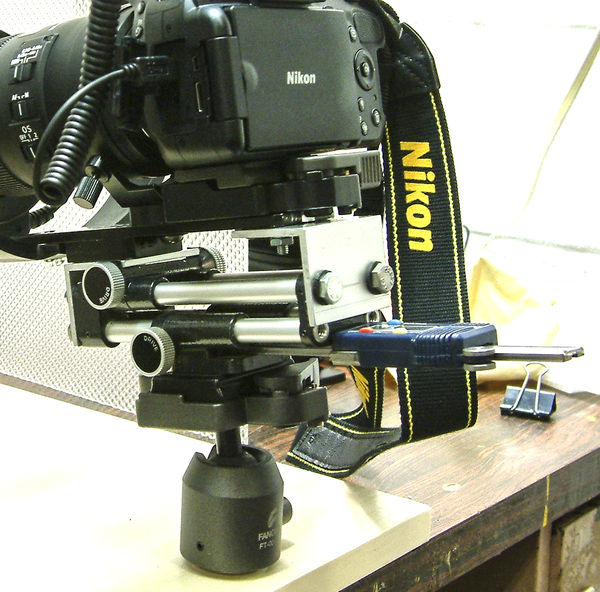
Wimberley F-2 Macro Bracket ($169.00)
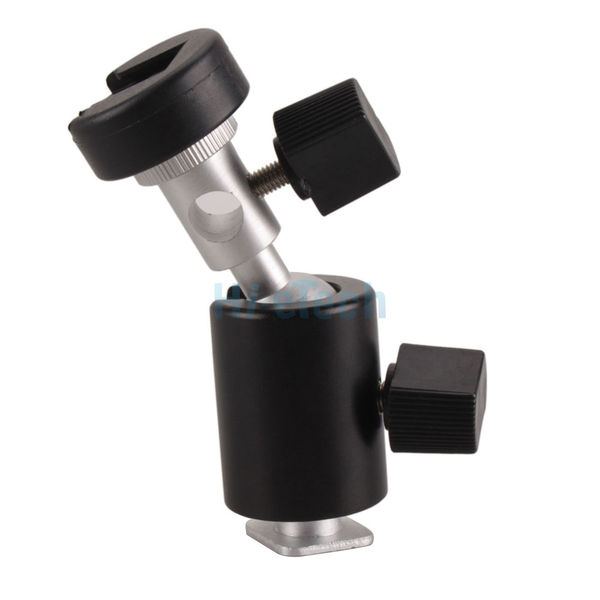
ball-joint cold-shoe extender aka 360° Swivel Flash Shoe Umbrella Holder Bracket C Type ($10 eBay)
TTL Off-Camera HotShoe Cord
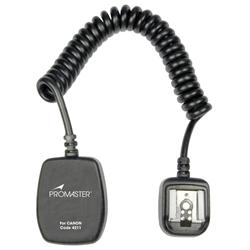
Vello TTL off-camera hotshoe cord

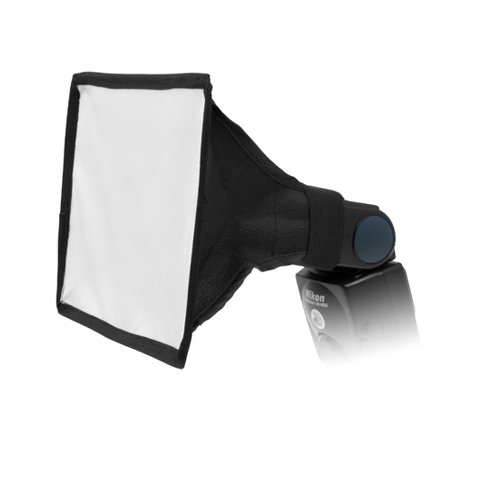
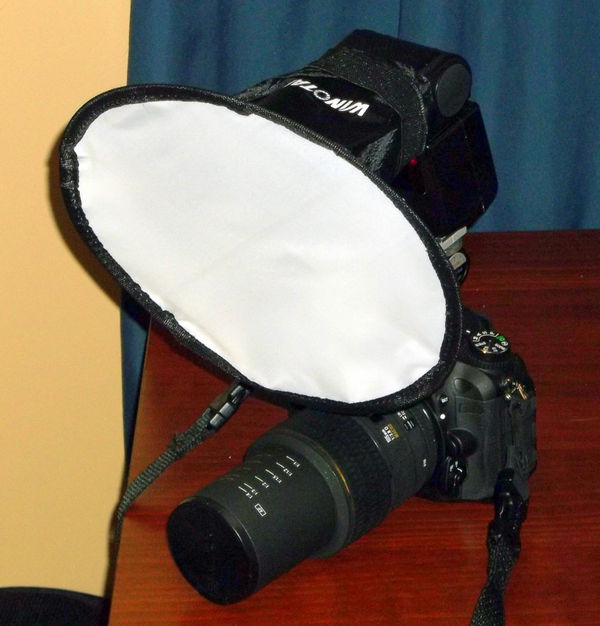
FotoDiox 6x8 softbox
Oct 20, 2013 03:38:25 #
This is my main macro rig these days. Canon 5DMKII, Sigma 150mm F/2.8 macro or Canon MP-E65 lens. MT24 twin flash difused in a Novaflex bracket.
http://i935.photobucket.com/albums/ad192/Thunderhaven/_MG_40920_zps73ed1564.jpg
http://i935.photobucket.com/albums/ad192/Thunderhaven/_MG_40920_zps73ed1564.jpg
Nov 5, 2013 21:33:59 #

Here is my current table-top macro studio set-up, every changing and evolving: Nikon D5100, Sigma 105mm macro lens + Sonoptor f=115 close up lens, Yongnuo YN-560 III speedlight.
Dec 3, 2013 09:59:28 #
Picked up a new diffuser last week. This one is an 8" round model which is a bit larger than the last one I tried & didn't care for. Likely will only be able to use it on bugs that are pretty much out in the open though due to it's size. Just mounted it on the camera to see how it fits. Haven't had a chance to try it out yet....Anyone else tried a round version ?
Dec 8, 2013 05:34:23 #
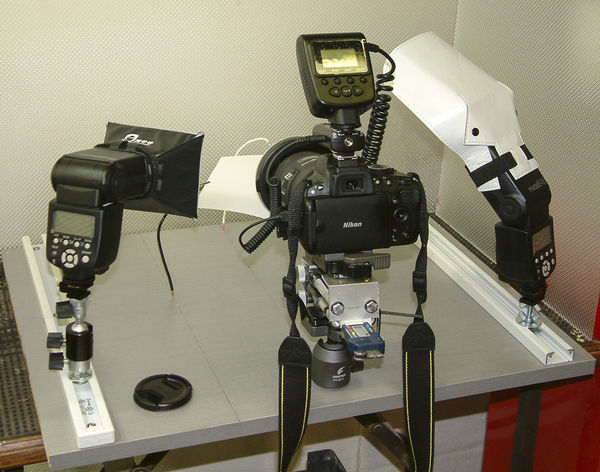
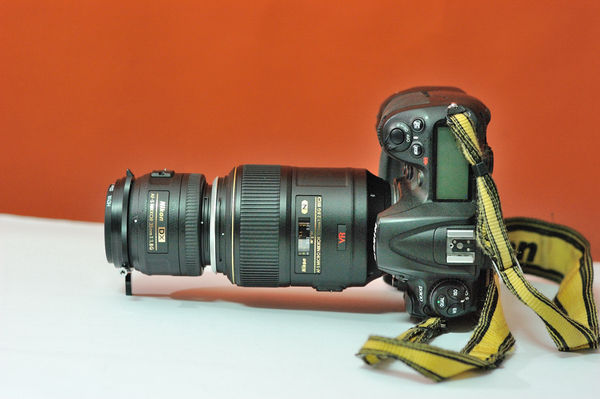
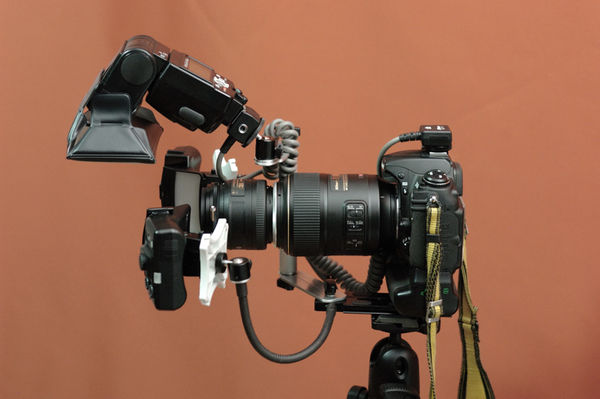
Nikon D300, SB-800 speedlight, R1 wireless system with diffusers (twin SB-R200 speedlights), Nikkor 105G, Nikkor 35mm G and filter to protect the entry of dust (Nikon BR-3 ring on the objective Nikon AI and AF-D, when reversed). With reversed Nikkor G lenses,it is necessary to use the Nikon BR-6 ring to keep the aperture open.
Working Distance of around 30-mm (1.2-inches)
Working Distance of around 30-mm (1.2-inches)
Nikkor 105G with reversed 35mm & BR-6 ring
DIY aluminum bracket for SB-800; flexible, thermo-plastic coated lighting arms support SB-200s

Notice Nikon BR-6 ring on reversed lens to open aperture
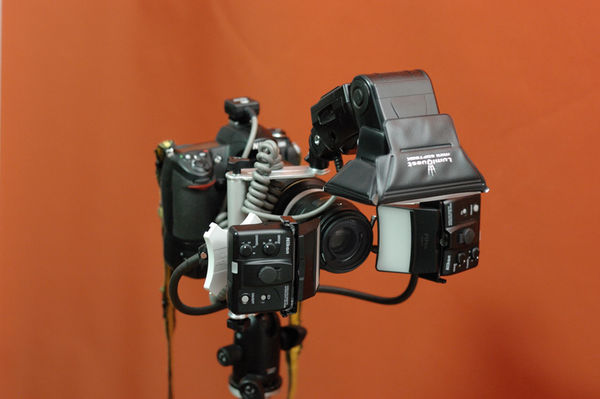
Nikon MB-D10 battery grip below camera.
Dec 14, 2013 18:36:15 #
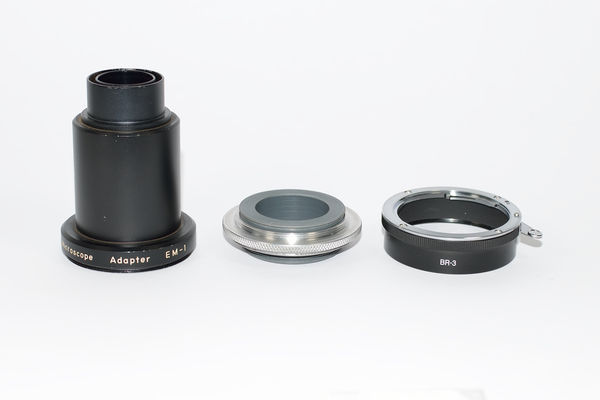
With all this set up, we have a 6x magnification with a working distance of 40 mm (1.6 inches)

Ring Nikon BR3 and Diy adapter to connect to the 50mm 1.8 lens microscope adapter Nikon EM-1
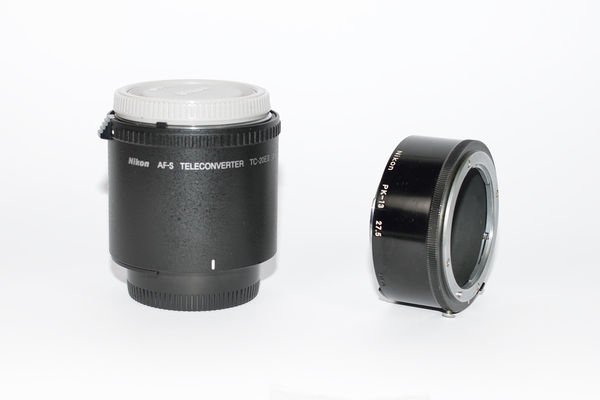
Nikkor 50mm 1.8 and Nikkor 135mm 2.8 AI
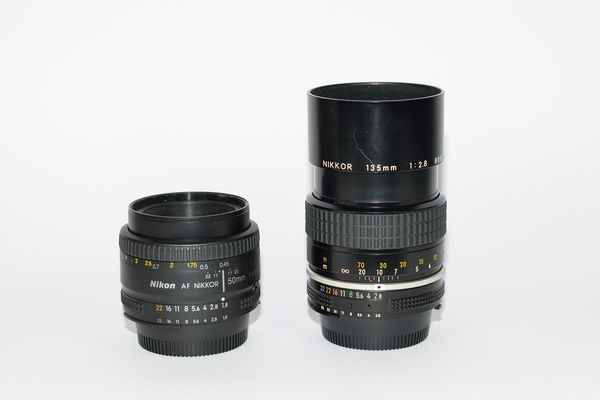
Nikon TC-20EII and Nikon PK-13 modified to fit the teleconverter
Jan 6, 2014 01:35:42 #
Ive been meaning to document my macro setups but never seemed to get around to it. With field macro slowing down to a crawl I found the time to do so. The pictures document my progression / trials and tribulations over the past year. Inspiration for most of the DIY equipment came from various websites that document such things. I have read so many I forget who to credit. Implementation of some of these ideas is a combination of several concepts I have stumbled across to produce a unique solution. I post with the hope that some may find solutions to their macro equipment needs and of course, showoff my rigs...
Original field macro setup - Canon T2i with 270EX II Flash - extending snoot and overhead speedlight illumination rigs. MP-E 65 extends out 75mm so if one wants to deliver illumination to the end of lens the flash source must travel as well. Solution - a gutted Vivatar teleconverter j-b welded to a gutted 58mm UV filter. A ¼ inch hole was drilled and tapped into the converter to attach an aluminum platform:
http://farm4.staticflickr.com/3765/11791435346_68302a7e41.jpg
t2i - mpe65 - lens mount platform - snoot and flipped 270 by William Banik, on Flickr
Snoot on the right is made of ¼ inch foam project board (white on inside). Velco straps snoot to flash and its secured to platform with gate latch, bolt, and wing nut. It has crude telescoping motion out to 3:1 and taped edges aid in smooth glide.
On the left 270 EX II flipped upside down on the platform ala Kurt (Hock Ping GUEK). It moves entire lens extension. A cheap popup diffuser softens the flash. Both applications can produce nice results but are inconsistent and the 270EX II doesn't refresh very fast.
When I first started macro I had a dickens of a time seeing focal points with the T2i pentamirror/small viewfinder. Solution - DIY LCD live view loupe - electronics project box, magnifying glass, aluminum bar scraps, old Kenko lens adapter:
http://farm4.staticflickr.com/3703/11791436016_e63752e055.jpg
t2i - lcd loupe by William Banik, on Flickr
It worked well but constantly using live view in the summer would overheat the sensor and require a 5 minute cool down period.
Details of the bits and pieces I made for the T2i. Far right is an old stereo microscope fiber optic bridle. Fiber arms attach to the Vivatar convertor shell with tin strip cinches and screws. Illumination wasnt sufficient It needs a bridle with at least 8 arms and preferably 18 long not 12.
http://farm6.staticflickr.com/5502/11791436586_af59eb0f24.jpg
t2i - diy pieces by William Banik, on Flickr
T2i finally blew a shutter gasket so I graduated to a 5D-III. Following pictures are of the lens/illumination combos I have. I believe photography nerds call this camera porn.
On the left Yashica Medical DX100 Very sharp optics, fixed aperture dependent on magnification. I got it from a retiring dentist for a song. I havent used this in the field as the lens wouldnt clear the viewfinder hump on my T2i. No such issues with the 5D so I plan on using it this coming spring. DIY coke can diffuser ala LordV with paper towel diffusion media on $2 thrift shop heavy duty bracket with Giotto MH 1004 ball head - $10 a pop.
On the right Sigma 180 2.8 First time I looked through this lens I was blinded by all the light. Its a very sharp lens that doubles up as good mid-range telephoto. Standard $15, softbox.
http://farm4.staticflickr.com/3800/11790914233_49a6231fe9.jpg
5d-iii - yashica-100m and sigma-180mm by William Banik, on Flickr
Canon TS-E 90 with 68mm of Kenko Auto tubes. Picked this up used on the cheap at the local camera store. Normal cosmetic wear and tear on the exterior - optics and shutter pristine. Tilts and shifts to adjust focal plane. 1:1 magnification with the tubes.
http://farm6.staticflickr.com/5487/11790914573_651ae1c1a0.jpg
5d-iii - tse-90 with kenko by William Banik, on Flickr
MP-E 65 collar ring clears the viewfinder hump on the 5D-III when rotated 180 degrees. This allows it to serve as a base for a flash platform (shown with 430 EX II). Good overhead illumination but can be overpowering depending on subject/background reflectors. Best used by manually selecting output levels - start at 1/4 power. Doesnt travel when the lens is extended, this limits effective illumination to 1:1 / 2:1 magnification:
http://farm3.staticflickr.com/2856/11791090114_e2a4b4cc3d.jpg
5d-iii - mpe-65 with tripod collar platform by William Banik, on Flickr
Latest MP-E 65 illumination MT-24EX preliminary diffusion strategy. Swatches of paper towel directly over flash heads, cheap popup diffusers, and on the right additional concave diffuser ala Kurt (Hock Ping GUEK) attached with gutted 58mm filter. Plan is to mold head sleeves and concave diffusion lens.
http://farm8.staticflickr.com/7326/11790668475_a1610272ab.jpg
5d-iii - mpe-65 mx24 with diffusers by William Banik, on Flickr
Fun with bellows - I like picking up old glass and mounting it on bellows. Some real keepers may be found for good prices. Eventually I want to get a used NEX7 and shoot old glass with it:
http://farm6.staticflickr.com/5535/11790916003_2d3c897cd1.jpg
5d-iii - fun with bellows by William Banik, on Flickr
Latest field stacking rig - A simple light weight field rig, good for subjects up to ~3:1. Velmex A1500 Unislide for precise inline positioning, Giotto MH658 quick release for roughing in horizontal position, Manfrotto Quick release, plexiglass base with clip. This is for beanbag / ground work. Manfrotto 488 ball head on the right for tripod mount:
http://farm4.staticflickr.com/3793/11790916413_54e4a08e3a.jpg
field stacking rig by William Banik, on Flickr
Feb 10, 2014 21:58:10 #

Here's my setup. I tried it today at 1/60th, 100, f/22 and it works great.
(Download)
My old Vivitar flash grip
(Download)
(Download)
The ball joint fits very loose so I had to put some electrical tape on the grip to tighten it up
(Download)
I wound up removing the plastic cold shoe and screw the stud directly into the flash cord for a more sure fit. **************** ********************************* The bottom piece does not fit snug in the flash bracket cold shoe so 3 pieces of tape were applied to the bottom.
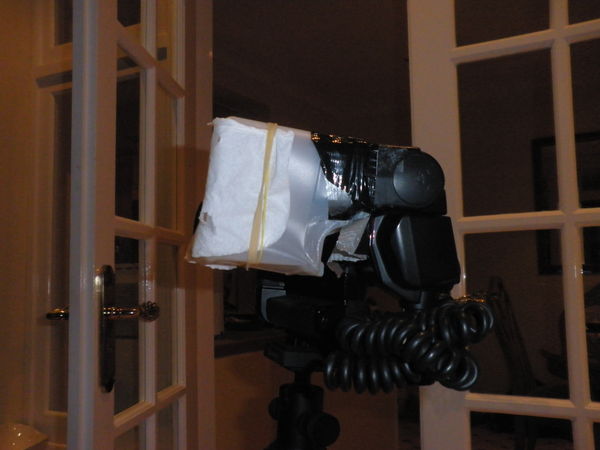
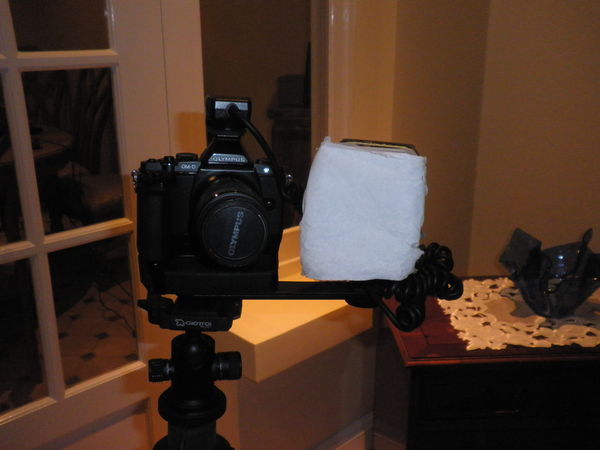
Mar 12, 2014 17:18:37 #
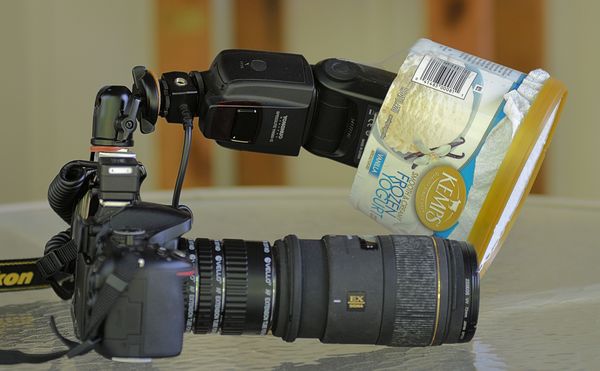
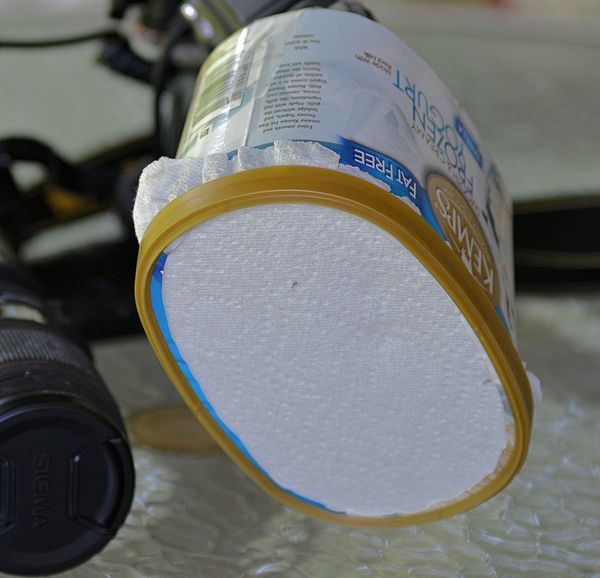
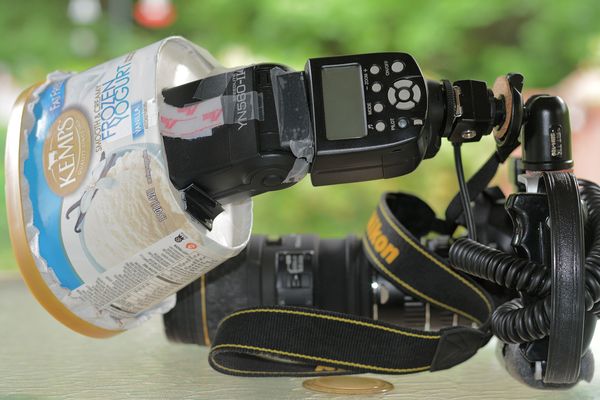
Have finally managed to have a set up that works for me. I can position the flash where and what angle I chose. If I tilt the flash 45 degrees, soft light still falls on the subject but if I'm using digital zoom I need the flash the same plane as the lens. The white tissue which covers the front of the plastic milk carton softens the light. The pull out diffuser "in flash" is not on, I find that the plastic carton with the tissue is enough diffusing material . I also experiment with the zoom settings on the flash as this can give you different effects.
Apr 12, 2014 00:01:59 #
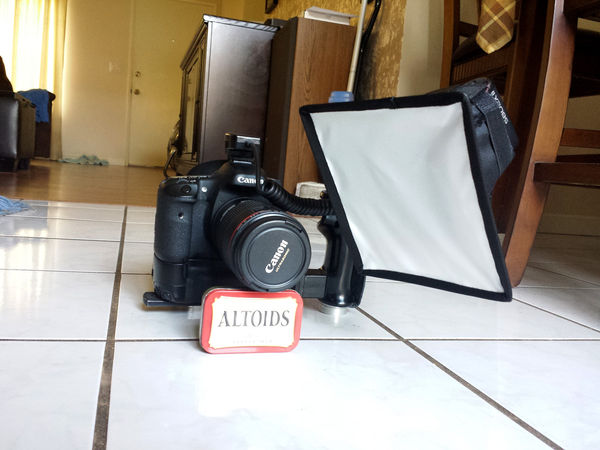
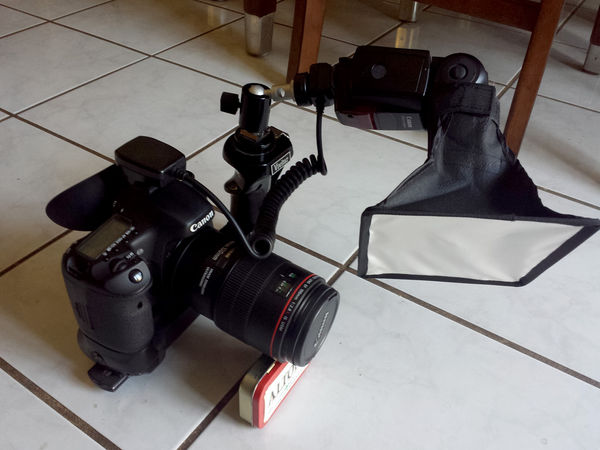
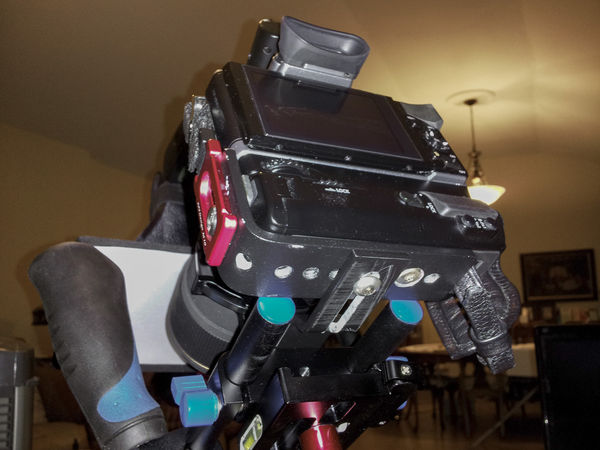
The Olympus OM-D E-M5 has a less than sturdy tripod mounting system. I keep the grip on always and have designed my own tripod mount/reinforcement bracket around the bottom of the battery grip that relies on the strap rings for added strength. (I've already broke the body's tripod socket once and don't want it to keep breaking).
So when faced with the task of adding a flash bracket I had to get a bit creative. I morphed a video rig into what you see in the photos for a rigid setup that adds support points to the bottom of the grip as well as the lens and it allows me to move the tripod mount forward. Plus it's got a handle so it works great hand held! I can move the flash up and down and back and forward easily.
I mostly use the Sigma EX 105mm f2.8 DG macro with the olympus ex 25 extension tube and Pani 4/3 converter. Flash is the Yongnuo YN-560III with the RF-603N wireless trigger modified to work on Olympus hot shoe. 6 x 8 softbox.
Please excuse my cell phone photos.
Apr 23, 2014 16:36:08 #
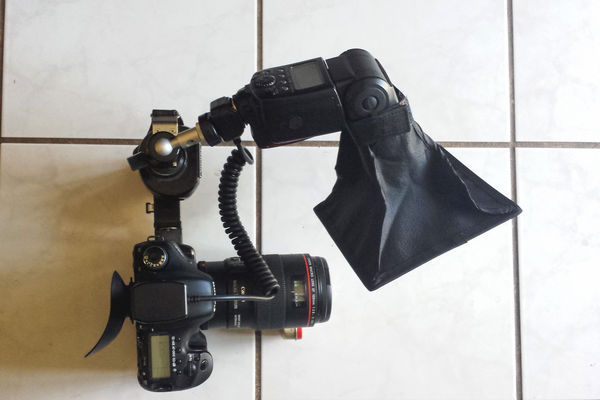
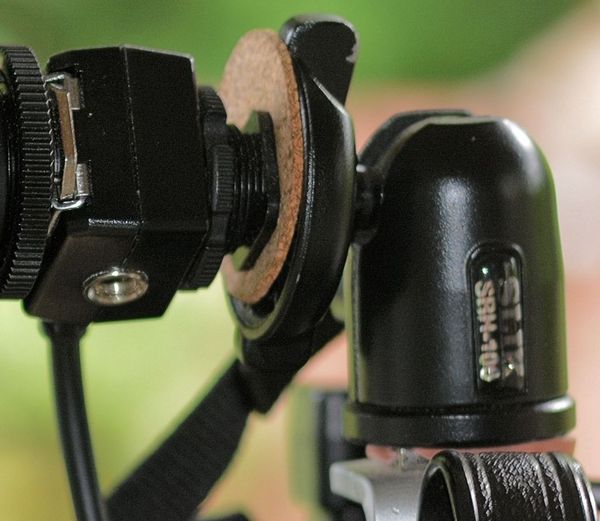
My current macro set-up: Nikon D5200 with 68-mm extension tubes & Sigma 150mm macro lens, Yongnuo 560-II speedlight with DIY softbox diffuser & single-thickness paper towel face. Slik SBH-100 Compact Ballhead bolt-mounted to Kalt L-grip (drilled a hole through shoe). ETTL cord base threads to ballhead bolt.
(Download)
(Download)
(Download)
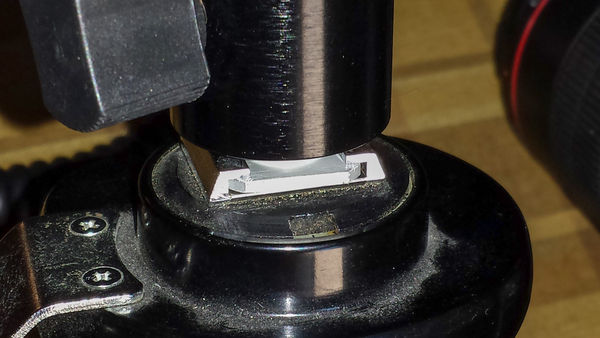
Slik SBH-100 Compact Ballhead
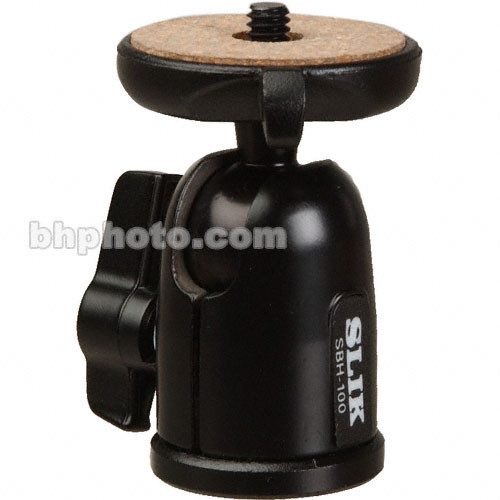
Bolt-mounted Slik SBH-100 Compact Ballhead
(Download)
Apr 24, 2014 15:50:52 #

Very impressive to see the skill and ingenuity of some of our enthusiasts. Just wanted to share will you. I have been using the Canon M-14 ring light. Most would say the lighting is too flat and I would agree. Did some experimenting with the lighting ratios on the back of the flash {you can change the light from each of the two flash tubes (in the one ring flash). Example 1/4 on left and 3/4 on the right etc. This will add more depth and texture to the images.
Best to all,
Steve
Best to all,
Steve
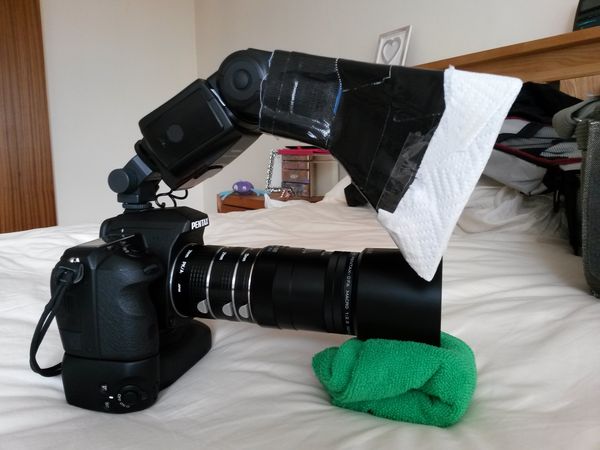
May 4, 2014 11:56:07 #
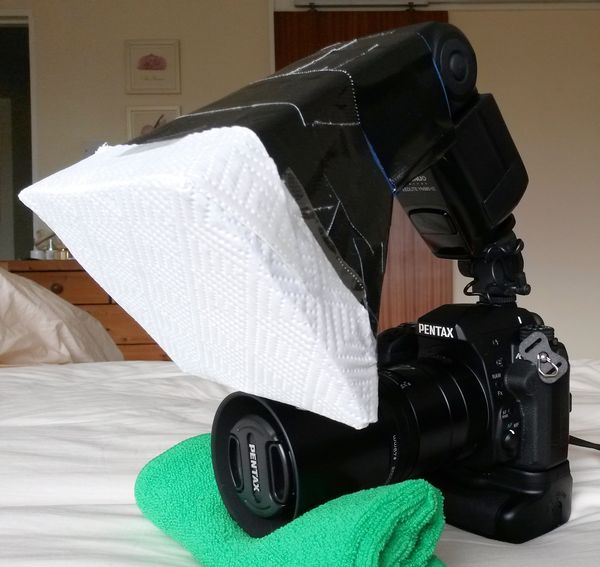
Newest macro set-up: Pentax K-3 with Tamron 90mm macro lens and Yongnuo YN-560 speedlight with home-made diffuser, including internal diffusion panel.
 new set up by crumlyt, on Flickr
new set up by crumlyt, on FlickrJun 18, 2014 22:00:01 #
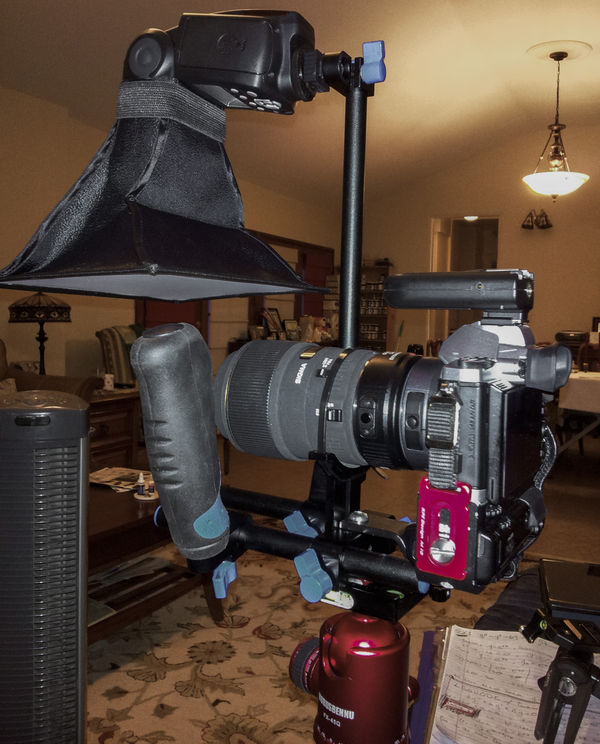
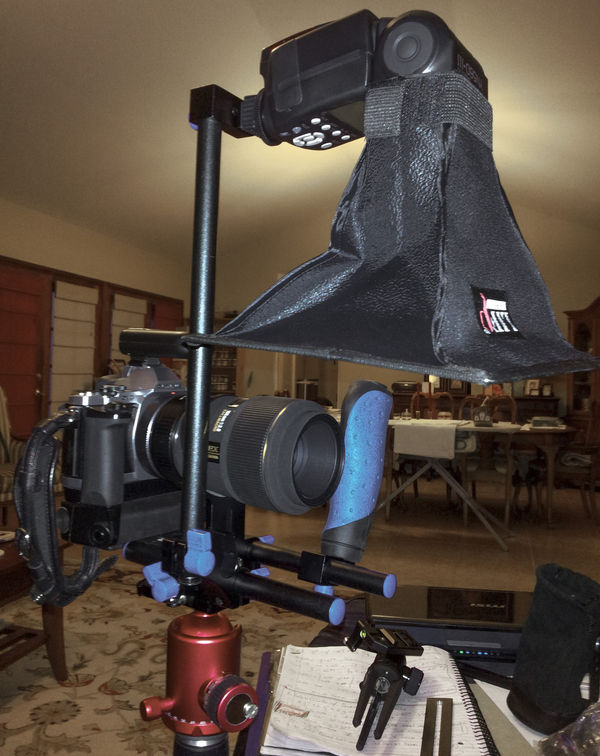
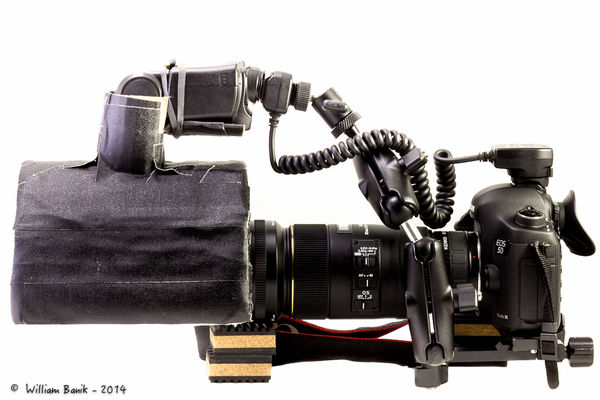
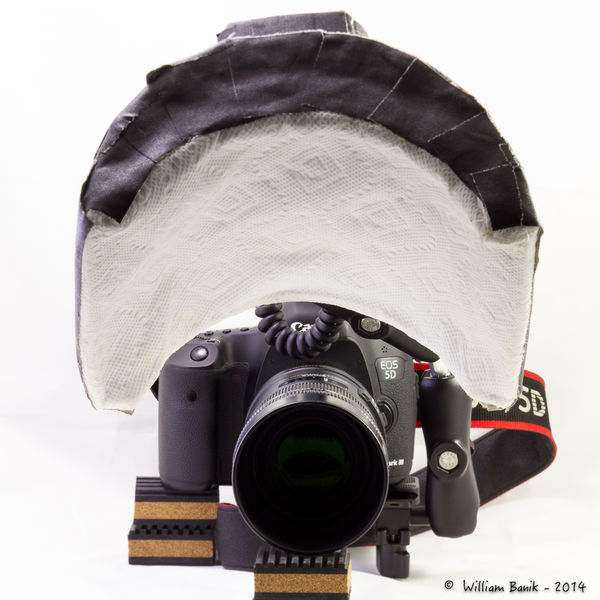
Update to diffuser and bracket setup: I went through a few of the el-cheapo articulating arms sold at the local camera store and they just weren't up to the field rigors I put my rig through. I'm constantly rotating and positioning the diffuser - loosening and tightening the arm. This coupled with the general bounce induced by long hikes over uneven terrain led to 2 stripped out units and a third relegated to lightweight tabletop stacking duty. I broke down and bought a used Wimberley Macro Arm. After a couple months of use I am very impressed with the unit. When locked down the arms hold tight, to the point that I don't hesitate using it as a handle to pick up my camera. I still use a Giotto Mini Ball Head (1004) on the end of the arm for fine positioning of the diffuser and flipping it up into a 45 degree position. Illumination - 430EX II flash with ETTL cable.
I have built a hardbox concave diffuser. I really like the concave concept as the light wraps around the subject. This is very evident when one runs tests on a tabletop rig and I can see the results in field shots. There are several versions of this type of diffuser out on the web. Most involving an thin piece of plastic extending out past the lens with diffusion material on top of it. I tried this style of diffuser but found it too fragile for my macro ventures. I fashioned my diffuser like other DIY hardboxes but with a concave diffuser surface. Typical materials - cardboard, foil inside the box, gaffers tape and doubled up paper towel. It's an awkward rig but I find all softboxes to be cumbersome so I might as well get wrap around illumination for the hassle. Typically I shoot with the diffuser over the end of the lens for a side profile shot and cock it up 45 degrees for head on shots. Overhead illumination is very efficient when it comes to flash power requirements. Cocked up at 45 degrees isn't as efficient as a flat paneled diffuser. Typically requiring a stop or two more power and the wrap around effect isn't as pronounced.
I have built a hardbox concave diffuser. I really like the concave concept as the light wraps around the subject. This is very evident when one runs tests on a tabletop rig and I can see the results in field shots. There are several versions of this type of diffuser out on the web. Most involving an thin piece of plastic extending out past the lens with diffusion material on top of it. I tried this style of diffuser but found it too fragile for my macro ventures. I fashioned my diffuser like other DIY hardboxes but with a concave diffuser surface. Typical materials - cardboard, foil inside the box, gaffers tape and doubled up paper towel. It's an awkward rig but I find all softboxes to be cumbersome so I might as well get wrap around illumination for the hassle. Typically I shoot with the diffuser over the end of the lens for a side profile shot and cock it up 45 degrees for head on shots. Overhead illumination is very efficient when it comes to flash power requirements. Cocked up at 45 degrees isn't as efficient as a flat paneled diffuser. Typically requiring a stop or two more power and the wrap around effect isn't as pronounced.
Side Profile in Typical overhead position for side profile shot. You can lift the diffuser off the lens ~3" for further seperation from the subject.
(Download)
Head on view with the diffuser cocked 45 degrees for head on or overhead shots. This is a quick adjusment with the mini ball head. Note the concavity of the diffuser.
(Download)
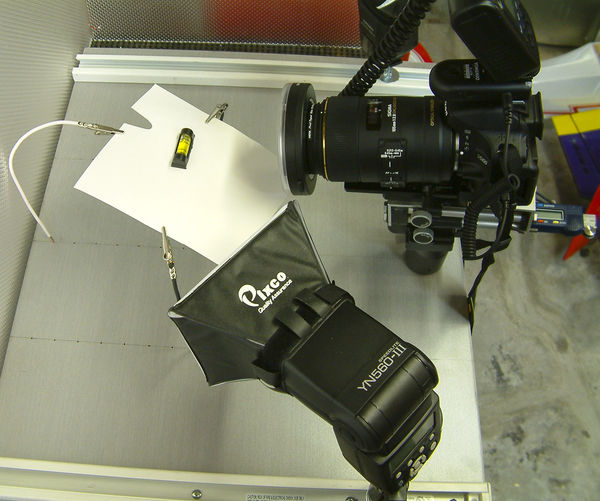
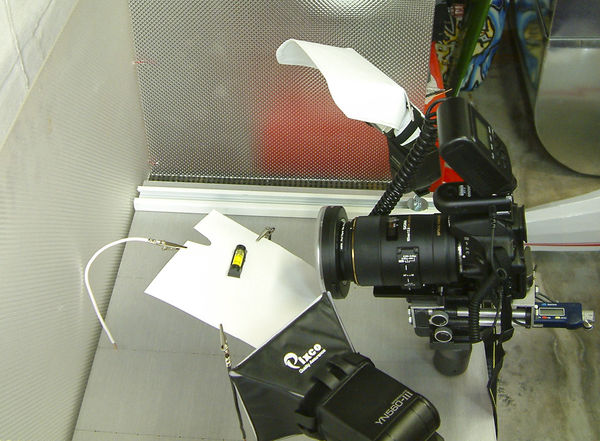
Jul 3, 2014 10:27:13 #

Just an update to the kit now used, Pentax K3, Pentax DA100mm WR, Jessop extension tubes, Yongnuo YN560-II speedlight.
The new diffuser is made with craft foam and lined with bright white paper this time rather than foil, maybe just me but prefer the light off it with the paper, this setup is more for portability.
Still use the previous bracket and diffusers just for the new kit really.
The new diffuser is made with craft foam and lined with bright white paper this time rather than foil, maybe just me but prefer the light off it with the paper, this setup is more for portability.
Still use the previous bracket and diffusers just for the new kit really.
If you want to reply, then register here. Registration is free and your account is created instantly, so you can post right away.