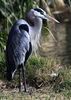
Dark bird-light background
Apr 26, 2013 15:12:44 #
Lost
Loc: Oakdale,Ca
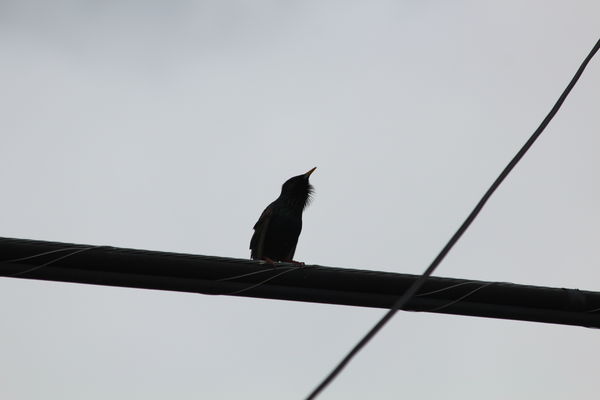
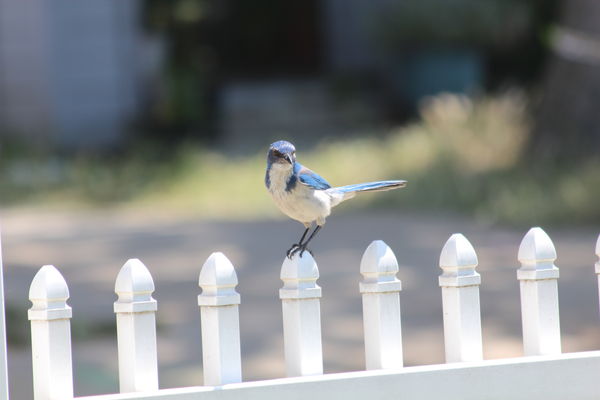
This is a problem I often have, bird on a wire or on top of something with bright background. The rest of the picture is OK but the bird is too dark to see. 2nd photo is after I played with it. I would like to take a better photo not just fix it.
Canon t3i 70/300 lens at 300
P mode with single focas point
All auto 1/400 ,F 7.1 ,ISO 125, matrix metering.
Bright sunlight.
First time at this so feel free to tell me if I need to change the way I post.
Thank You Dennis
Canon t3i 70/300 lens at 300
P mode with single focas point
All auto 1/400 ,F 7.1 ,ISO 125, matrix metering.
Bright sunlight.
First time at this so feel free to tell me if I need to change the way I post.
Thank You Dennis
1
2

Apr 26, 2013 15:39:06 #

You should use manual settings. The original is underexposed because of all the backlight.
Apr 26, 2013 15:47:23 #

Lost wrote:
This is a problem I often have, bird on a wire or on top of something with bright background. The rest of the picture is OK but the bird is too dark to see. 2nd photo is after I played with it. I would like to take a better photo not just fix it.
Canon t3i 70/300 lens at 300
P mode with single focas point
All auto 1/400 ,F 7.1 ,ISO 125, matrix metering.
Bright sunlight.
First time at this so feel free to tell me if I need to change the way I post.
Thank You Dennis
Canon t3i 70/300 lens at 300
P mode with single focas point
All auto 1/400 ,F 7.1 ,ISO 125, matrix metering.
Bright sunlight.
First time at this so feel free to tell me if I need to change the way I post.
Thank You Dennis
Use some setting that gives you more control like aperature priority or shutter priority.
If your camera has exposure compensation, set it for +1.0 to start with. On a very sunny day I often use +1.7.
Apr 26, 2013 16:22:11 #
Lost
Loc: Oakdale,Ca
Thank you but I think manual is more then I can handle.
I did try exposure comp but went too far and it was all white.
I am trying shutter contol to try and freeze the birds
Thanks for your replies.
I did try exposure comp but went too far and it was all white.
I am trying shutter contol to try and freeze the birds
Thanks for your replies.
Apr 26, 2013 16:23:26 #
Lost wrote:
This is a problem I often have, bird on a wire or on top of something with bright background. The rest of the picture is OK but the bird is too dark to see. 2nd photo is after I played with it. I would like to take a better photo not just fix it.
Canon t3i 70/300 lens at 300
P mode with single focas point
All auto 1/400 ,F 7.1 ,ISO 125, matrix metering.
Bright sunlight.
First time at this so feel free to tell me if I need to change the way I post.
Thank You Dennis
Canon t3i 70/300 lens at 300
P mode with single focas point
All auto 1/400 ,F 7.1 ,ISO 125, matrix metering.
Bright sunlight.
First time at this so feel free to tell me if I need to change the way I post.
Thank You Dennis
This is a difficult type of exposure situation. Using a 'normal' metering mode the large area of sky overwhelms the much smaller, darker area and causes serious underexposure.
One solution could be spot metering, but I don't think that the spot area on a digital camera will be small enough to cover just the area of the bird.
The alternative is a sort of try it and see approach, although you need a camera with a histogram display.
As shot the histogram has a very tall, narrow peak (for the sky) with a tonality of around 200, and another, less tall, peak at about 12. Although this is within the recording capability of the image, it is too low to register on a monitor, and thus it just looks black. Your editing, which, I have to say, has been remarkably successful, has pushed the peak up to around 50 and also flattened it out by spreading it over a range of about 25-100. Although you have done a good job on it, you are quite right to want to get something like it straight from the camera because the editing must have caused considerable information loss. When you made the exposure, the screen view would (if set appropriately) have displayed a histogram much as I have described. This would have shown up the underexposure and told you to reshoot, giving more exposure. Two or three extra ones at different settings would have given you a number of choices to consider at your leisure.
GHK
Apr 26, 2013 17:28:52 #
Lost
Loc: Oakdale,Ca
I think I need to post whom I am repling to.
GHK
Thank you for the responce.
I put the pic back on the memerory card and looked in the manuel fo the histogram view. On pic review the histogram is 1/4 of the screen, too small for any numbers but the high spike is on the right side and the medium spike is on the left for all,red green blue. A simaler pic with {same bird}with a tree behind shows a round hump in the middle of the histogram. On the thumbnail the sky showing through the tree is blinking white. I think the blinking is telling me over exposure. I dont understand wich part of the first histogram is telling me under exposure.
Thanks for everyone's time. Dennis
Apr 27, 2013 05:40:39 #
the P setting stands for poncy and of no real use to the enthusiast!!!!!!
Set the camera to aperture priority with centre spot metering. You can also set in a certain amount of over exposure with the +exp - no more than one stop as you will get fringing from the highlight into the dark area. Shoot RAW and import int LR where you can then tweek to your hearts content without touching the original file.
Set the camera to aperture priority with centre spot metering. You can also set in a certain amount of over exposure with the +exp - no more than one stop as you will get fringing from the highlight into the dark area. Shoot RAW and import int LR where you can then tweek to your hearts content without touching the original file.
Apr 27, 2013 08:21:51 #
Lost wrote:
This is a problem I often have, bird on a wire or on top of something with bright background. The rest of the picture is OK but the bird is too dark to see. 2nd photo is after I played with it. I would like to take a better photo not just fix it.
Canon t3i 70/300 lens at 300
P mode with single focas point
All auto 1/400 ,F 7.1 ,ISO 125, matrix metering.
Bright sunlight.
First time at this so feel free to tell me if I need to change the way I post.
Thank You Dennis
Canon t3i 70/300 lens at 300
P mode with single focas point
All auto 1/400 ,F 7.1 ,ISO 125, matrix metering.
Bright sunlight.
First time at this so feel free to tell me if I need to change the way I post.
Thank You Dennis
Welcome to the Hog.
A couple suggestions.
First, use the Quote Reply button when answering a response so that we know to whom your comments are directed.
Second.... On the photo of the bird. Your camera did exactly what you told it to do. It took a light reading on the sky and not on the bird you were attempting to shoot. With the Canon T3i you need to tell the camera to do spot light meter reading for one. Get out of 'P' mode and make the bird look visually correct in your view finder or back screen, ignoring the sky that you see. You can do this by opening the f/stop and/or slowing the shutter time down. Your sky will totally wash out, but your bird will be brighter.
If you are shy about using 'Manual' mode, you could set your camera to AV and set the F/stop to about f/5.6 or so, and allow the camera to adjust your shutter, but you MUST do spot light meter reading, otherwise, you will get the same results.
Good luck and show us the results.
Apr 27, 2013 11:32:40 #
Lost wrote:
This is a problem I often have, bird on a wire or on top of something with bright background. The rest of the picture is OK but the bird is too dark to see. 2nd photo is after I played with it. I would like to take a better photo not just fix it.
Canon t3i 70/300 lens at 300
P mode with single focas point
All auto 1/400 ,F 7.1 ,ISO 125, matrix metering.
Bright sunlight.
First time at this so feel free to tell me if I need to change the way I post.
Thank You Dennis
Canon t3i 70/300 lens at 300
P mode with single focas point
All auto 1/400 ,F 7.1 ,ISO 125, matrix metering.
Bright sunlight.
First time at this so feel free to tell me if I need to change the way I post.
Thank You Dennis
Use exposure compensation and open up the aperture between 1&2 stops.
Apr 27, 2013 12:33:48 #

In lighting situations like that back in film days I'd just hold my hand up in the direction I wanted to shoot and metered my hand. Worked every time. Haven't tried it since, but it's the same sun....soDJT
Apr 27, 2013 15:30:48 #
Lost
Loc: Oakdale,Ca
Jblanke wrote:
Use exposure compensation and open up the aperture between 1&2 stops.
I used the suggested 5.6. I think the camera had me at 7.1 is that 2 stops?
Apr 27, 2013 15:31:57 #
Lost
Loc: Oakdale,Ca
djtravels wrote:
In lighting situations like that back in film days I'd just hold my hand up in the direction I wanted to shoot and metered my hand. Worked every time. Haven't tried it since, but it's the same sun....soDJT
Yea, but it moves. Put my test cable in the shade.
Apr 27, 2013 15:47:33 #
Lost
Loc: Oakdale,Ca
I lost a reply so I will try again.
No birds so i just shot the cable.
When I was done the volunteer came along.
Thanks to everyone
No birds so i just shot the cable.
When I was done the volunteer came along.
Thanks to everyone
Apr 27, 2013 17:14:46 #
Brian in Whitby
Loc: Whitby, Ontario, Canada
Try changing your metering mode to Spot.
Looking through the viewfinder, place the active spot in the viewfinder on the bird.
Press the shutter button half way, re-frame (if necessary) while holding the shutter button half way down.
Press the shutter all the way down to capture the image. The sky will be washed out but the bird will be properly exposed.
Apr 27, 2013 18:58:15 #

Lost wrote:
This is a problem I often have, bird on a wire or on top of something with bright background. The rest of the picture is OK but the bird is too dark to see. 2nd photo is after I played with it. I would like to take a better photo not just fix it.
Canon t3i 70/300 lens at 300
P mode with single focas point
All auto 1/400 ,F 7.1 ,ISO 125, matrix metering.
Bright sunlight.
First time at this so feel free to tell me if I need to change the way I post.
Thank You Dennis
Canon t3i 70/300 lens at 300
P mode with single focas point
All auto 1/400 ,F 7.1 ,ISO 125, matrix metering.
Bright sunlight.
First time at this so feel free to tell me if I need to change the way I post.
Thank You Dennis
As has been mentioned, you had a problem because of the ratio of very light sky, to dark bird.
Your camera cannot do a good job figuring these sorts of things out.
Here is ONE way to do it without using an incident meter (which I think is the best option.)
Hold your hand out palm facing the camera.
Fill the frame with your palm and take a reading.
Take note of what the camera said were the proper settings and set your camera to manual using those settings.
You should be very close to correct....within reason anyway.
This is the reason that I shoot manually...the settings don't change in an unexpected way depending on where you point your lens.
If you shoot manual....you walk outside, shoot your hand, adjust the settings and as long as the light doesn't make a drastic change (i.e. you are now shooting in shade, or the storm clouds blow in) then you can happily shoot away and ignore that wildly swinging needle in your camera.
Make sense?
If you want to reply, then register here. Registration is free and your account is created instantly, so you can post right away.