In this, the second of my beginners guides, I explain the principles of
Shutter Speed Priority mode, marked as S for Shutter or sometimes TV for Time Value, on the cameras mode dial. Whether you use a film camera or a digital camera, the basic principles are the same but for the purposes of this article I will presume the use of a digital camera of either the single lens reflex type or the non-reflex type.
The
shutter speed is the duration of time that the light is allowed to strike the sensor, controlled in fractions of a second, each progressive setting giving half (or double) the duration of the previous setting. Here is the shutter speed progression table in one EV steps: 1/15 - 1/30 - 1/60 - 1.125 - 1/250 - 1/500 - 1/1000 - 1/2000 - 1/4000 1/8000 etc. The shutter duration setting may also, as has been pointed out in a reply to my previous article, also extend to whole seconds, minutes or even hours, depending on the circumstances.
The
"aperture" is the "f" stop or "f" number. It is the opening in the iris diaphragm in the lens and controls the intensity of light (or the brightness of the image) passing through the lens to the sensor. Each progressive f number allows double (or half) the amount of light to pass through the lens. Here is the table of progressive f numbers:
f/0.7 - f/1.0 - f/1.4 - f2.0 - f2.8 - f/4.0 - f/5.6 - f/8 - f/11 - f/16 - f/22 - f/32 - f/45 - f/64 etc.
I had taken the train into London Town one afternoon and found myself in the vicinity of Petticoat Lane. Being a nice sunny autumn day I was equipped with my street kit, which is a Nikon D7000 body fitted with an AF Nikkor 35mm f1.8G prime lens. I prefer this combination for street photography because it is very lightweight, small and unobtrusive. On my APS-crop sensor camera the 35mm focal length gives the equivalent field of view of a 52.5mm lens on a full frame camera which is near enough to 50mm as to make no difference and suits my style of street photography very well.
I always keep a lookout for colourful buildings or good street graffiti and I happened to come upon a restaurant with very colourful security shutters over the windows. Being mid-afternoon, the place was not yet open for business and the shutters were still pulled down. They were painted to resemble market stalls, and each of the four was a different, vibrant, colour. Even better, the building opposite had stone stairs going up to its entrance doors which allowed me a good vantage point to photograph the restaurant window shutters. While I was contemplating the scene, I noticed that there was a cycle lane running past the restaurant along which a steady stream of cyclists passed. Most cyclists in London wear high-visibility jackets and helmets, and the strident colours of these jackets were contrasting wonderfully with the bright colours of the shutters. I wanted to use the cyclists as part of my composition and at the same time convey the movement of the cyclists across the scene.
To do so I would have to introduce a certain amount of blur or
subject movement to the cyclists, in the direction of their travel. I would have to keep the restaurant façade and the rest of the scene pin sharp. I had no idea how fast the cyclists were actually travelling, I did not have a tripod, there was no convenient mailbox or lamp-post to rest my camera on, therefore some experimentation was in order. I set the ISO to 200, which is my personal default setting for colour, street shooting. Im sure that the Nikon D7000 is capable of virtually noiseless images at higher sensitivity settings, but this was November 2011 and I had not had the camera long enough to be sure. I have one rule when out with a camera never presume. I also had a nice big print in mind, and I wanted it to be as good as possible.
I set the mode to S for Shutter Speed Priority which would enable me to select a suitably slow shutter speed to show subject movement in the bicycles. The question was, how slow a shutter speed could I set without sacrificing sharpness in the rest of the scene?
There is no VR or IS (image stabilization) feature in the Nikon 35mm f1.8G lens, nor is there in the camera body, so to give the camera some stability I sat on the steps opposite and rested my elbows on my knees. I chose a height on the steps that gave me a viewpoint parallel to the building opposite. This meant that I could keep my camera as parallel to the ground as possible resulting in minimal perspective distortion. I focussed on the facade of the building opposite and composed the image. There was a traffic sign on poles in the middle of the scene that was quite distracting, so if possible I needed to place a cyclist in front of the poles to hide them as much as possible. I included the doors of the restaurant on either side and a strip of the grey tarmac road in the foreground to act as a neutral foil to the bright colours of the window shutters. I quite liked the magenta traffic lane markings that matched the colour of the window second from the right. I decided to try a shutter speed of 1/60th at which speed the camera selected an aperture of f/12 with the metering set to centre weighted. This wasnt going to be easy!
It was a case of waiting for a cyclist to come by while holding the camera perfectly still and trying again and again to get the shot! If I had panned the camera (followed the cyclist) I would have had a sharp cyclist and a blurry background. I wanted the opposite, a sharp background and a blurry cyclist. After half a dozen or so attempts I decided to increase the shutter speed to 1/90th, just to compare the difference in subject movement blur, and that was when I managed to release the shutter at the definitive moment when one cyclist came past, dressed in hi-viz jacket, and travelling at quite a rapid rate, and I captured him perfectly in front of the traffic sign poles. The exposure was 1/90th at f9.5, ISO 200, focus mode AF-A , 3D tracking, back button focussing. I could have used manual focus, but back button focussing has the same effect, as the focus will not move once I release the button and this is my default focus method.
I had the Jpg image quality set to large Jpg normal, picture control Vivid with saturation +3 because I wanted the colours to pop. I downloaded into Lightroom in my usual way (see this previous thread for details:
http://www.uglyhedgehog.com/t-102223-1.html ) I opened the Jpg image in Photoshop CS5, created and saved a master Tiff file, re-sized it to 1024 pixels across, converted the colour space to sRGB, sharpened it for the web, applied my watermark, saved it as a 96dpi Jpg file at quality setting 6 and thats the image you see here. I did not use the RAW file as there was no need.
Shutter speed priority comes into play whenever
subject motion has to be either frozen or shown as a motion blur.
When photographing sports such as soccer on a bright day with a 70-300mm lens, (thats the game where everybody runs around chasing a big round ball and tries to kick it between the opposing teams goal posts) I set the mode to S for Shutter Priority , I set a shutter speed of 1/2000th and ISO to 400. Thus the camera selects an aperture of around f/8 which results in sufficient depth of field to get the players sharp while isolating them somewhat from the background. The shutter speed of 1/2000th is fast enough to freeze the action.
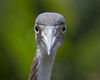
When photographing
birds in flight (or BIF as I have been educated into calling it) shutter speed priority is a must in order to freeze the bird in flight. Depending on the speed of the bird, the distance and my panning ability, I set a shutter speed of between 1/500th and 1/2000th with ISO on 200 auto and plus one EV compensation if I am shooting against the bright sky. I will not go into all of the other parameters of BIF photography here.
Another subject that requires shutter priority mode is
motor sport. Photographing racing motorcycles or racing cars from the track-side requires a good understanding of shutter priority mode and a practised skill in being able to pan the camera to maintain a rapidly moving subject in the correct place within the frame to make a pleasing composition. Good panning technique will absorb the motion of the subject to a certain degree, and the slower the shutter speed, the more the background will blur. Choosing a shutter speed that results in a nicely blurred background while keeping the subject pin sharp while you pan the camera, is a learned skill, but once learned, can result in spectacular photographs.
Remember the exposure triangle 1) Aperture, 2) Shutter speed and 3) ISO sensitivity. To maintain equality, If you adjust any one of them, one other must be adjusted accordingly to compensate.
FAQ:
Shutter release mode:
Why didnt I set the camera on multi shot, burst mode and just hold down the shutter release while a cyclist came by? Well, I could have, but what would have been the challenge in that? Besides, Im old school and I resent the fact that the camera can probably out-think me at every turn. Using single shot, I had to compensate for the shutter lag (the delay between pressing the shutter release and the shutter actually firing) which is always good training.
Why did I use centre weighted metering?I could have used matrtix metering, but I find that I get more consistent results using centre weighted metering with the Nikon D7k. In matrix metering mode, the metering uses not only the brightness of the various parts of the scene, but also the brightness and colour of the subject identified by the auto-focus point. I used back button focussing, single point 3-D tracking, therefore, in matrix metering mode, the colour and brightness of whatever was under the centre focussing point at the instant that I pressed the focus on button would have influenced the exposure. I personally dont like this feature as I think that it introduces a degree of inconsistency to the matrix metering. Just my opinion.
Picture control picture style:
Why did I use Vivid picture setting with additional boost of saturation? I wanted the colours of the window shutters as well as the high-vis jackets of the cyclists to really pop against the fairly dull background. The default Vivid setting on the Nikon D7k isnt vivid enough for the result that I envisaged. I also had the RAW file to play with if I didnt get what I wanted from the Jpg. As it turned out, the Jpg file was right on the button. Incidentally, I dont think that this image would have worked in monochrome (B&W) at all.
Graham Serretta
London 2013.
In this, the second of my beginners guides, I exp... (