Dehaze filter
May 18, 2019 19:14:39 #

One of the more remarkable tools in LR is the dehaze filter. Adobe promoted it for removing distant haze in landscapes. However, I found it handy for adding punch and bringing out detail.
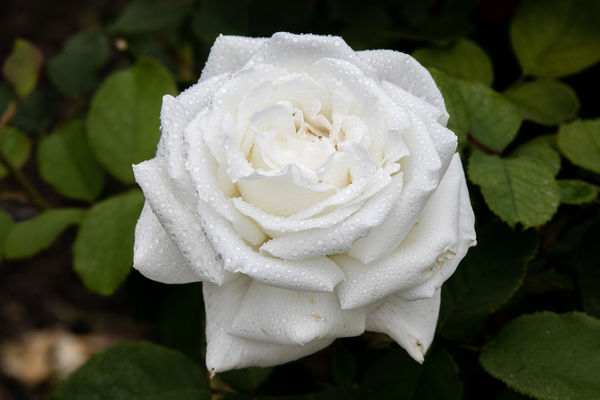
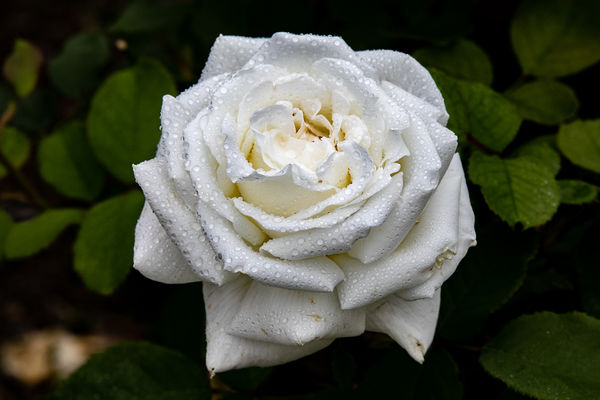
I was in California recently and shot roses on my last day there. (Canon 80D, Sigma 24-70 and 70-200, tripod.) I bracketed exposures at 2/3 stop and picked the best one in LR. The workflow was to apply a ColorChecker profile, adjust the white balance with a gray card, crop, apply auto-exposure, set shadows to -100, dehaze, adjust exposure (rarely needed), apply local adjusts (also rarely needed) and set the vignette to about -30. Adjusting the exposure sliders could not produce the effect I wanted but a slight positive dehaze did. Here are the before and after dehaze adjustments.
Give this a try on your own photos.
May 18, 2019 20:14:14 #

I use dehaze in Affinity, too. I try it on any photo that I feel needs help. Usually it does make a difference. If it doesn't, I just don't apply it and there is nothing lost. Usually, it does help.
May 18, 2019 21:11:56 #

May 19, 2019 09:08:37 #

I have similar results using dehaze in PhotoScape also.
Your 2nd pic is amazingly good.

Your 2nd pic is amazingly good.
May 19, 2019 09:11:57 #
Linda From Maine wrote:
Quite an amazing comparison. Thanks Bob!
You are welcome.
May 19, 2019 09:12:28 #
Jimmy T wrote:
I have similar results using dehaze in PhotoScape also.
Your 2nd pic is amazingly good.
Your 2nd pic is amazingly good.
Thank you.
May 19, 2019 09:50:18 #
Looks good! I also find that lowering highlights helps this kind of situation as well.
May 19, 2019 10:05:18 #
sodapop wrote:
Looks good! I also find that lowering highlights helps this kind of situation as well.
I use LR and might be able to duplicate the effect with all the sliders. The beauty of this is you need only one slider, dehaze.
May 19, 2019 13:19:29 #
I agree with you very much. I also usually apply just a hint of positive Dehaze to most of my photos as I find it accomplishes what I could create with several other sliders with a single tool. The examples you posted are really good. jak
May 19, 2019 15:00:12 #
abc1234 wrote:
One of the more remarkable tools in LR is the deha... (show quote)
I used to use this tool only on hazy shots. As you point out, it really helps for shots that don't have any distant haze as well. Thanks.
Erich
May 19, 2019 20:55:06 #
Jak and Erich, thanks. I do not know if Adobe intended for people to use the tool for other than haze, but it is certainly a winner.
If you want to reply, then register here. Registration is free and your account is created instantly, so you can post right away.