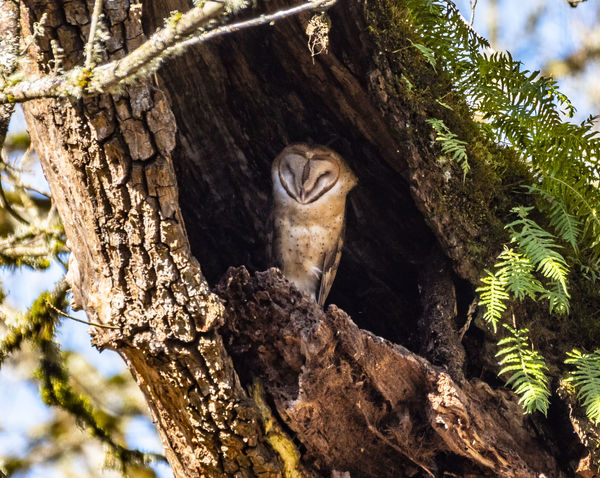
A Barn Owl to challenge your editing skills!
Mar 27, 2019 18:08:56 #
Used the Raw file with Camera Raw with the settings as pictured and ON1 Resize to crop
Mar 28, 2019 09:35:56 #
I'm a little late to this but thought it was a good challenge to see what I could get without too many tricks.
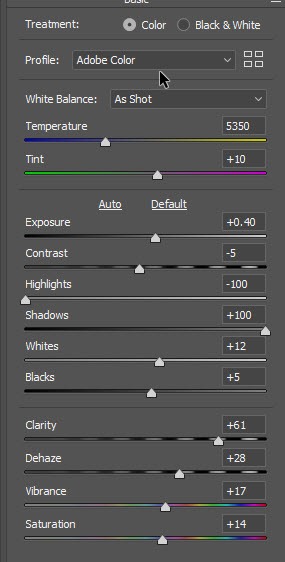
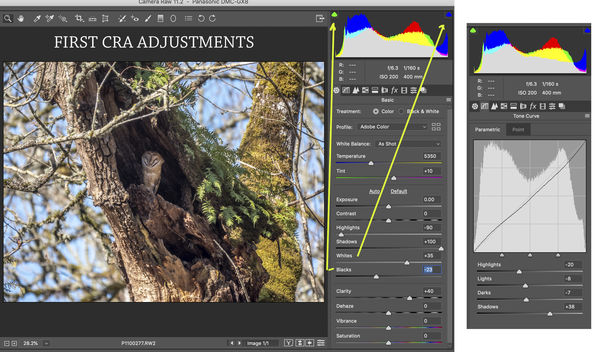
I use Photoshop for most of my edits but on this one you could get just about all of it done with Lightroom sliders. I attached a picture of my first settings. One thing that I wanted to point out is as I adjusted the Whites and the Blacks slider I watched the triangles in the upper left and right to stop moving the sliders just as the triangle lit up.
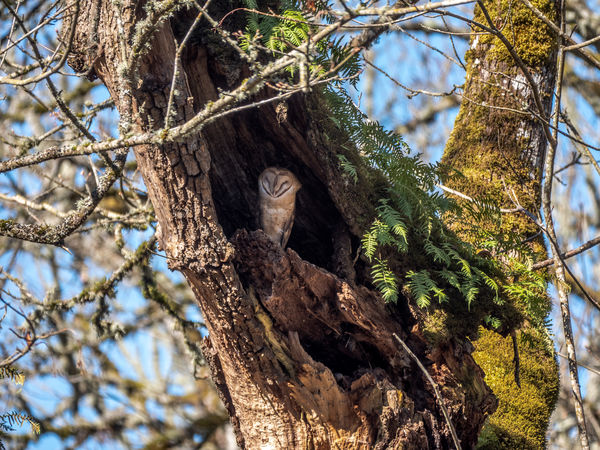
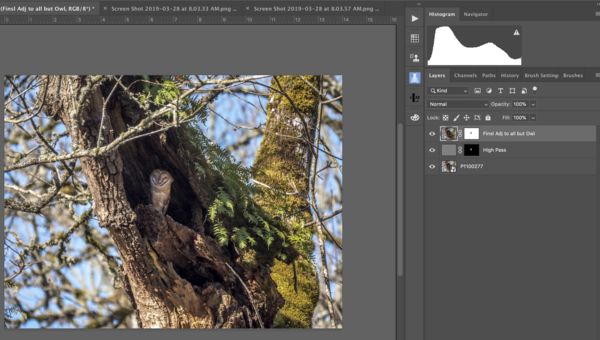
After the initial opening with Camera Raw I added a High Pass filter set to Hard Light and masked out all but the Owl to sharpen it.
Next I hit (Command + alt/Option key +Shift key + E) to place a new Merged layer on top. With this layer I opened Camera Raw filter and applied -30 Exposure, Contrast +7, Highlights +6, Blacks -4. To me this improved the overall contrast and brightness. I didn't want to change anything on the Owl so I added a white mask and painted black over the Owl so these last changes would not apply to it.
Jim
I use Photoshop for most of my edits but on this one you could get just about all of it done with Lightroom sliders. I attached a picture of my first settings. One thing that I wanted to point out is as I adjusted the Whites and the Blacks slider I watched the triangles in the upper left and right to stop moving the sliders just as the triangle lit up.
After the initial opening with Camera Raw I added a High Pass filter set to Hard Light and masked out all but the Owl to sharpen it.
Next I hit (Command + alt/Option key +Shift key + E) to place a new Merged layer on top. With this layer I opened Camera Raw filter and applied -30 Exposure, Contrast +7, Highlights +6, Blacks -4. To me this improved the overall contrast and brightness. I didn't want to change anything on the Owl so I added a white mask and painted black over the Owl so these last changes would not apply to it.
Jim
(Download)
My first settings (Could be done in Lightroom)
(Download)
Showing final layer set up
(Download)
Mar 28, 2019 10:35:57 #
If you want to reply, then register here. Registration is free and your account is created instantly, so you can post right away.