A Barn Owl to challenge your editing skills!
Mar 25, 2019 18:24:45 #
It has been a few years since I saw an owl peeking out of its hole in a Tuscon cactus. I had a small camera with a short lens. I nearly cried. The only good news was that I can still see it in my "mind's eye".
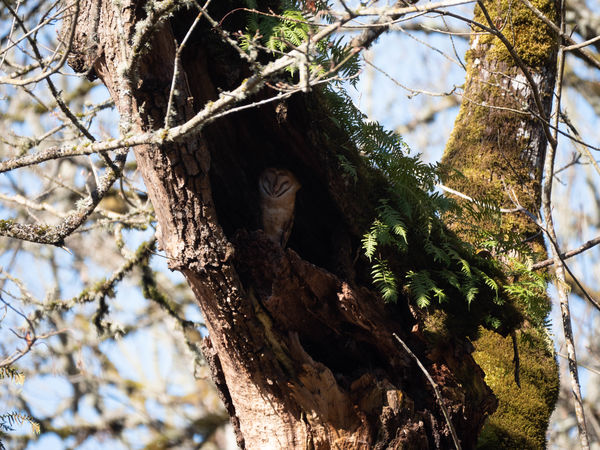
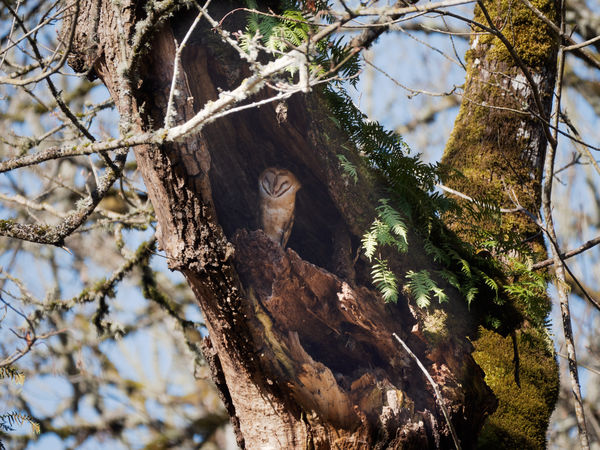
A week ago I was walking around in the woods they call the Nisqually Wildlife Refuge and I caught what I think is a Barn Owl hiding in a hole of a tree trunk. Was he/she polite enough to pose in decent light? Hell no.
Here is a JPEG exported from the untouched RAW captured in a Panasonic Lumix GX8 M4/3 mirroless with a 100-400 Lumix lens. No time for tripods! Hand held with magical "dual" image stabilization and a small twist of the exposure compensation dial.
Can it be "fixed" in post processing. I put the SOOC RAW on dropbox: https://www.dropbox.com/s/ee6glkckae0uxf6/P1100277.RW2?dl=0
Please consider it public domain so that you can do anything you can or want. But, show me how to fix it!!!
Mar 25, 2019 19:07:42 #

bsprague wrote:
It has been a few years since I saw an owl peeking... (show quote)
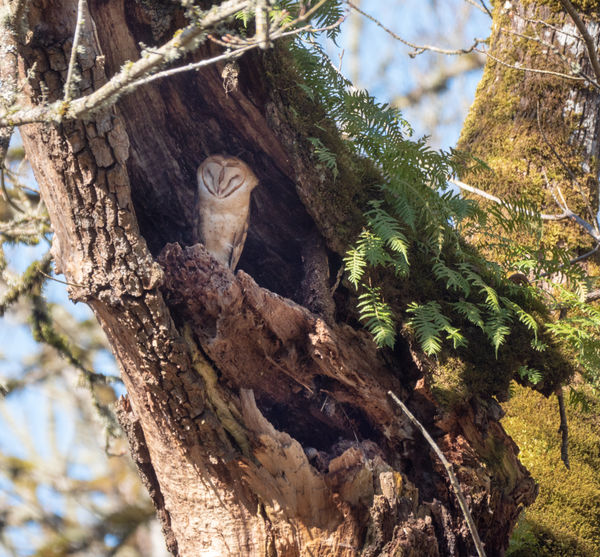
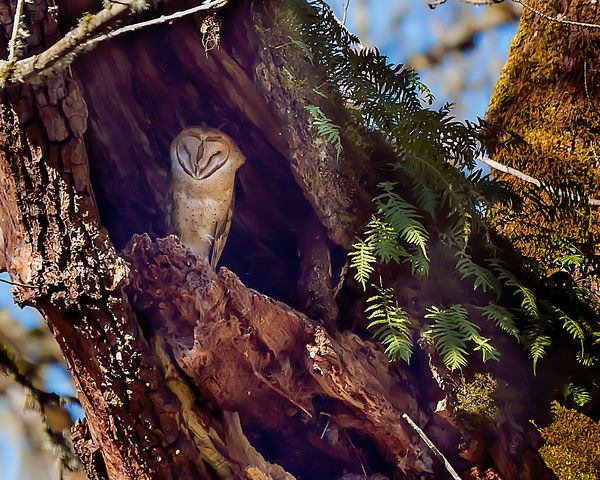
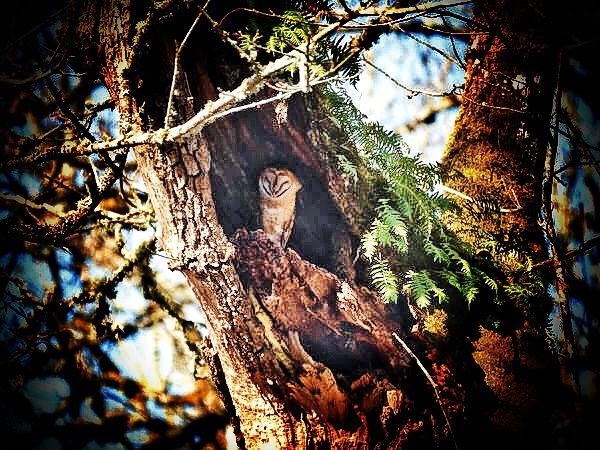
Just a quick edit of the raw file.
In LR crop the image
Remove any sharpening that LR may have applied.
In the devlop module just hit "auto" button. (this helps a lot)
Export as a web sized psd to be opened up in PS (just makes it a bit easier to publish).
In PS
Duplicate the background.
Blending mode screen to lighten all the image.
Open up the layer mask.
Fill it with black. This takes the image back to normal.
Paint the layer mask with a soft white brush to bring out the owl and the trunk interior.
Hope this helps.
Mar 25, 2019 19:21:08 #
RichardTaylor wrote:
Just a quick edit of the raw file. br br In LR cr... (show quote)
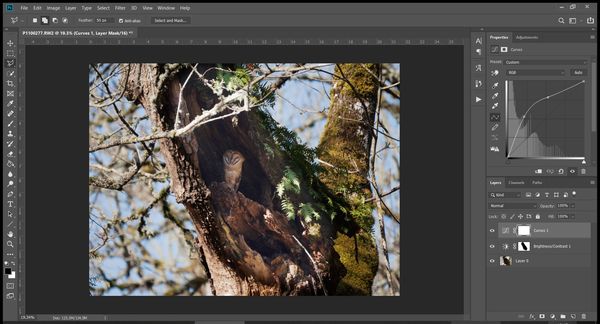
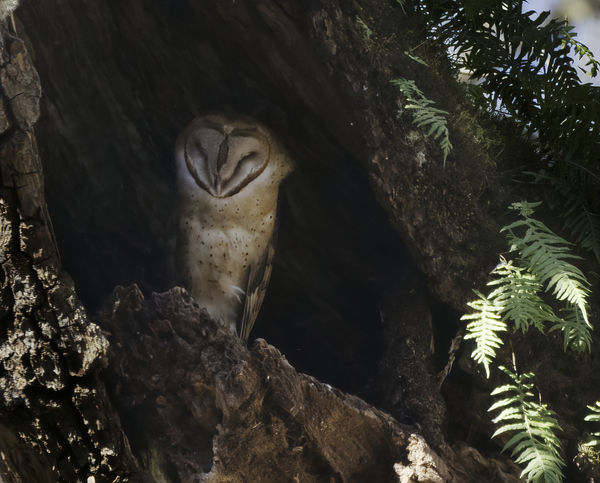
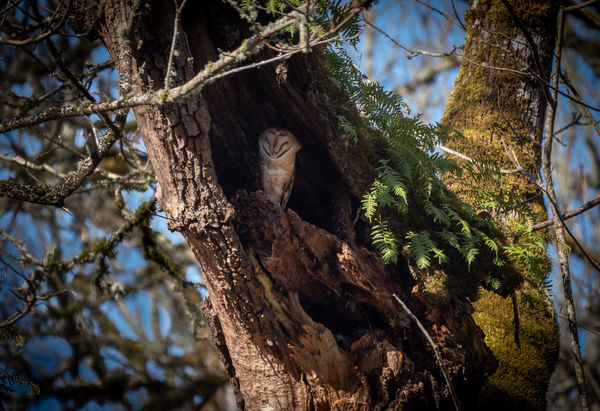
Similar actions in Photoshop:
Curves to bring out the owl. That blew out the outside of the tree.
Rough selection of the tree, then inverted, then reduced the brightness. That brought the outside down to reasonable brightness.
About 5 minutes from download to upload of screenshot.
About 2 minutes to correct typing errors.
Another few minutes to recognize I had the wrong color profile and correct it.
Mar 25, 2019 19:35:09 #

DirtFarmer wrote:
😄...About 2 minutes to correct typing errors.
Another few minutes to recognize I had the wrong color profile and correct it.
Another few minutes to recognize I had the wrong color profile and correct it.
Mar 25, 2019 19:55:01 #

bsprague wrote:
Please consider it public domain so that you can do anything you can or want. But, show me how to fix it!!!
Please consider it public domain so that you can do anything you can or want. But, show me how to fix it!!!
.. just something different.
Sized to 10 x 8.
Then lots of playing around with AD Pro Panel (Luminosity Panel)
Mar 25, 2019 22:31:24 #

DirtFarmer wrote:
Similar actions in Photoshop:
Curves to bring out the owl. That blew out the outside of the tree.
Rough selection of the tree, then inverted, then reduced the brightness. That brought the outside down to reasonable brightness.
About 5 minutes from download to upload of screenshot.
About 2 minutes to correct typing errors.
Another few minutes to recognize I had the wrong color profile and correct it.
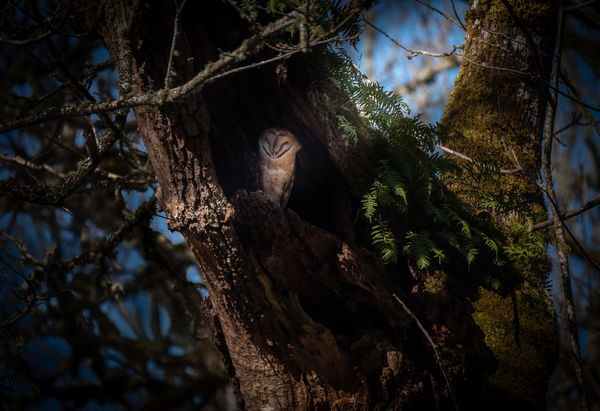
I liked DirtFarmer's rendition best. I took the result and used Topaz AI Clear on it which removed noise and tended to sharpen it a bit more.
Here it is:
Mar 26, 2019 08:06:08 #
RichardTaylor wrote:
Just a quick edit of the raw file. br br In LR cr... (show quote)
Wow, I’m really impressed by this. Thanks for sharing.
Mar 26, 2019 12:20:10 #

bsprague wrote:
It has been a few years since I saw an owl peeking... (show quote)
Just a little playing with snapseed. I didn’t use the raw. Sorry r
Mar 26, 2019 14:05:36 #
RichardTaylor wrote:
Just a quick edit of the raw file. br br In LR cr... (show quote)
Thank you Richard. I like it!
Mar 26, 2019 14:08:06 #
DirtFarmer wrote:
Similar actions in Photoshop:
Curves to bring out the owl. That blew out the outside of the tree.
Rough selection of the tree, then inverted, then reduced the brightness. That brought the outside down to reasonable brightness.
About 5 minutes from download to upload of screenshot.
About 2 minutes to correct typing errors.
Another few minutes to recognize I had the wrong color profile and correct it.
Curves to bring out the owl. That blew out the outside of the tree.
Rough selection of the tree, then inverted, then reduced the brightness. That brought the outside down to reasonable brightness.
About 5 minutes from download to upload of screenshot.
About 2 minutes to correct typing errors.
Another few minutes to recognize I had the wrong color profile and correct it.
DirtFarmer,
I like how you brightened the owl. My thought is that the brighter background draws the eye away from the owl. That said, I'm going to try your Photoshop steps. I need to learn more of that.
Mar 26, 2019 14:10:09 #
dannac wrote:
.. just something different.
Sized to 10 x 8.
Then lots of playing around with AD Pro Panel (Luminosity Panel)
Sized to 10 x 8.
Then lots of playing around with AD Pro Panel (Luminosity Panel)
dannac,
I like the crop. I was afraid of that because it is shot with a "smaller sensor" camera and my goal was a print. I don't know what the AD Pro Panel is.
Mar 26, 2019 14:12:10 #
JimH123 wrote:
I liked DirtFarmer's rendition best. I took the result and used Topaz AI Clear on it which removed noise and tended to sharpen it a bit more.
Here it is:
Here it is:
I like the tight crop and didn't know if there was enough in the capture to do that. May AI Clear had a significant impact. I have a lot of the Topaz stuff, but not that one.
Mar 26, 2019 14:14:18 #
retired2014 wrote:
Snapseed is great stuff. I've had it on my phone and tablet. My understanding is that parts of it came from NIK when Google bought it. I think the RAW works better at showing some detail in on the owl hiding in the shadow.Just a little playing with snapseed. I didn’t use the raw. Sorry r
Mar 26, 2019 14:15:24 #
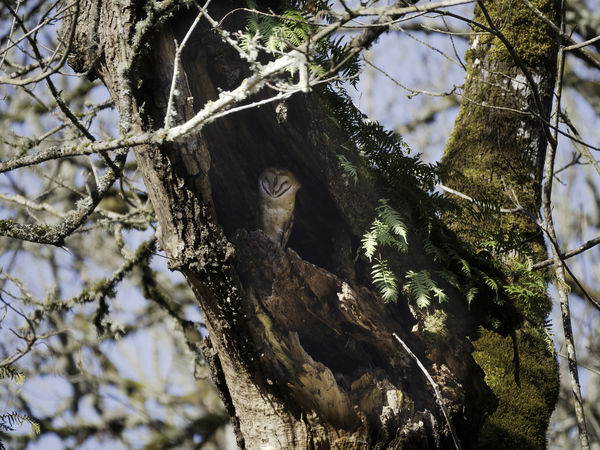
As anyone following might guess, I tried my own version for a 13x19 wall print. I did it all in Lightroom Classic to take advantage of what the RAW had in the shadows.
Mar 26, 2019 14:24:08 #
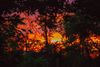
I think the fundamental problem with the image is that there is so much to distract the eye from the owl. So I played with a Lightroom trick to put the owl in a shaft of sunshine.
If you want to reply, then register here. Registration is free and your account is created instantly, so you can post right away.